Keep a clear record of when a driver was hired, left and came back. The Employment History tab lists these events with their dates and reasons. You can correct an event there. New events are created when you change the driver's Status.
Who can do this: users with access to Drivers. Editing and deleting events needs extra permissions; without them you only see the list.
Before you begin
Employment events are recorded when the driver's Status changes in the profile, or when a driver is added. Change the status in the order things happened, and give every event a date that is on or after the event before it.
- A Termination needs a Reason for termination.
- A Rehire is only possible for a driver whose status is Terminated.

The three events
| Event | When it is created | What it records |
|---|---|---|
| Hire | When a Lead or Pre-Hired driver is made Active for the first time, or when a driver is added as already active | The hire date |
| Termination | When the driver's Status is changed to Terminated | The date, the reason, notes, and whether the driver can be rehired |
| Rehire | When a Terminated driver is made Active again | The rehire date and a note |
See the history
- Open Drivers and select the driver.
- Select the Employment History tab.
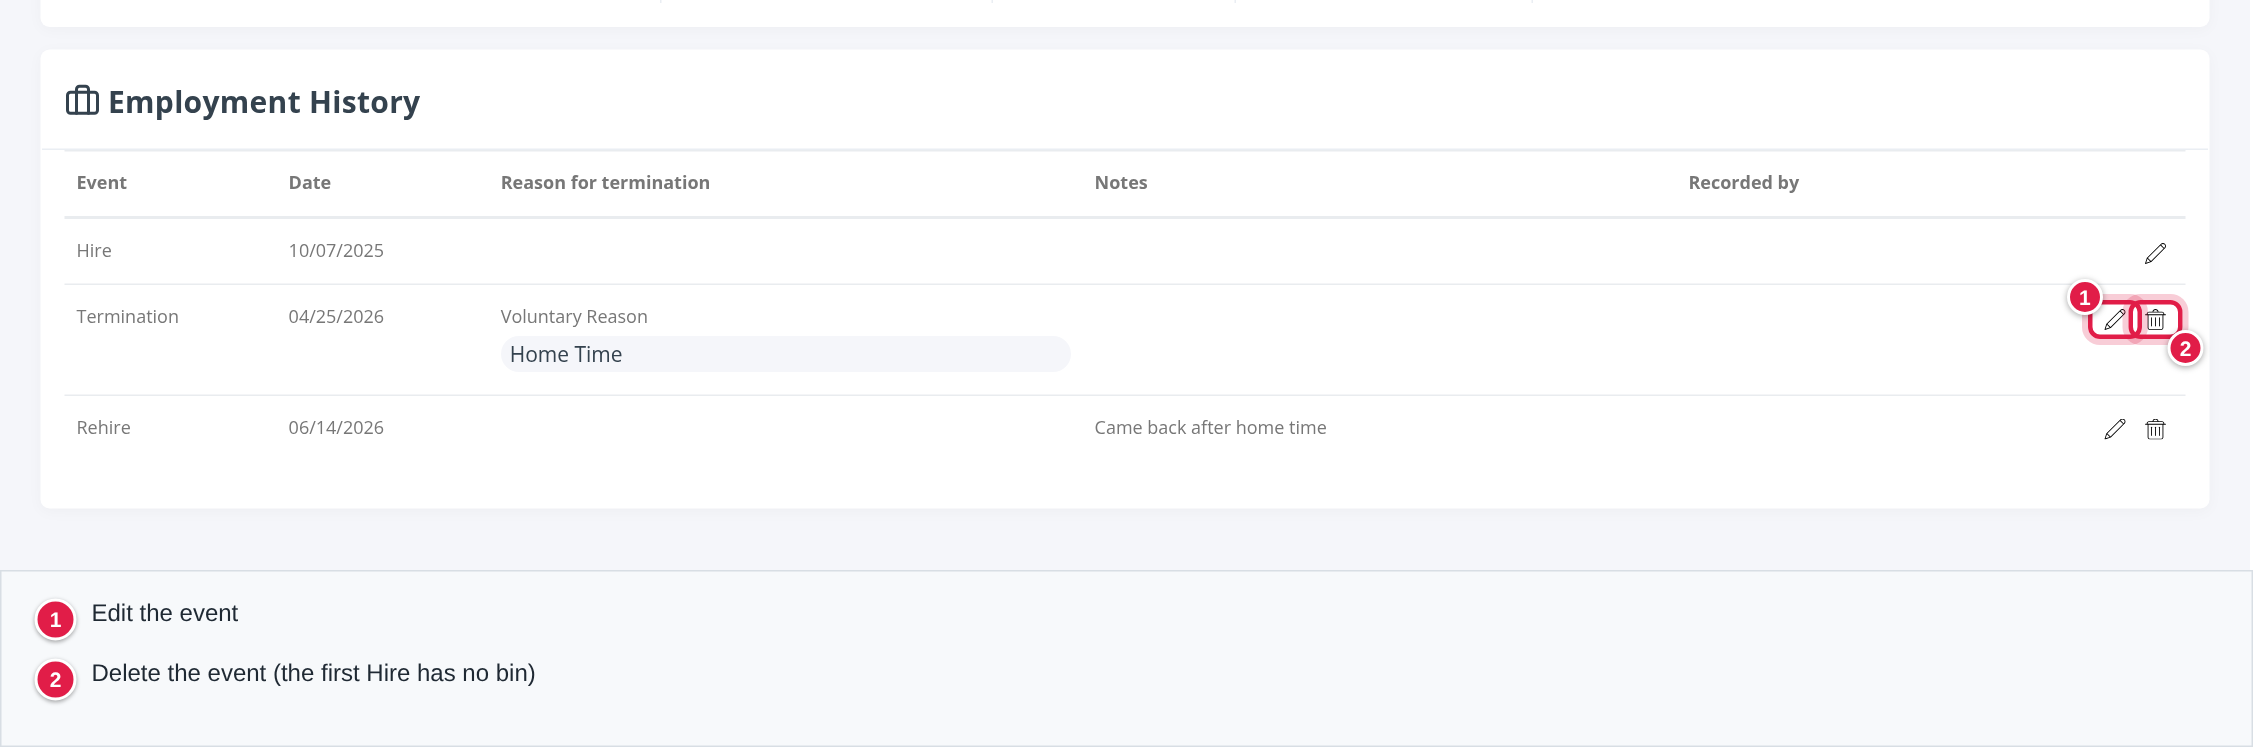
Each row shows the Event, Date, Reason for termination (for terminations), Notes, Recorded by and the edit and delete icons. Until an event is recorded, the tab says "There are no employment events yet".
Terminate a driver
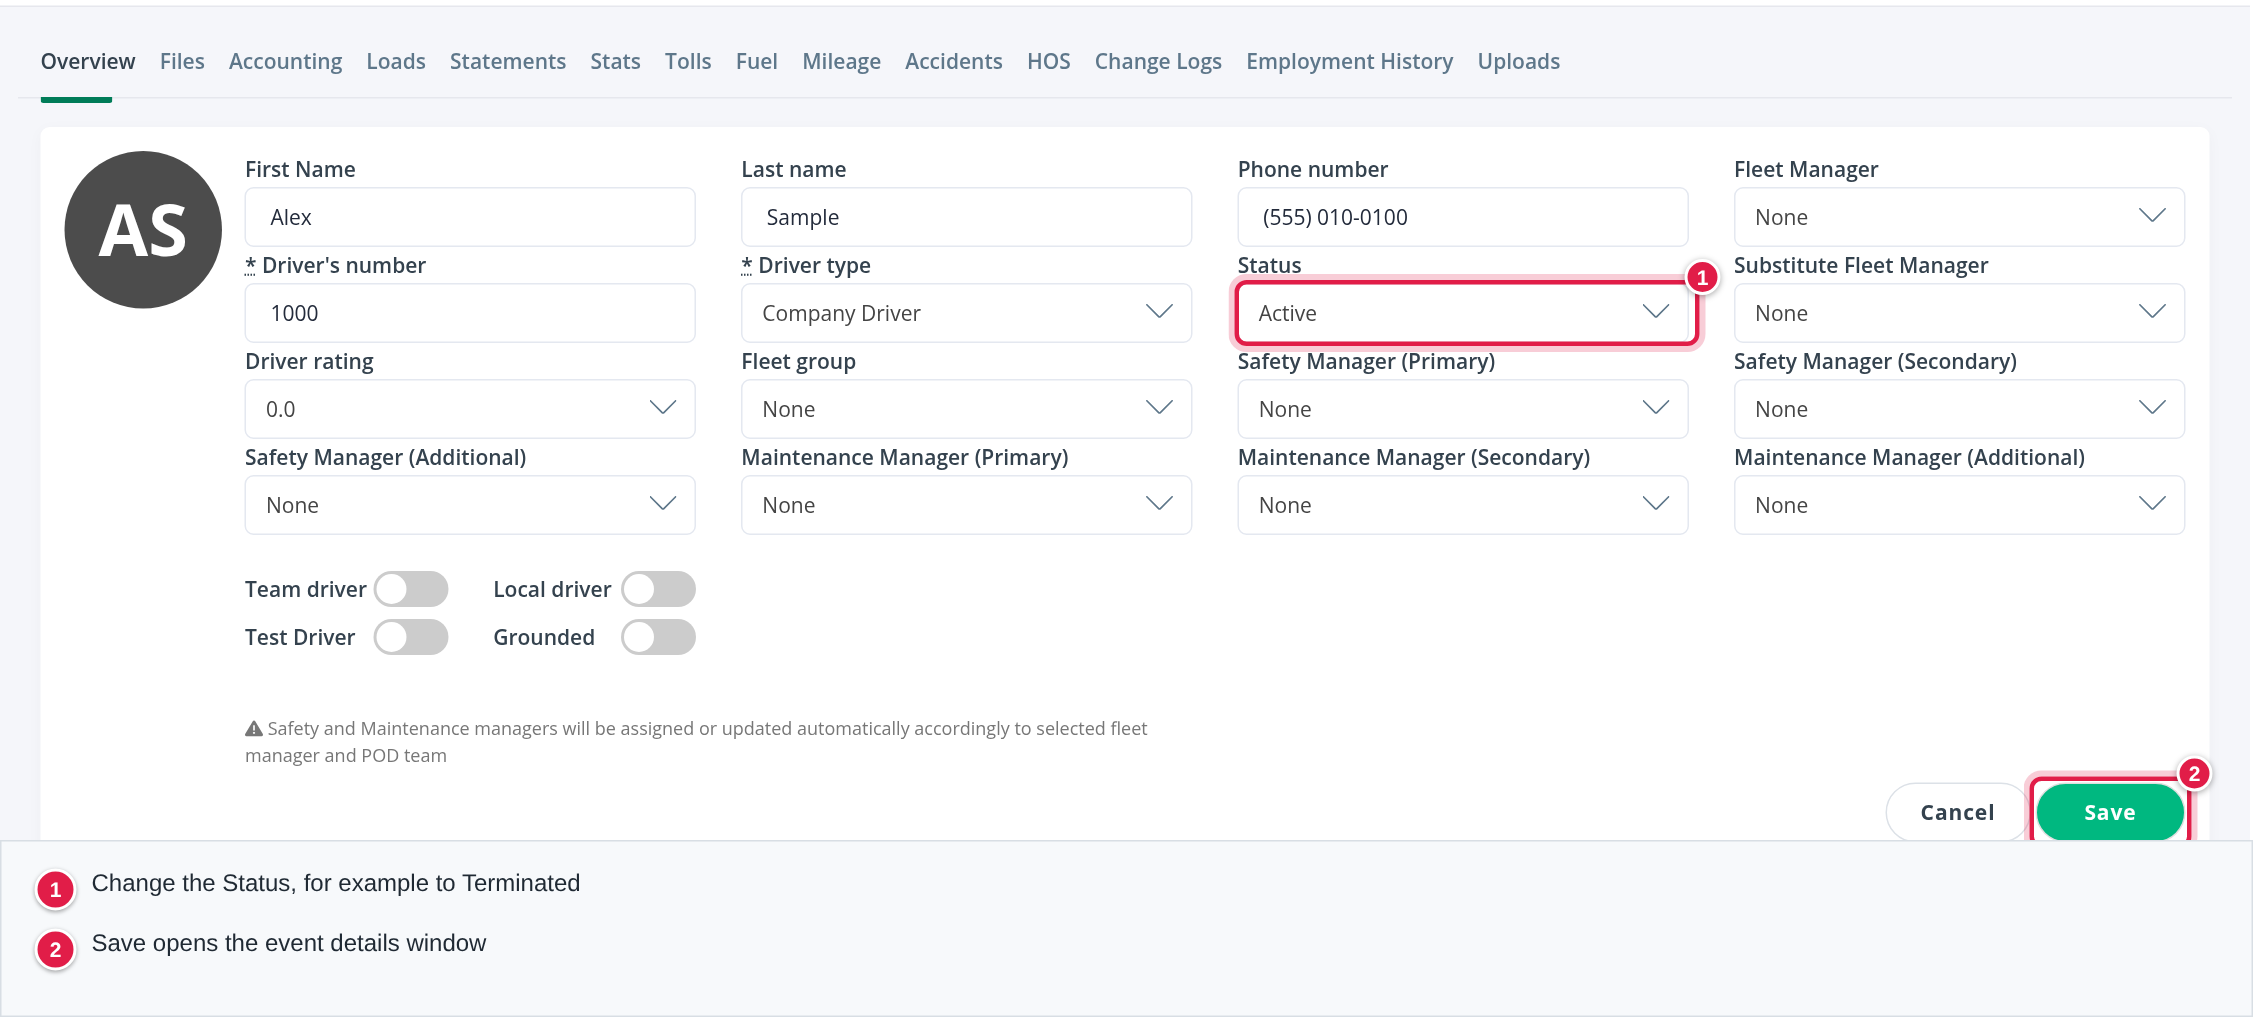
- On the Overview tab, select the pencil icon at the top of the profile.
- Change Status to Terminated.
- Select Save. The Termination details window opens.
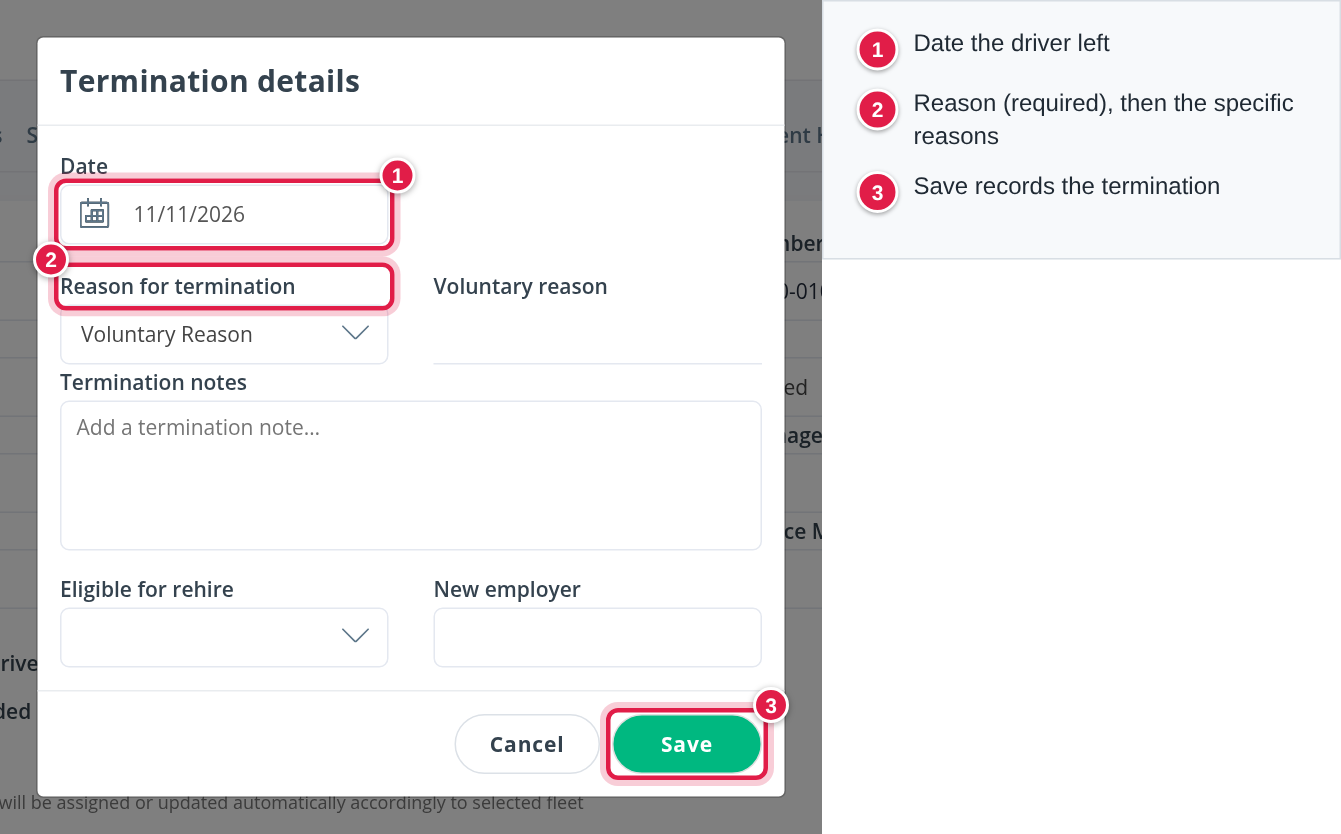
- Check the Date. It starts as today.
- Choose the Reason for termination (required): Voluntary Reason, Involuntary Reason or Internal Transfer.
- For a voluntary or involuntary reason, choose one or more specific reasons, for example Home Time or Retired (voluntary) or Poor performance or Safety (involuntary).
- Add Termination notes if you need to.
- Choose Eligible for rehire and fill in New employer if you know it.
- Select Save.
The new Termination event appears on the Employment History tab, and the driver's Employment Status changes to Terminated.
Rehire a driver
- On the Overview tab, select the pencil icon at the top of the profile.
- Change Status from Terminated to Active.
- Select Save. The Rehire details window opens.
- Check the Date, add a Rehire note if you want one, and select Save.
A Rehire event is added to the history, and the date is also added to the Rehire Dates card on the Overview tab.
Correct an event
- On the Employment History tab, select the pencil icon on the row.
- Change what you need. A Hire event only has its date. A Rehire event has its date and note. A Termination event has its date, reason and notes.
- Select Save.
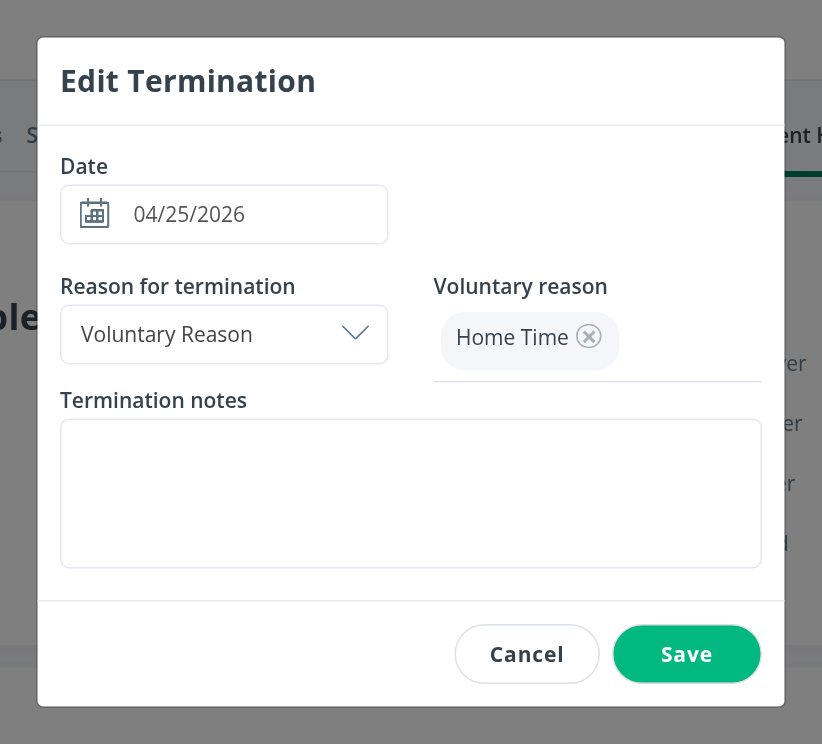
A date cannot be earlier than the event before it or later than the event after it. A termination needs a reason.
When you change a hire or termination, the driver's own dates and reason are updated to match the latest event of that type.
Delete an event
Select the bin icon on the row and confirm. The driver's dates go back to the previous event of the same kind. The driver's Status does not change.
The first Hire event cannot be deleted.
Frequently asked questions
Was this article helpful?
That’s Great!
Thank you for your feedback
Sorry! We couldn't be helpful
Thank you for your feedback
Feedback sent
We appreciate your effort and will try to fix the article