Automatic Load Entry reads a rate confirmation PDF with AI (OpenAI) and fills in a load for you, so you do not type it by hand. It works in two ways: you upload a PDF on the New Load page, or the Robot reads load emails from a mailbox you connect. Settings per customer tell the Robot which customer a document belongs to and which values to fill in by default.
Automatic Load Entry is an extra feature. It is switched on per account. If you do not see Start Automatic Load Entry on the New Load page or the Automatic Load Entry tab on a customer, contact help@openroadtms.com to have it enabled.
Who can do this: setting up a customer needs permission to edit customers, or the Automatic Load Entry configuration permission. Anyone who can create loads can use Start Automatic Load Entry on the New Load page.
Before you begin
- The customer must exist and be active. Only active customers can be chosen for a setting.
- For the mailbox mode, you need a mailbox for load emails (see "Connect a mailbox" below).
Set up a customer
Each customer that should use Automatic Load Entry needs its own setting.
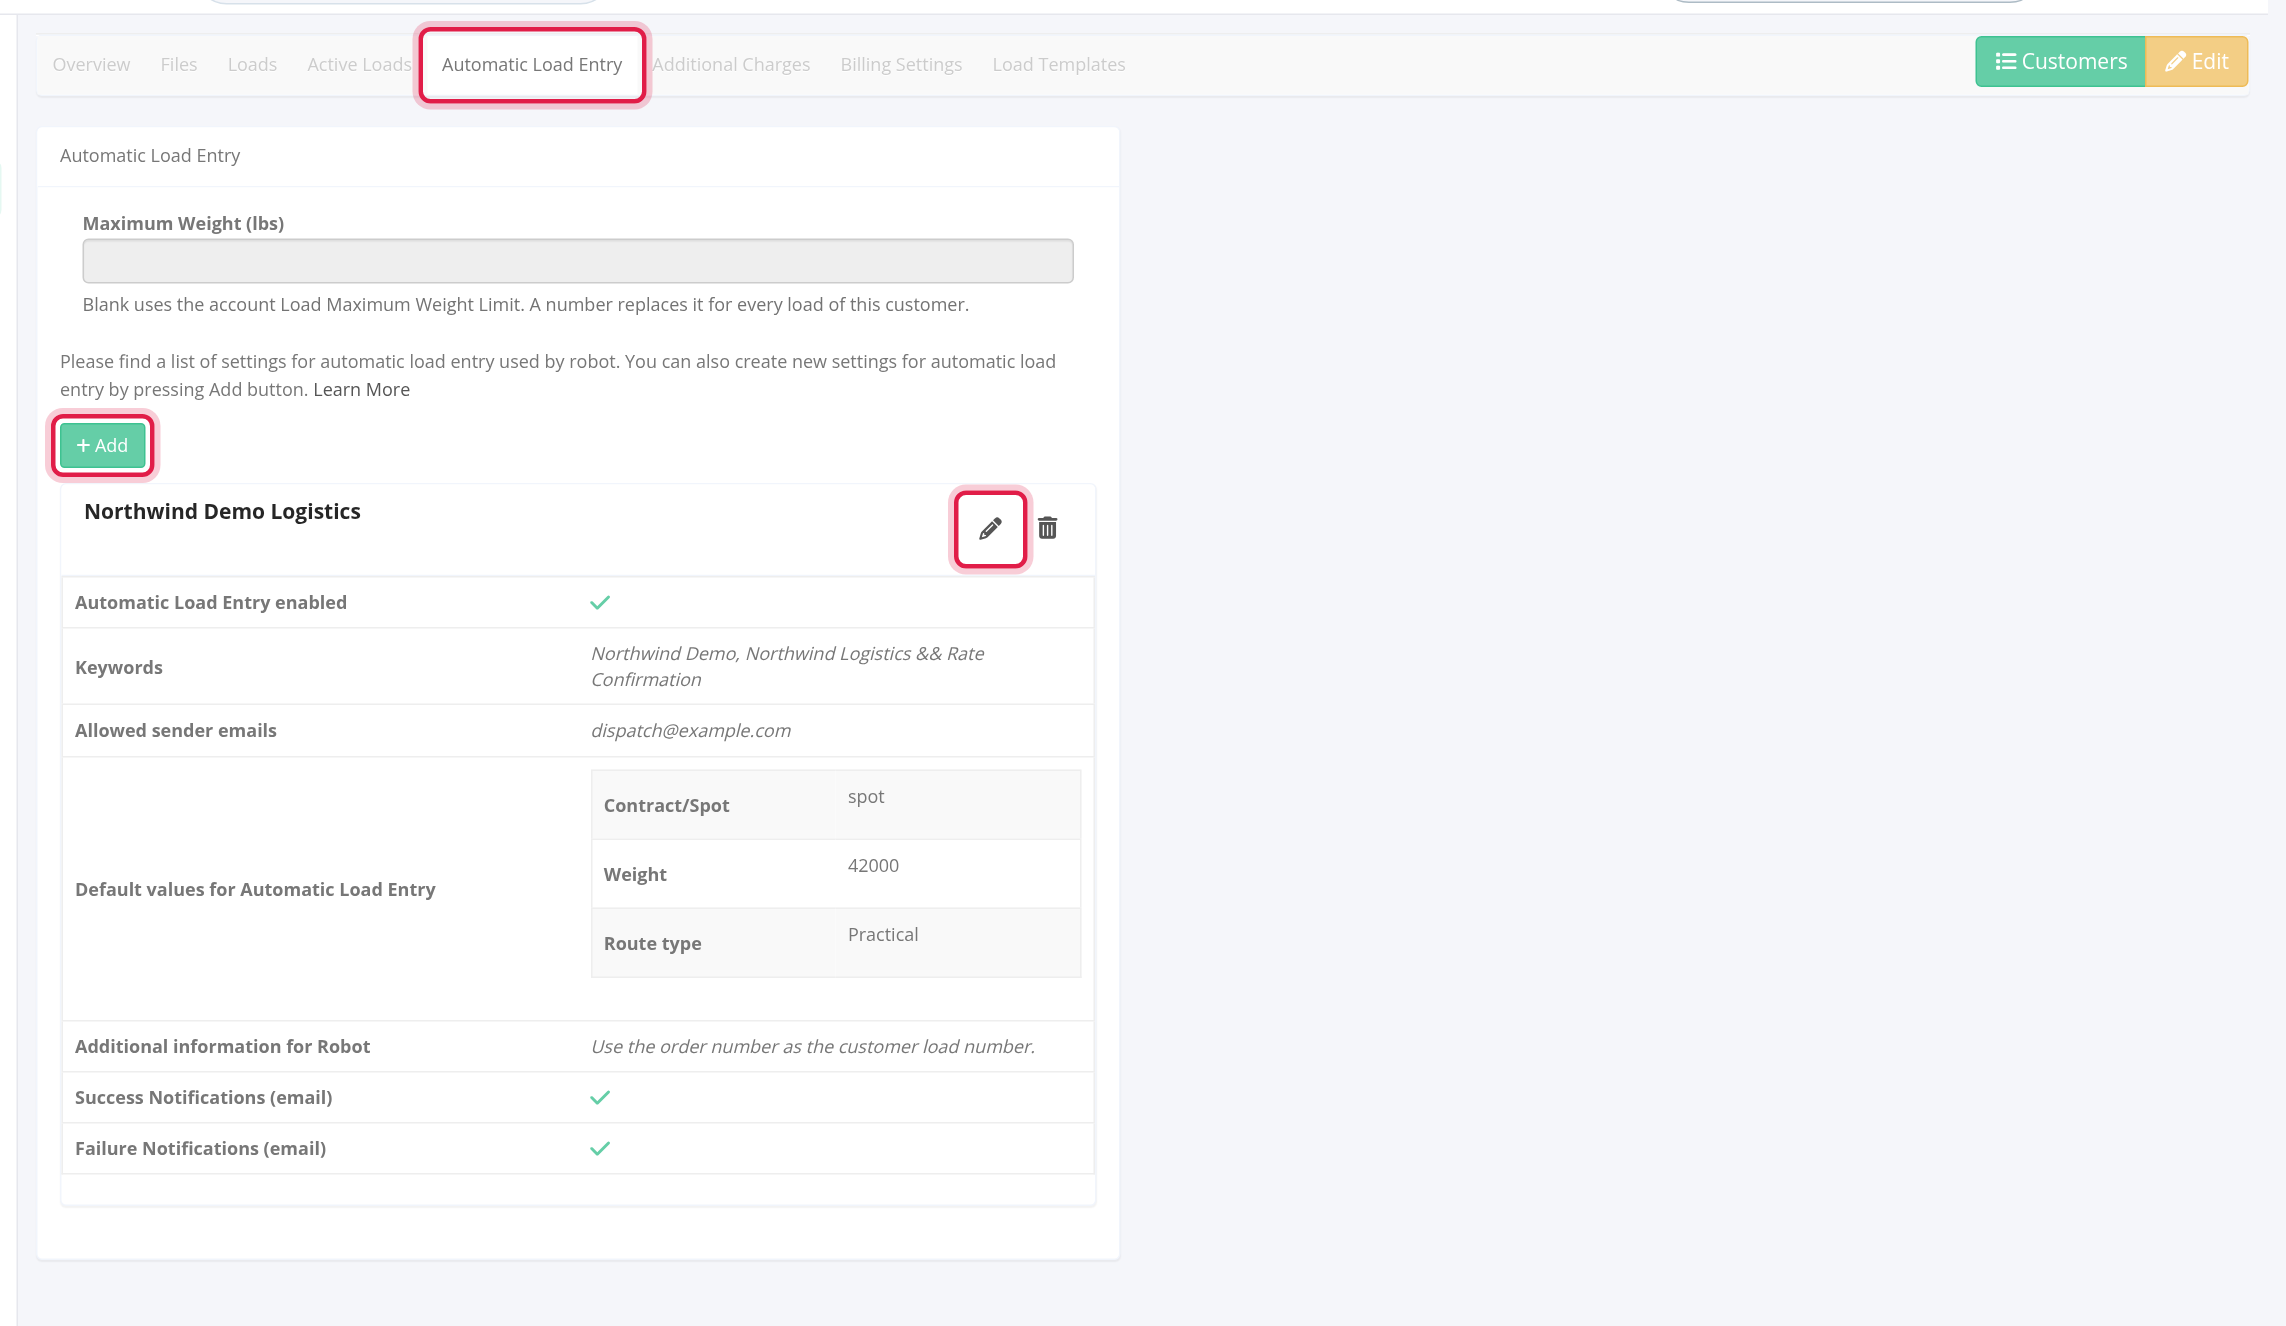
- Open Customers and open the customer.
- Select the Automatic Load Entry tab.
- Select + Add. The Automatic Load Entry window opens.
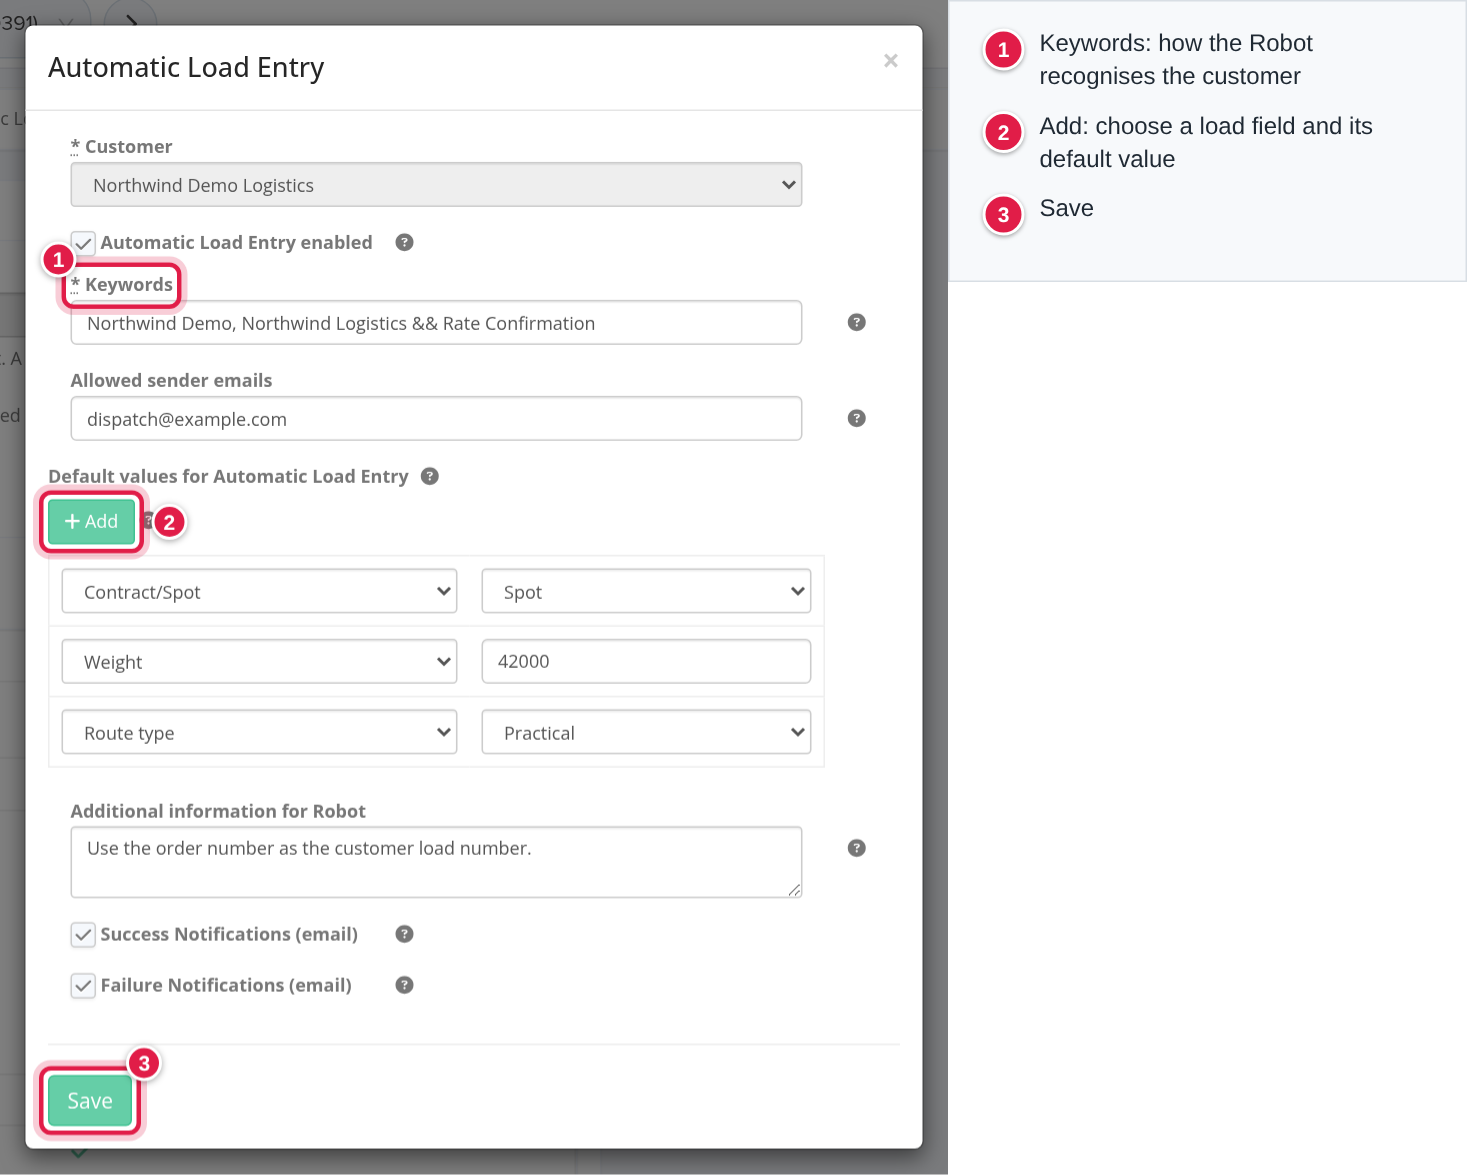
- Fill in the fields (below).
- Select Save.
The tab then shows the setting as a card with the customer's name. Select the pencil icon to change it or the trash icon to delete it (OpenRoad asks you to confirm). A customer name crossed out on the card means the setting is switched off.
The fields
- Customer: chosen for you and locked when you open the window from the customer's own tab.
- Automatic Load Entry enabled: tick it to switch the Robot on for this customer.
- Keywords (required): words that identify this customer in the rate confirmation. Separate keywords with commas (keyword 1, keyword 2). To require several words together, join them with && (keyword A1 && keyword A2, keyword B1 && keyword B2). The Robot uses the keywords to recognise the customer in the document and puts that customer on the load.
- Allowed sender emails: optional, separated by commas. OpenRoad saves the list, but sender matching starts in a later release, so it does not change anything yet. Each address must be a valid email.
- Default values for Automatic Load Entry: select Add, choose a load field and a value. Every load the Robot creates for this customer gets those values. You cannot add the same field twice ("Duplicate values are not allowed!"). The fields you can choose from include Contract/Spot (Contract or Spot), Fuel Surcharge, Equipment, Commodity, Weight, Storage, Notification E-mail, P.O.D. Notification E-mails, Temperature, Sales Rep, Alcohol Shipment, PFF, Route type (Practical, Shortest or Fastest) and Tolls type (Discouraged or Encouraged), and a few more load fields.
- Additional information for Robot: free text. Add instructions for the Robot to use when it enters loads for this customer.
- Success Notifications (email): tick it to get an email when the Robot enters a load successfully.
- Failure Notifications (email): tick it to get an email when a load entry fails.
Hover over the ? icons in the window to read the help text for each field.
Warnings on a customer's setting
- A customer with Credit Hold switched on shows a red warning triangle on its card: "Selected Customer has Credit Hold enabled. New loads will not be entered."
- A customer whose available credit is above the hard block limit shows a dollar icon: "Selected Customer available balance of credit is above hard block limit. New loads will not be entered. Please contact accounting team for hard block removal." The icon only shows when the account's available balance alert is on.
The same tab also has a Maximum Weight (lbs) field above the settings. Blank uses the account's Load Maximum Weight Limit, and a number replaces it for every load of this customer.
Semi-Automatic Load Entry: upload a PDF on the New Load page
- Open New Load.
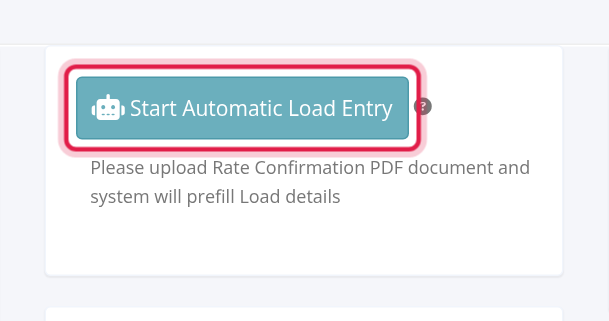
- In the upload area, select Start Automatic Load Entry (robot icon).
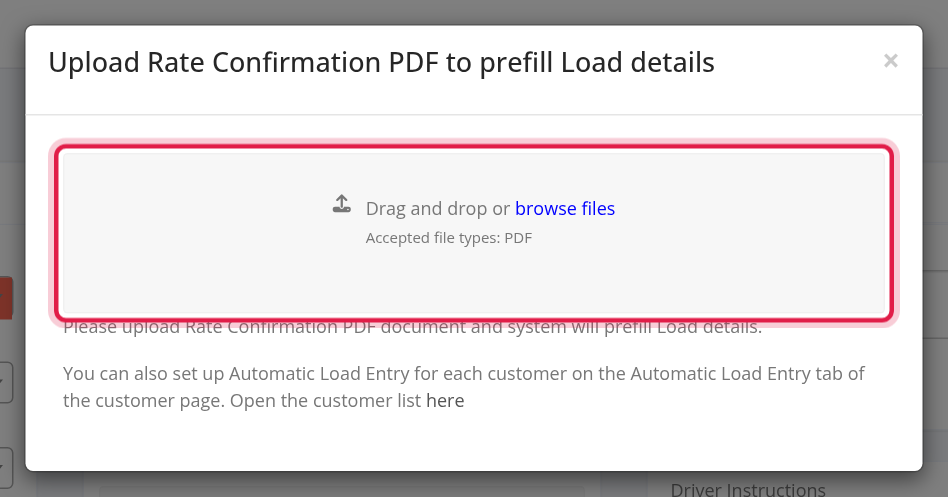
- In the window Upload Rate Confirmation PDF to prefill Load details, drag the PDF in or select browse files. Only PDF files are accepted, up to 6 MB.
- Wait while the Robot reads the file with OpenAI. OpenRoad shows "Please wait. This may take around …" while the Robot reads the file. If it takes longer than usual, it says "This is taking longer than usual. Try refreshing the page."
- The New Load page is filled in with the details from the document. Check them, correct what is needed, and save the load.
The PDF is also saved with the load as its rate confirmation.
If the Robot cannot read the file, OpenRoad tells you why and offers Retry. The messages are:
- The file is larger than 6 MB: "Provided file exceeds maximum allowed size (6 MB). Please enter load manually."
- The file is not a valid PDF, or it is password protected: remove the password and upload again.
- The Robot could not read any text in the file: "Please try a clearer scan or a different file."
- The Robot could not find the load information, or could not find required information: it names the missing fields. Enter the load manually, or try a clearer file.
- The Robot took too long: "Please try again."
- The Robot could not receive the file: "Please try a smaller file, or enter the load manually."
- A server error: "Error in response from the Robot server. Please try later."
Fully Automatic Load Entry: loads from email
In this mode the Robot reads load emails from a mailbox you connect, finds the customer by its Keywords, and creates the load without anyone opening the New Load page. OpenRoad emails you when it succeeds or fails, as set on the customer (see Success Notifications (email) and Failure Notifications (email)).
Connect a mailbox
- Open Settings, then AI, then Automatic Load Entry.
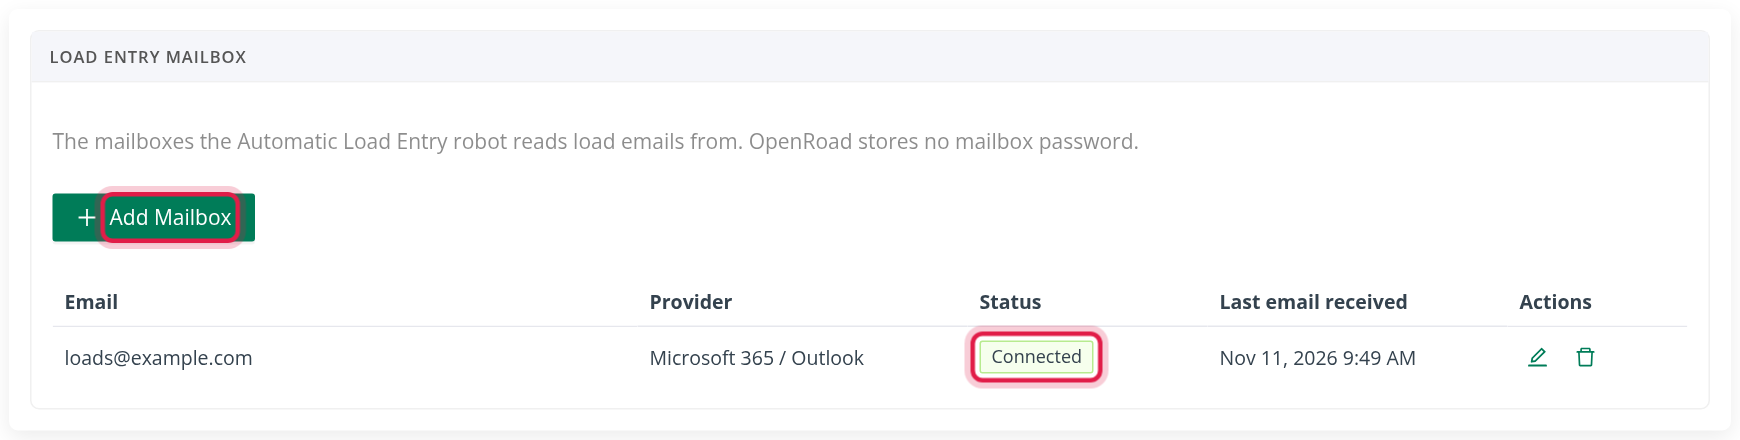
- In the Load entry mailbox card, select Add Mailbox.
- Enter the Mailbox email address (for example loads@carrier.com) and choose the Mailbox provider: Microsoft 365 / Outlook or Gmail / Google Workspace.
- Save.
OpenRoad stores no mailbox password. The table shows each mailbox's Email, Provider, Status and Last email received. Status is Connected when OpenRoad has received an email from the mailbox in the last 7 days, and Not connected otherwise.
The emails OpenRoad sends
When the feature is switched on, OpenRoad creates five email settings for the account, all turned off at first: Automatic Load Entry Request Success Notification, Request Failure Notification, Processing Success Notification, Processing Failure Notification and Automatic Load Entry Daily Reports. Set the recipients in the account's email notification settings and switch on the ones you want.
- Rateconf Analysis Started Notification: the request was received and sent for reading.
- Rateconf Analysis Completed Notification: the load was created, with a link to it.
- Rateconf Analysis Failed Notification: the load was not created, with the error messages, the customer and a link to the document.
- Automatic Load Entry Statistics Report: a daily summary of yesterday's successful and failed loads, with percentages.
Frequently asked questions
Was this article helpful?
That’s Great!
Thank you for your feedback
Sorry! We couldn't be helpful
Thank you for your feedback
Feedback sent
We appreciate your effort and will try to fix the article