In addition to the web version, OpenRoad provides a mobile application called OpenRoad Driver, available for download on both the App Store and Google Play.
We regularly enhance the app to improve user experience, add new features, and stay up-to-date with technological advancements. To benefit from the latest updates, drivers should update the app regularly.
Logging In
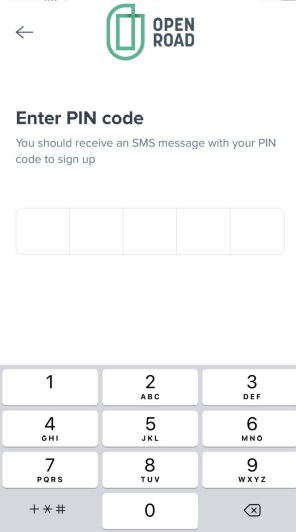
After installing the app, drivers must enter the phone number registered in their OpenRoad profile.
A PIN code will be sent via SMS for secure login.
Drivers can log in from multiple devices.

App Tabs Overview
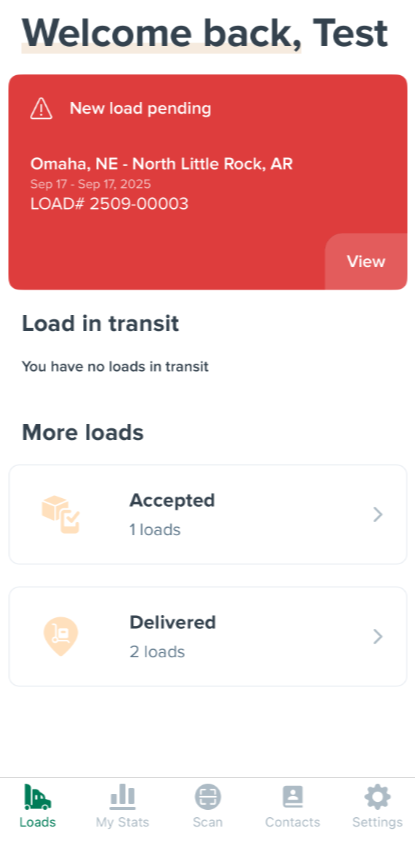
1. Loads
Displays all dispatched loads in Pending, Accepted, and Delivered folders.
Load workflow:
Pending: Driver can preview and accept the load.
Accepted: Appears in the Accepted folder.
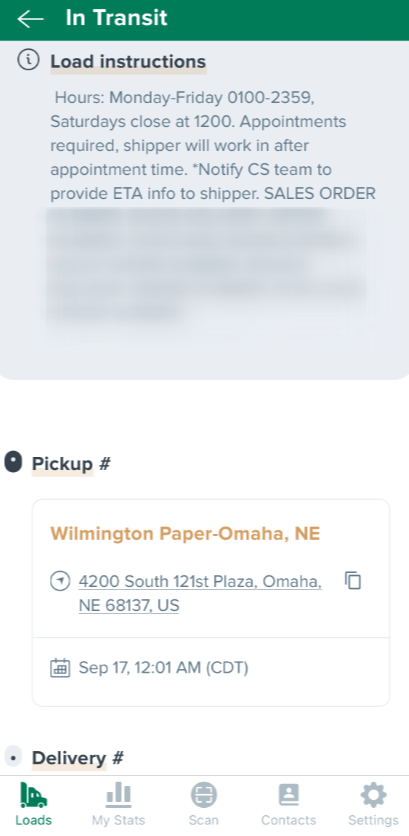
In Transit: Visible on the main screen.
Delivered: Moves to the Delivered folder.
Load status can be changed at any time, allowing drivers to update progress as needed.


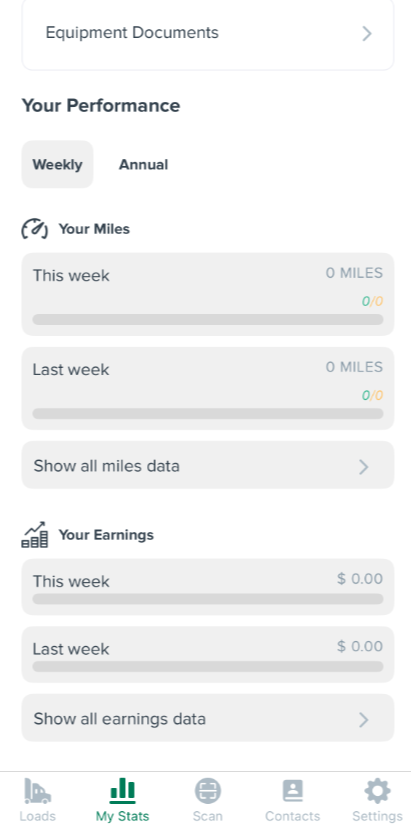
2. My Stats
Shows weekly and yearly statistics on mileage and earnings.
Drivers can view their statements and performance metrics.
3. Scan
Allows uploading documents with type selection:
Bill of Lading: Linked to Proof of Delivery in web version.
Lumper Receipt: Linked to Lumper Receipt in web version.
Scale Ticket: Linked to Scale Ticket in web version.
Miscellaneous: Linked to Driver Uploads in web version.

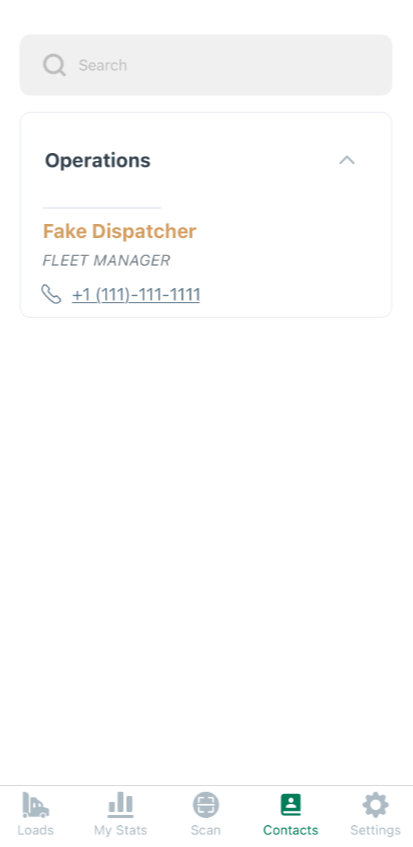
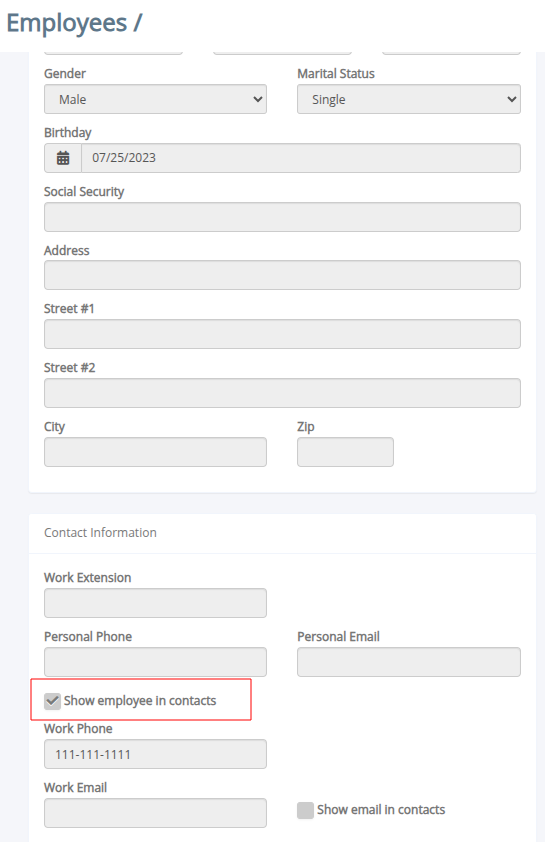
4. Contacts
Lists company contacts.
Employee records must be set up in the web version to appear here.
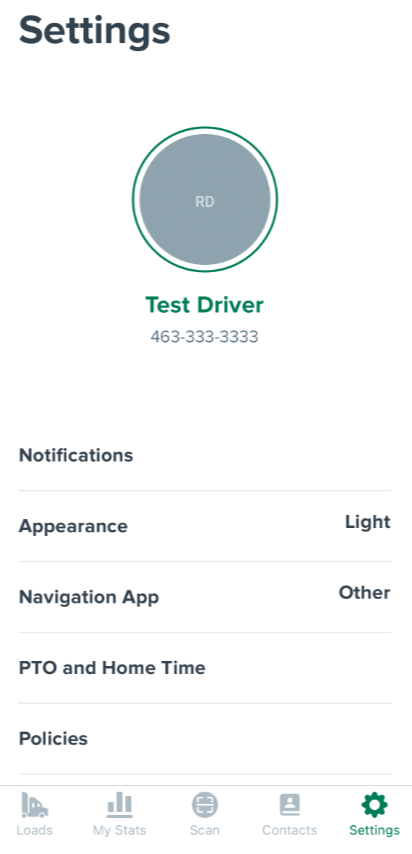
5. Settings
Configure app notifications, appearance, navigation app, PTO & Home Time (information from web profile), and access company policies (PDFs uploaded in web settings).
This structure ensures drivers can easily manage their loads, track performance, upload documents, and access company resources directly from their mobile devices.
Was this article helpful?
That’s Great!
Thank you for your feedback
Sorry! We couldn't be helpful
Thank you for your feedback
Feedback sent
We appreciate your effort and will try to fix the article