All the loads of your account in one table: where each load picks up and delivers, who is driving it, its status, its rates and its miles. Use it to find a load, see what is booked or delayed, assign a driver or change a status without opening the load, and export what you see to Excel.
Who can do this: dispatcher, capacity, accounting and safety users can open the page. Accounting users have no menu link to it and cannot make the quick changes in the table (status, driver). Add Load only shows when your role allows creating loads. Some columns only show when your account has the matching feature.
Before you begin
- Create loads with Add Load, see Load form: create, copy and edit a load, or automatically from PDFs, see Automatic Load Entry (EXTRA FEATURE): create loads from PDF rate confirmations.
- The page shows every load of your account. It is not limited to your own loads.
Open the page
In the left menu, select Loads, then All Loads.
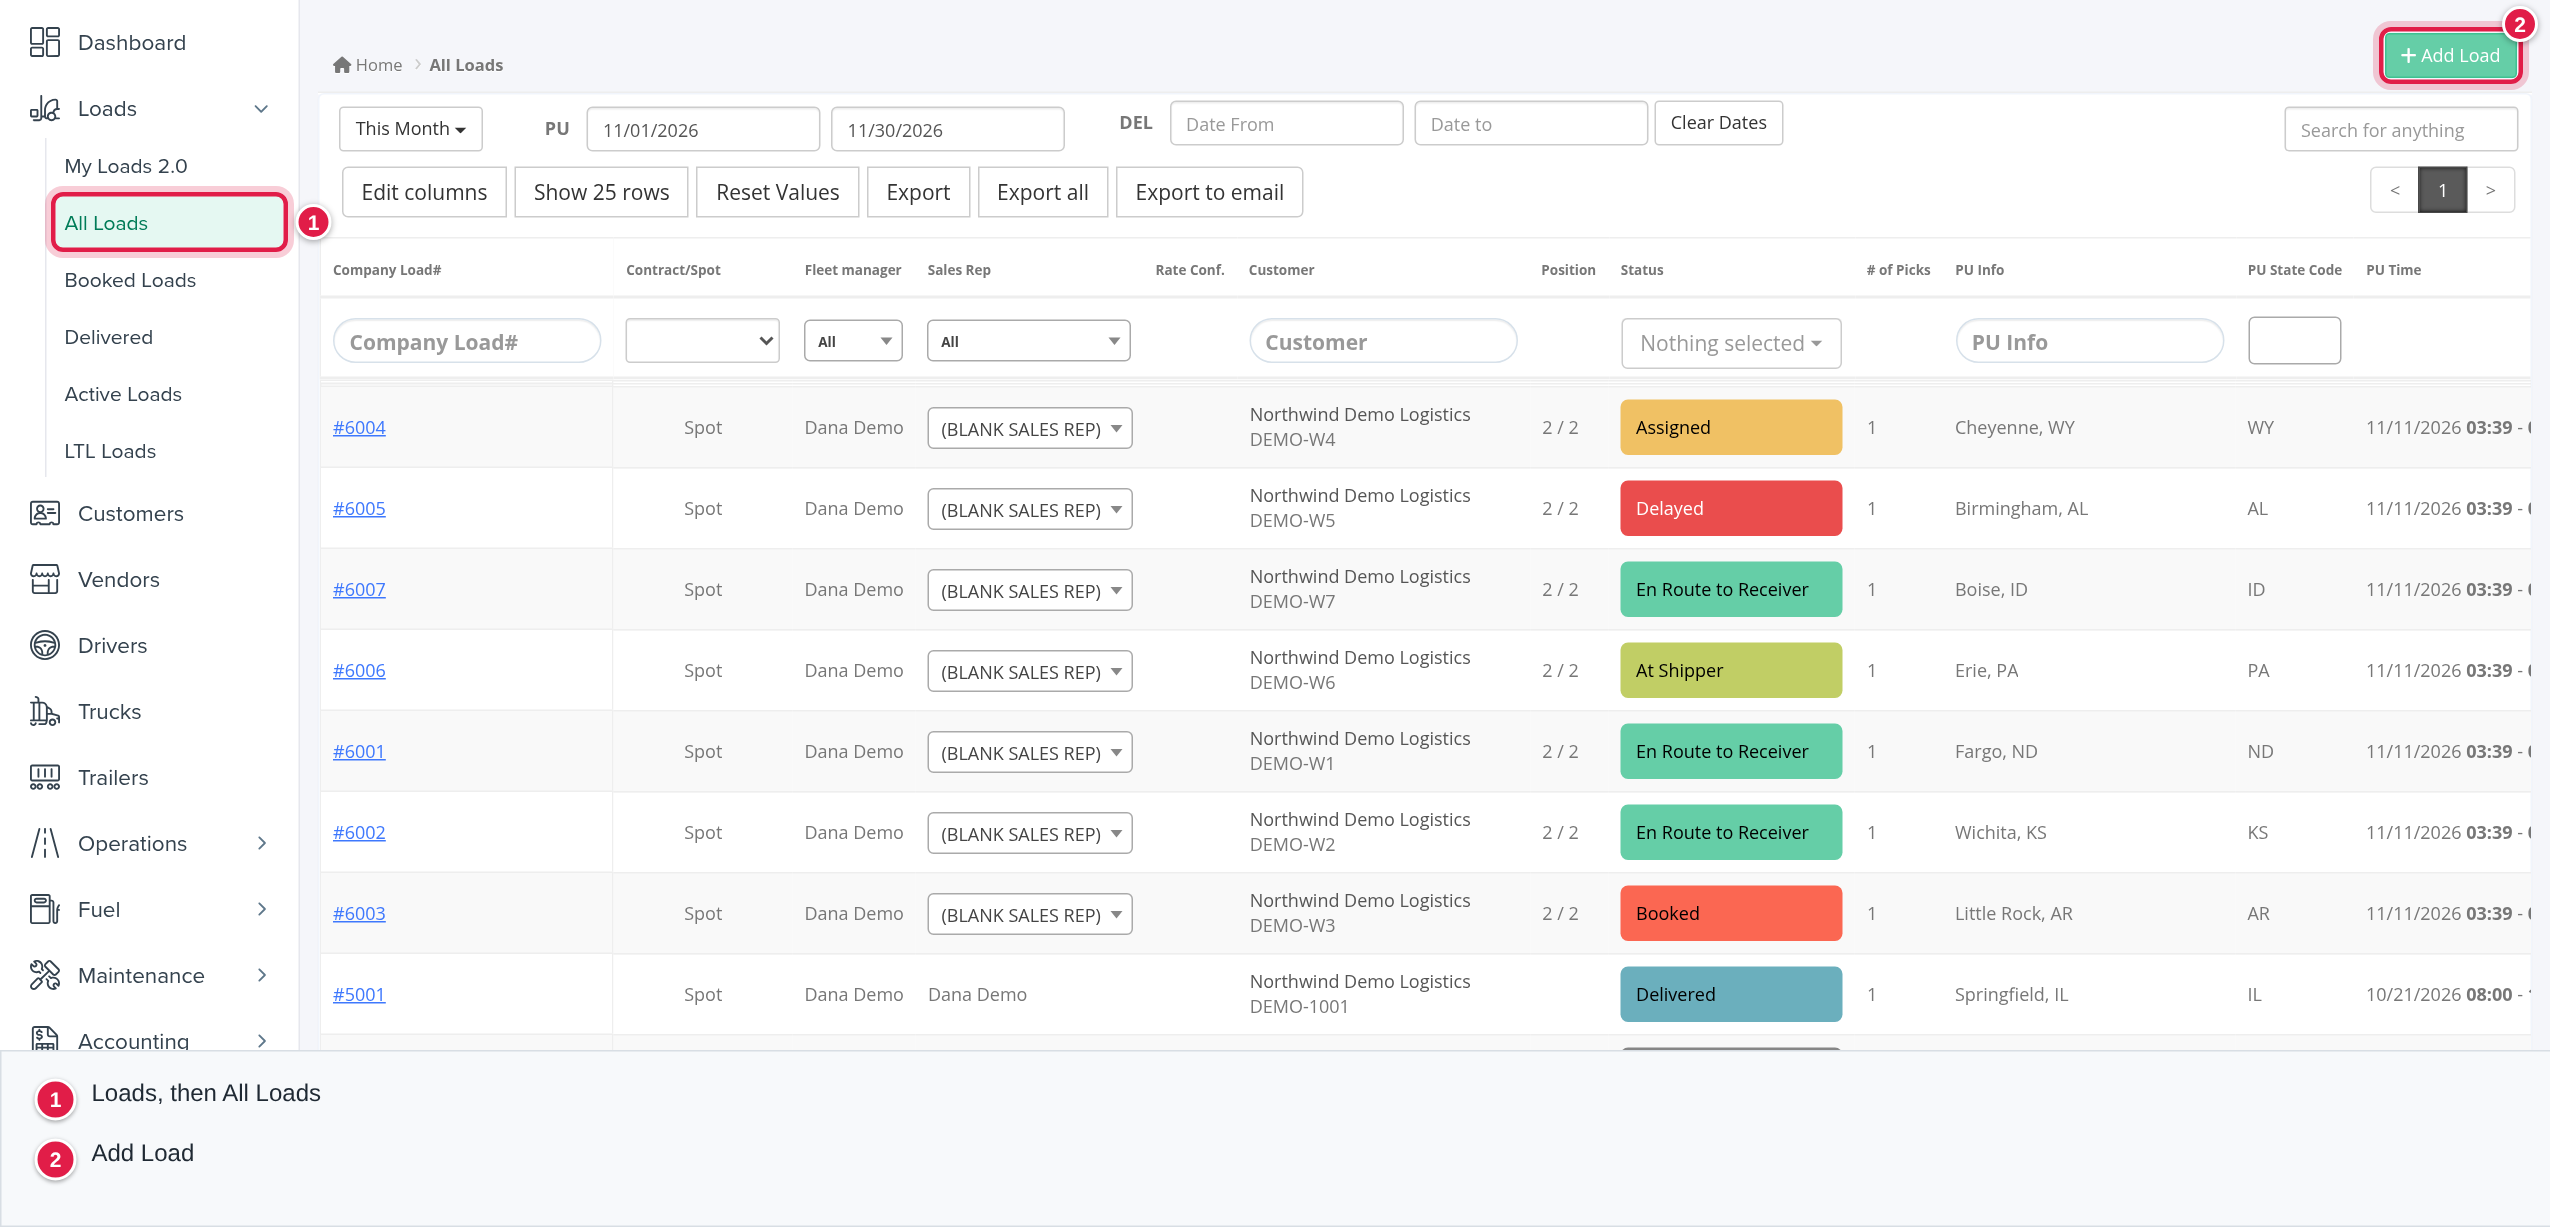
The page has the green Add Load button (top right), a date selector, a Search for anything box and one table. There are no status tabs, no totals row and no checkboxes for bulk actions.
Choose the period
Above the table, the date selector decides which loads you see. It opens on This Month.
- Pick a ready-made period from the dropdown: Today, This Week, This Month, This Quarter, This Year, Yesterday, Last Week, Last Week to Date, Last Month, Last Quarter or Last Year.
- Or type or pick your own dates. The caption changes to Custom.
- PU (From and To) filters on the first pickup of the load. DEL (From and To) filters on the last delivery.
- Clear Dates empties all four date boxes, so every load shows.
Search and filter
- Search for anything finds a load by its company load number, its customer load number or the customer name. Press Enter.
- Under the column headings there is a row of filters, one per column. Text filters apply after you stop typing. Dropdowns apply when you choose. All filters work together.
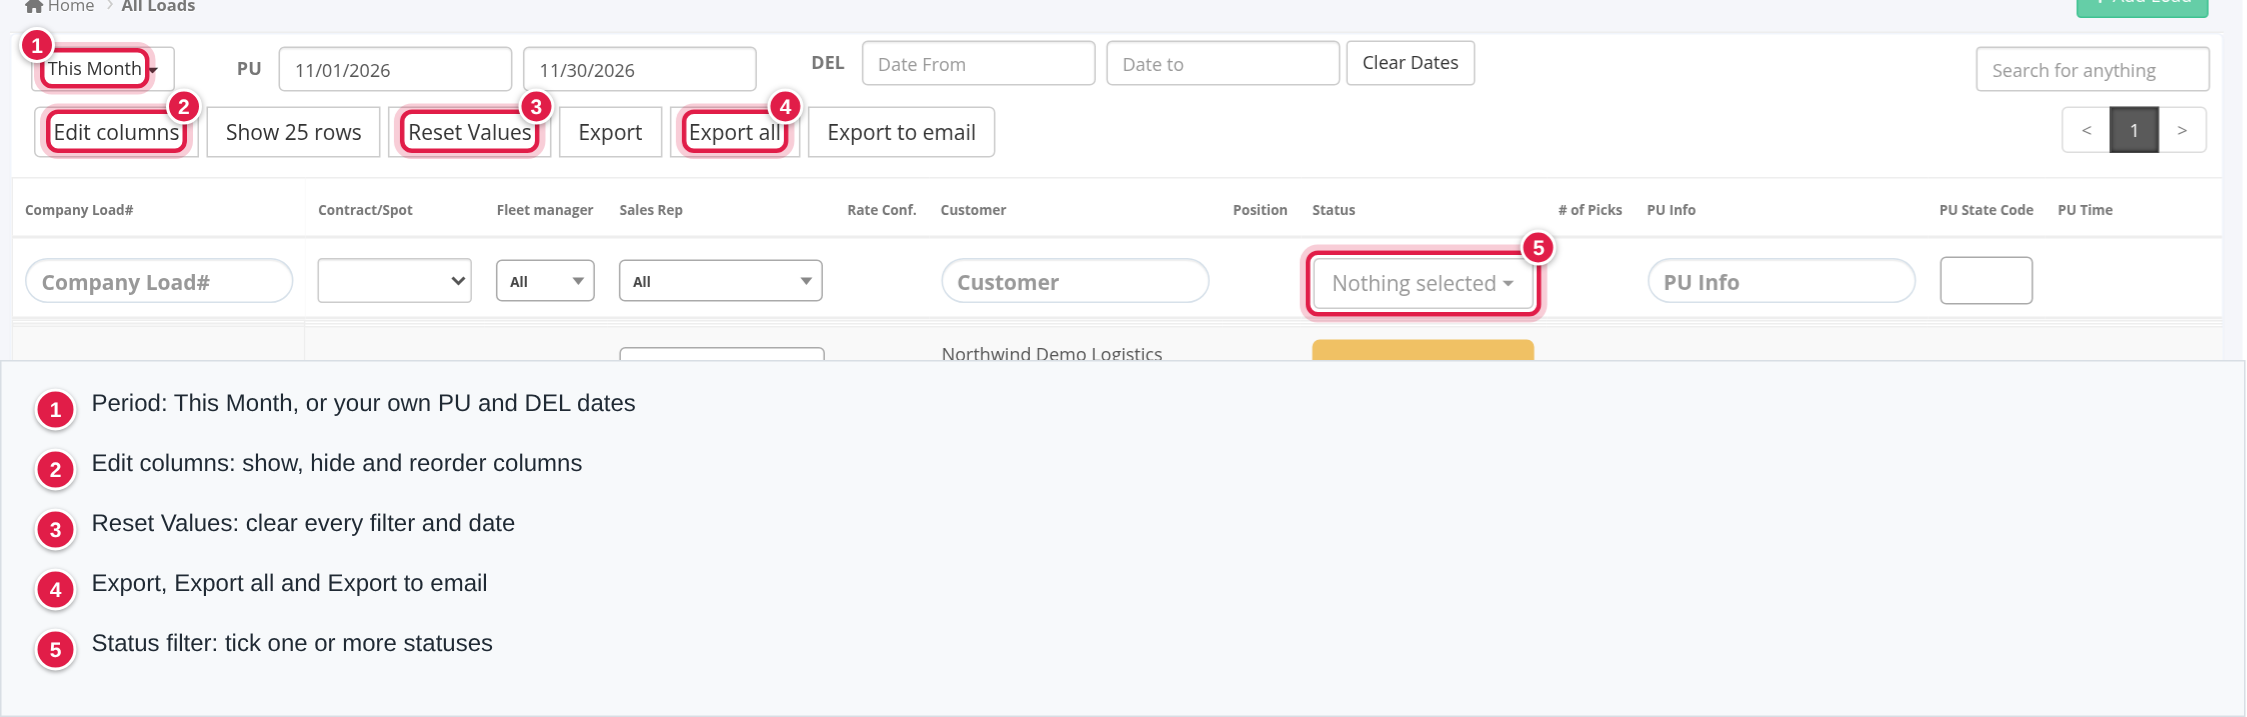
Filters you will use most:
- Company Load# and Customer: type part of the number or name.
- Status: tick one or more statuses. Use select all to tick every one.
- PU Info and DEL Info: city or state of the first pickup and last delivery. PU State Code and DEL State Code let you pick states. PU Zip and DEL Zip match the start of the zip code.
- Driver: type a driver number or name.
- Sales Rep and Fleet manager: choose a person.
- Contract/Spot: Contract, Spot, Dedicated or Internal.
- Detention: All, Upcoming, Started or Ended.
- Yes/No filters for load options: Alcohol Shipment, Sealed, High Value, Hot, Last Mile, Re-Power, Ad-Hoc, Short Haul, Regional, Flatbed, Split, PFF and Not Scheduled. EDI Load and FourKites have a Yes/No filter too, when they apply to your account.
Your filters, the columns you chose and the sort are remembered in your browser the next time you open the page. Reset Values clears them.
The buttons above the table
- Edit columns: show, hide and reorder columns.
- Show 25 rows: the button shows the page size. Choose 10, 25, 50, 100, 250 or 500 rows per page. The page opens at 25.
- Reset Values: clears the search, every filter and every date.
- Export: downloads the current page, as an Excel file, with the visible columns only.
- Export all: downloads every load that matches your filters (up to 10,000), with an extra Actions column holding a link to each load.
- Export to email: sends the export by email. It needs a pickup or a delivery period with both a From and a To date, otherwise you see "Please select period (start date and end date) for which data should be exported."
To rearrange the table, drag a column heading. The first column, Company Load#, stays fixed on the left while you scroll.
The columns
Select Edit columns to change what you see. By default you see:
| Column | What it shows |
|---|---|
| Company Load# | The load number, as a link that opens the load. |
| Contract/Spot | Contract, Spot, Dedicated or Internal. |
| Fleet manager | The manager of the load's drivers. |
| Sales Rep | The dispatcher. When empty, a dropdown (BLANK SALES REP) lets you assign one. |
| Rate Conf. | A PDF icon for each uploaded rate confirmation. EDI loads without a document show EDI. |
| Customer | Customer name and customer load number. Opens the customer. |
| Position | Current stop out of total stops, for example 2/4. |
| Status | The status as a coloured label (see below). |
| # of Picks / # of Drops | Number of pickup and delivery stops. |
| PU Info / DEL Info | City and state of the first pickup and last delivery. |
| PU State Code / DEL State Code | The states. |
| PU Time / DEL Time | Customer appointment of the first pickup and last delivery. |
| Driver PU Time / Driver DEL Time | The times the driver reported. |
| Driver | Driver number, name and on-time percentage. When empty, a dropdown (BLANK DRIVER) lets you assign one. |
| Linehaul and Fuel Surcharge | Money columns. |
| Customer Empty Miles / Customer Loaded Miles | The customer's miles. |
| Statement $ per Mile (Loaded) / (Total) | Rate per mile. |
Other columns you can add: Detention, detention duration and paid detention amount, Lumper, Storage, Misc., Weight, Commodity, Account Manager, CSR Manager, Created At, Equipment, Company, and the load-option columns listed under Filters, which show a green check when the option is on.
Some columns depend on your account:
- EDI Load and EDI Load Status need EDI.
- Planned Empty Miles, Planned Loaded Miles and Planned $ per Mile need the route planner.
- Load score columns need the Load Score feature.
- Accounts that broker loads see a different set of default columns, including Equipment, Company, Carrier Pay and Profit.
The status colours
The Status column shows each status as a coloured label, for example Booked (red-orange), Assigned (yellow), En Route to Shipper and At Shipper (greens), Loaded, Delayed (red), En Route to Receiver, At Receiver, Delivered, Exported, Missing Paperwork, Pending to Bill, Billed, Paid and Canceled.
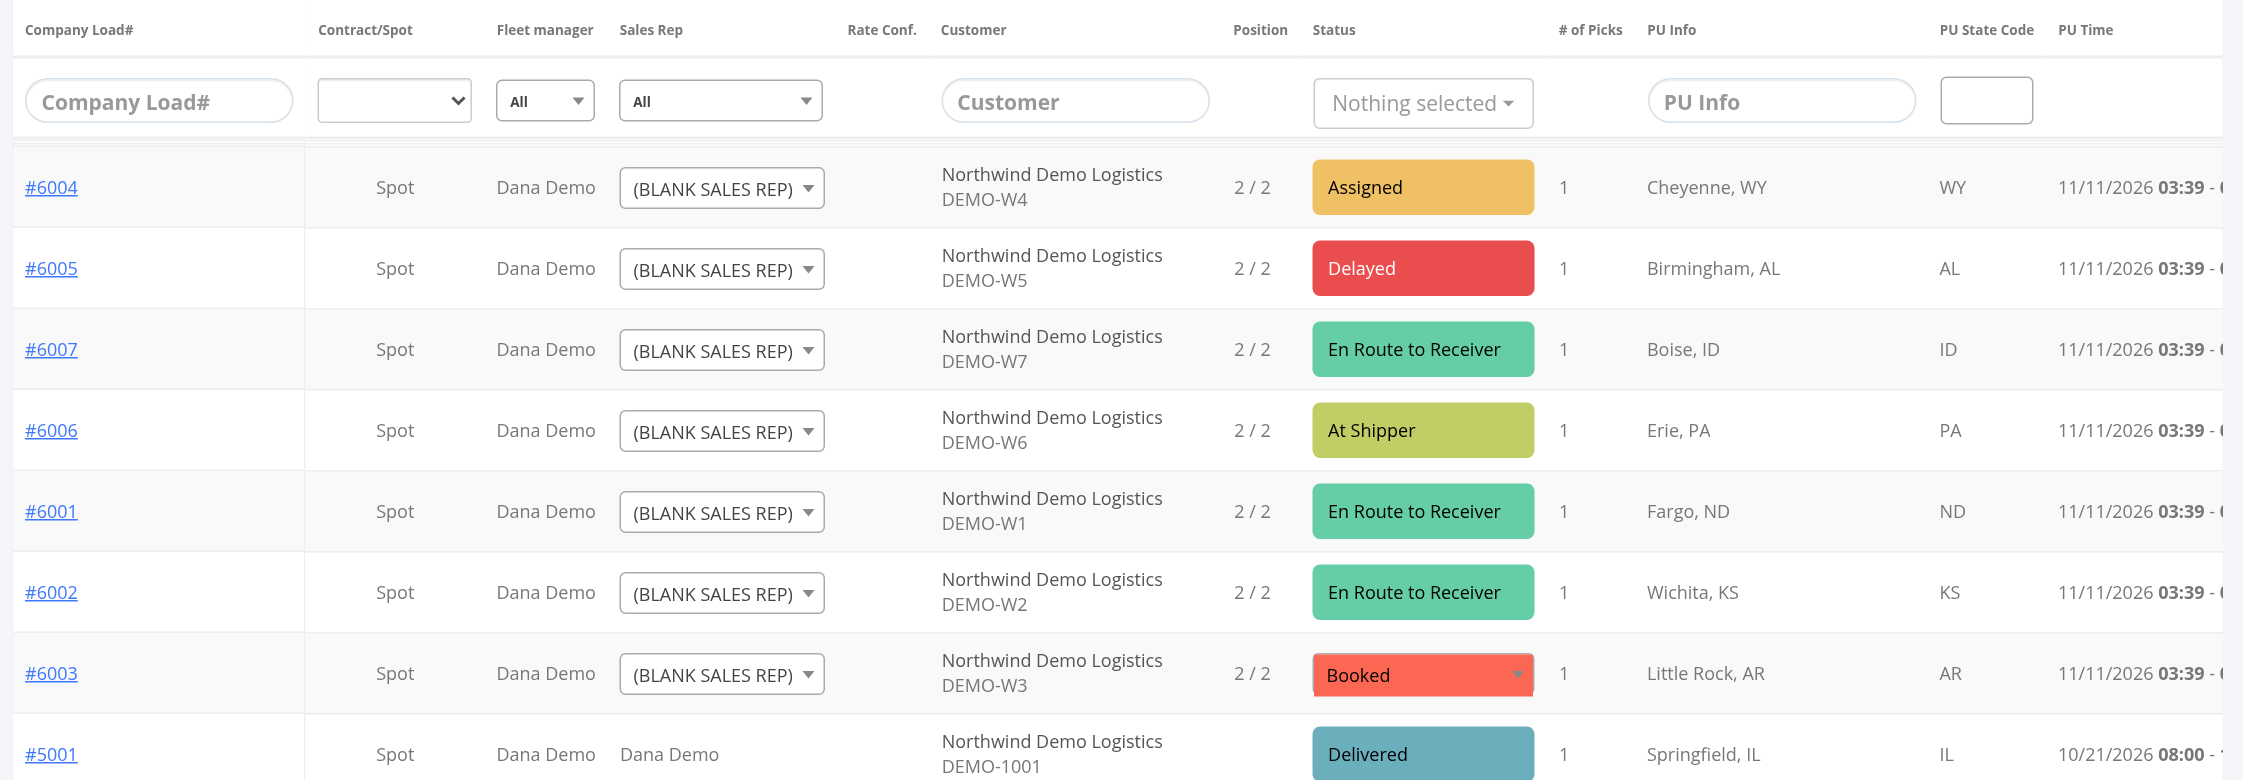
Change a status, driver or sales rep from the table
- Status: select the label, pick the new status from the list. You see "Status successfully changed." and the table reloads. If it fails you see "Failed to change status." with the reason. A status your account has locked cannot be changed here. Changing a load to Canceled removes its driver and trailer.
- Driver: on a load with no driver, open (BLANK DRIVER) and pick a driver. You see "Driver successfully assigned." or "Failed to assign driver.".
- Sales Rep: on a load with no sales rep, open (BLANK SALES REP) and pick a person. You see "Sales representative successfully assigned."
Accounting users cannot use these quick changes.
FAQ
Was this article helpful?
That’s Great!
Thank you for your feedback
Sorry! We couldn't be helpful
Thank you for your feedback
Feedback sent
We appreciate your effort and will try to fix the article