The vendor profile holds everything OpenRoad knows about one company: its name and address, tax and carrier numbers, payment details, contacts, insurance and notes.
This article covers the three tabs of the profile: Overview (reading and changing the vendor and what each card means), Files (the vendor's documents and the files of its trucks and drivers) and Driver + Equipment (its drivers, trucks and trailers, and assigning equipment). To add a vendor, see Adding a vendor (Vendors → New vendor: what is required and what to fill in).
Who can do this: you need permission to view vendors to open a profile, and permission to edit vendors to see Edit and Save. What you can see and change field by field depends on your access settings: a field you may only read is locked. Uploading files and assigning drivers, trucks and trailers need Edit.
Before you begin
- To add a new vendor, see Adding a vendor (Vendors → New vendor: what is required and what to fill in).
- A vendor is the company a driver is paid through. When you add a driver you choose it in Pay to. See Adding a driver (Drivers → New driver: required fields and app login).
- Driver statements are sent to the e-mail address of the driver's linked vendor, not to the driver's own e-mail. Give every vendor that is paid an E-mail address, otherwise its drivers' statements have nowhere to go. See Driver profile: Accounting tab.
- Maintenance shops used in service logs need the type Maintenance and status Active to appear in the Vendor list of a service log.
Open a profile
- In the left menu, select Vendors.
- Select the vendor's name. The profile opens in view mode: fields are locked.
- Select Edit (top right, orange) to change it. Select Vendors (top right, green) to go back to the list.
The tabs are Overview, Files and Driver + Equipment. The vendor's name is shown above the cards.
Two warnings can appear at the top:
- A red DO NOT USE box when the status is Do Not Use.
- A yellow box, Another profile with this email already exists., when another Active vendor of your account has the same e-mail address. The vendor can still be saved.
Edit a vendor
Select Edit, change the fields, then select Save (bottom of the page). A message confirms the save. Nothing is saved until you select Save.
The Overview tab, card by card
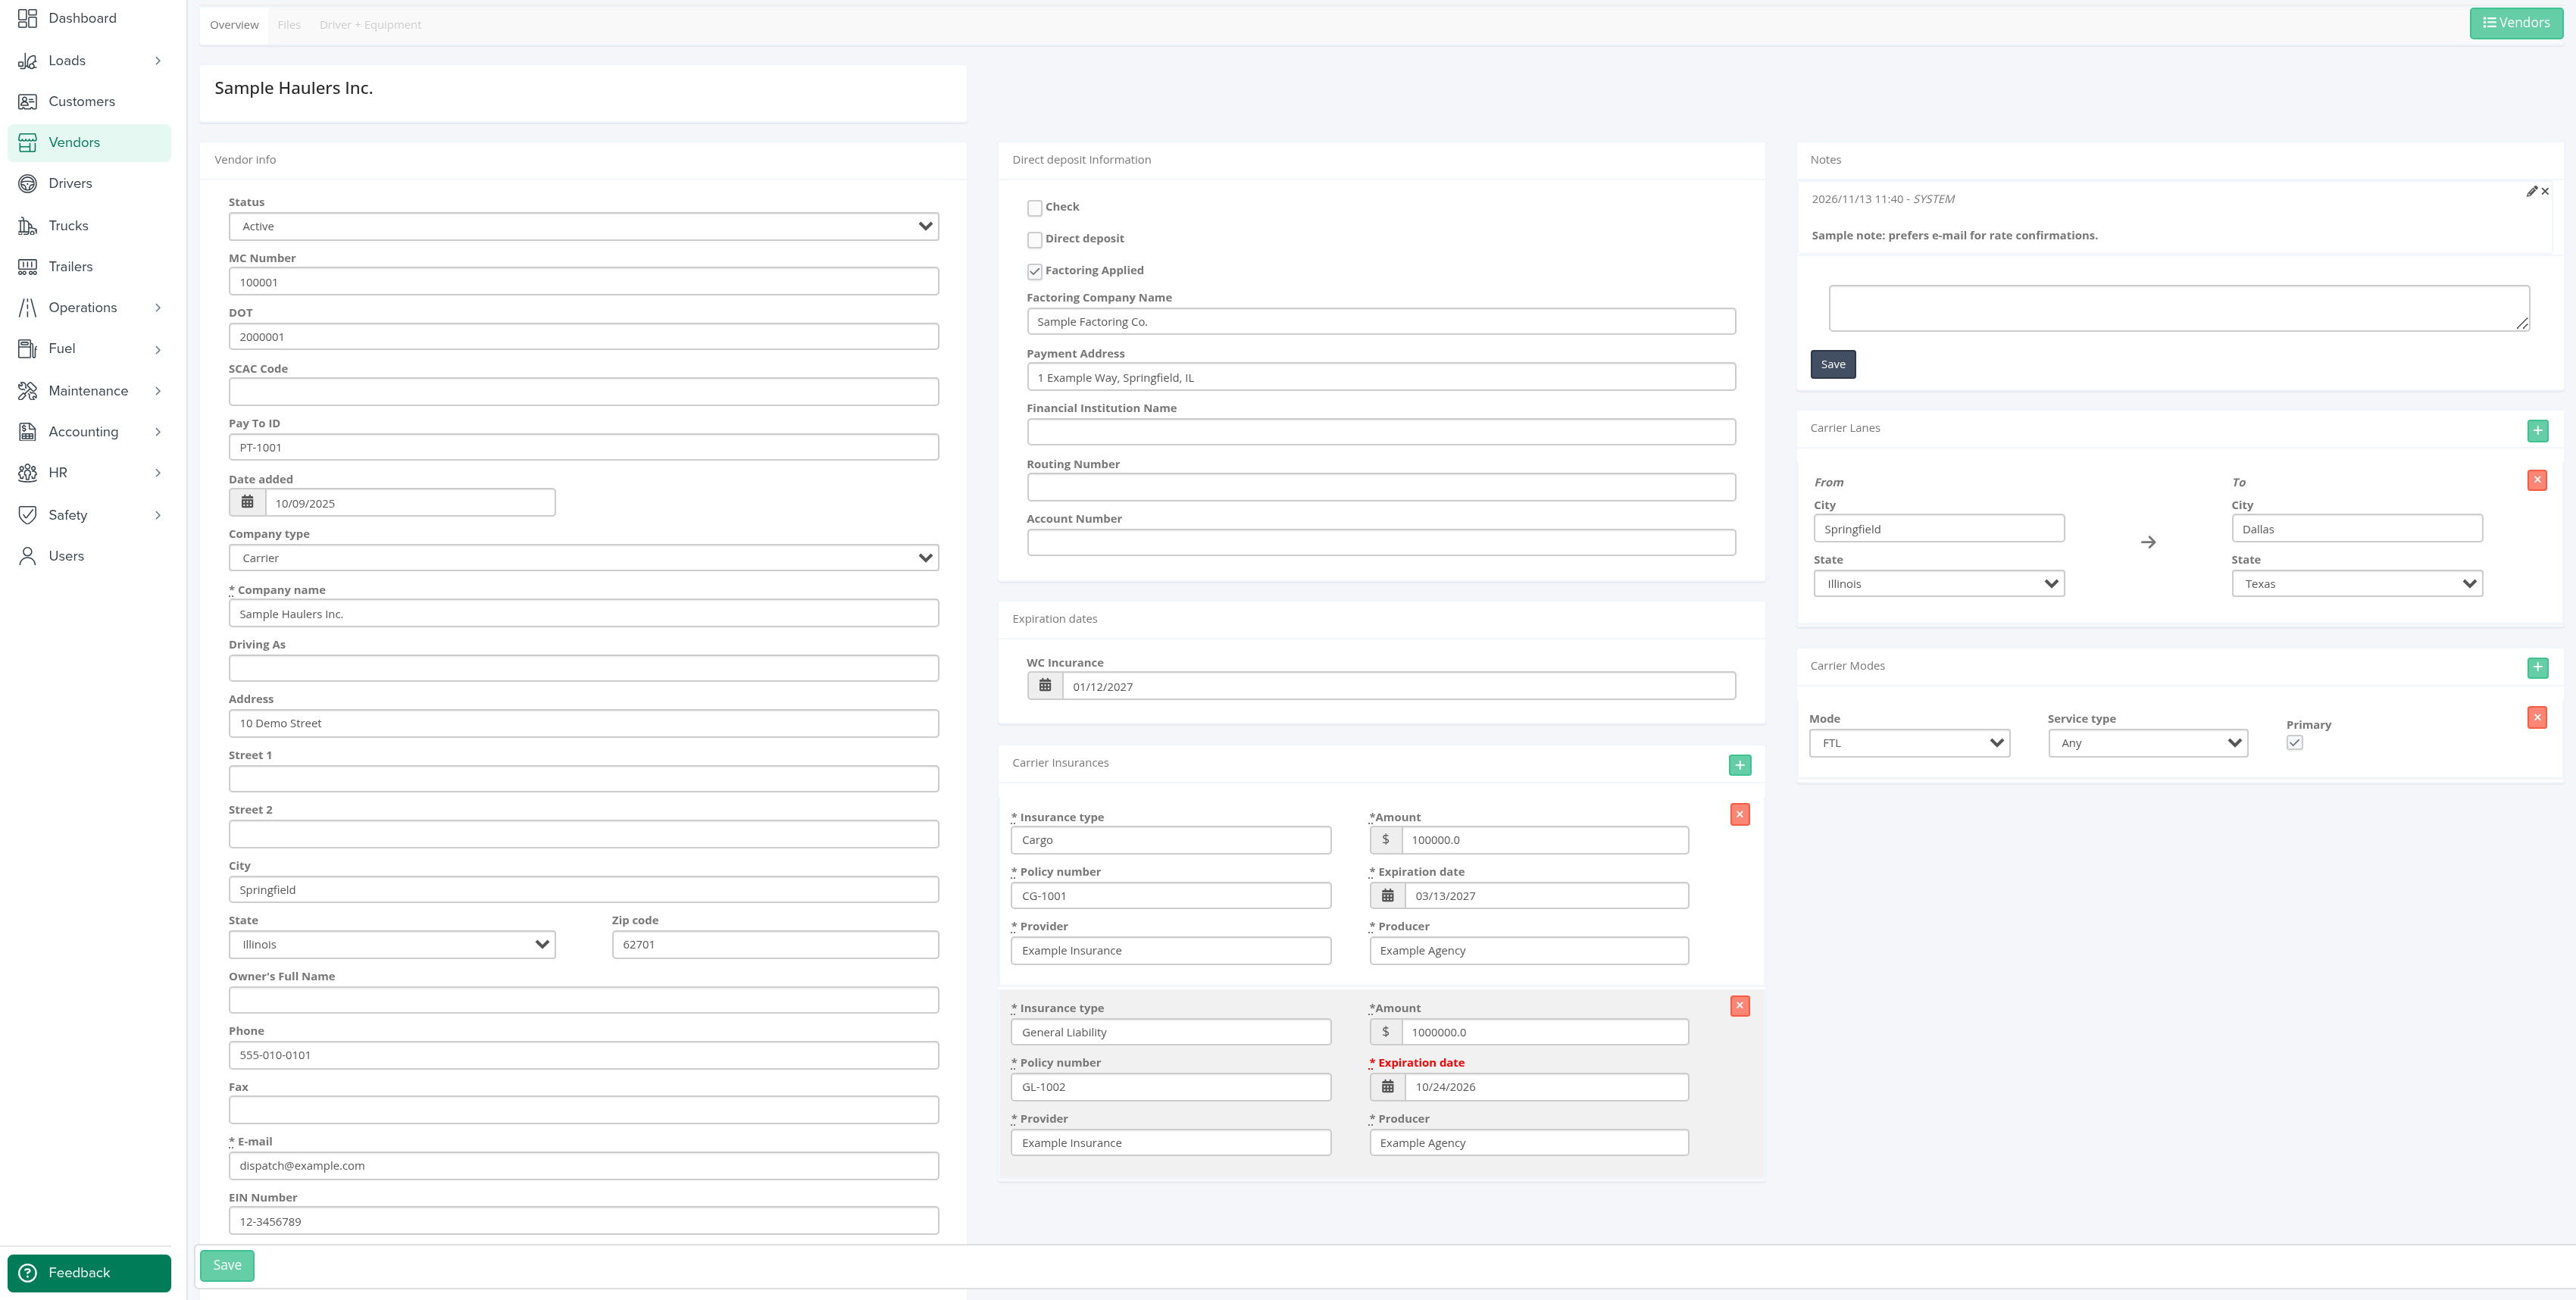
Vendor info
- Status: Active, Inactive or Do Not Use. Use Inactive or Do Not Use to stop using a vendor without deleting it. Do Not Use also shows the red warning and marks the vendor "(Deactivated)" in the list.
- MC Number, DOT, SCAC Code.
- Sage ID: only when your account uses Sage. Must be unique in your account.
- Pay To ID.
- Date added and Date removed.
- Company type: Owner Operator, Carrier, Equipment, Company Driver or Maintenance.
- Company name (required), Address, Street 1, Street 2, City, State, Zip code.
- Owner's Full Name, Phone, Fax, E-mail, EIN Number.
- Account Manager: one of your active users.
Carrier Contacts
People to call at the vendor. Select the + button in the card heading to add one: Name (required), Title, Phone, E-mail and Primary. Remove a contact with the red x on its row (you are asked to confirm). The same name, phone and e-mail cannot be entered twice.
Direct deposit Information
- Check and Direct deposit: tick how the vendor is paid.
- Factoring Applied, Factoring Company Name and Payment Address. Factoring Company Name only shows once Factoring Applied is ticked. While you type the factoring company's name, OpenRoad suggests names already used by your other active vendors that have Factoring Applied ticked. Picking one fills in its Payment Address.
- Financial Institution Name, Routing Number (up to 9 characters) and Account Number.
Expiration dates
WC Incurance (spelled this way on screen): the date the vendor's workers' compensation insurance expires.
Carrier Insurances
Select + to add a policy. Every field is required: Insurance type (type your own, or pick General Liability, Liability, Cargo, Worker's Compensation or Umbrella), Policy number, Provider, Amount (in dollars), Expiration date and Producer. A policy whose expiration date has passed is shown greyed with the date in red.
Notes
Shown on an existing vendor only. Notes are listed newest first. Type a note in the box and select Save under it to add it. You only see this card if your role may add notes to vendors.
Carrier Lanes
Select + to add a lane: a From city and state and a To city and state. The same lane cannot be entered twice.
Carrier Modes
Select + to add a mode: Mode (FTL, LTL, Parcel, Drayage, Flatbed, Reefer or Intermodal), Service type (Any, Expedite or Standard) and Primary. The same mode with the same service type and Primary setting cannot be entered twice.
My Carrier Packet
When your account uses the My Carrier Packet integration and your role may see it, a My Carrier Packet panel appears at the top of the Overview tab. It shows the carrier's data when the vendor has an MC Number or DOT, and a warning asking you to fill one in when it has neither.
How drivers relate to vendors
Every driver is linked to one vendor, chosen in the driver's Pay to field (shown in the Payment info card of the driver's Accounting tab). The vendor is the company the driver is paid through: for a company driver usually your own company, for an owner operator the driver's own company.
- The driver then appears in the vendor's Drivers column on the list and in the Driver + Equipment tab of the vendor.
- Weekly statements are e-mailed to the vendor's E-mail address, not to the e-mail on the driver's profile. To change where a driver's statements go, change the vendor's E-mail, or link the driver to another vendor.
Files tab
Open a vendor and select Files. The tab has four cards:
- Carrier Files: the vendor's own documents, in these folders: W9, Direct Dep. Auth., WC Insurance and Misc.
- Carrier Insurance Files: one folder, Insurance Documents.
- Truck Files: one tab per active truck of the vendor (named by its unit), with that truck's document folders.
- Driver Files: one tab per active driver of the vendor (named by the driver number), with the document folders of your drivers.
Every folder is one row with the File Type, the User who uploaded the last file and the Time uploaded. When a folder holds files, its name shows the number of files in brackets. Select the name, or the file or folder icon at the start of the row, to open the files in a small window.
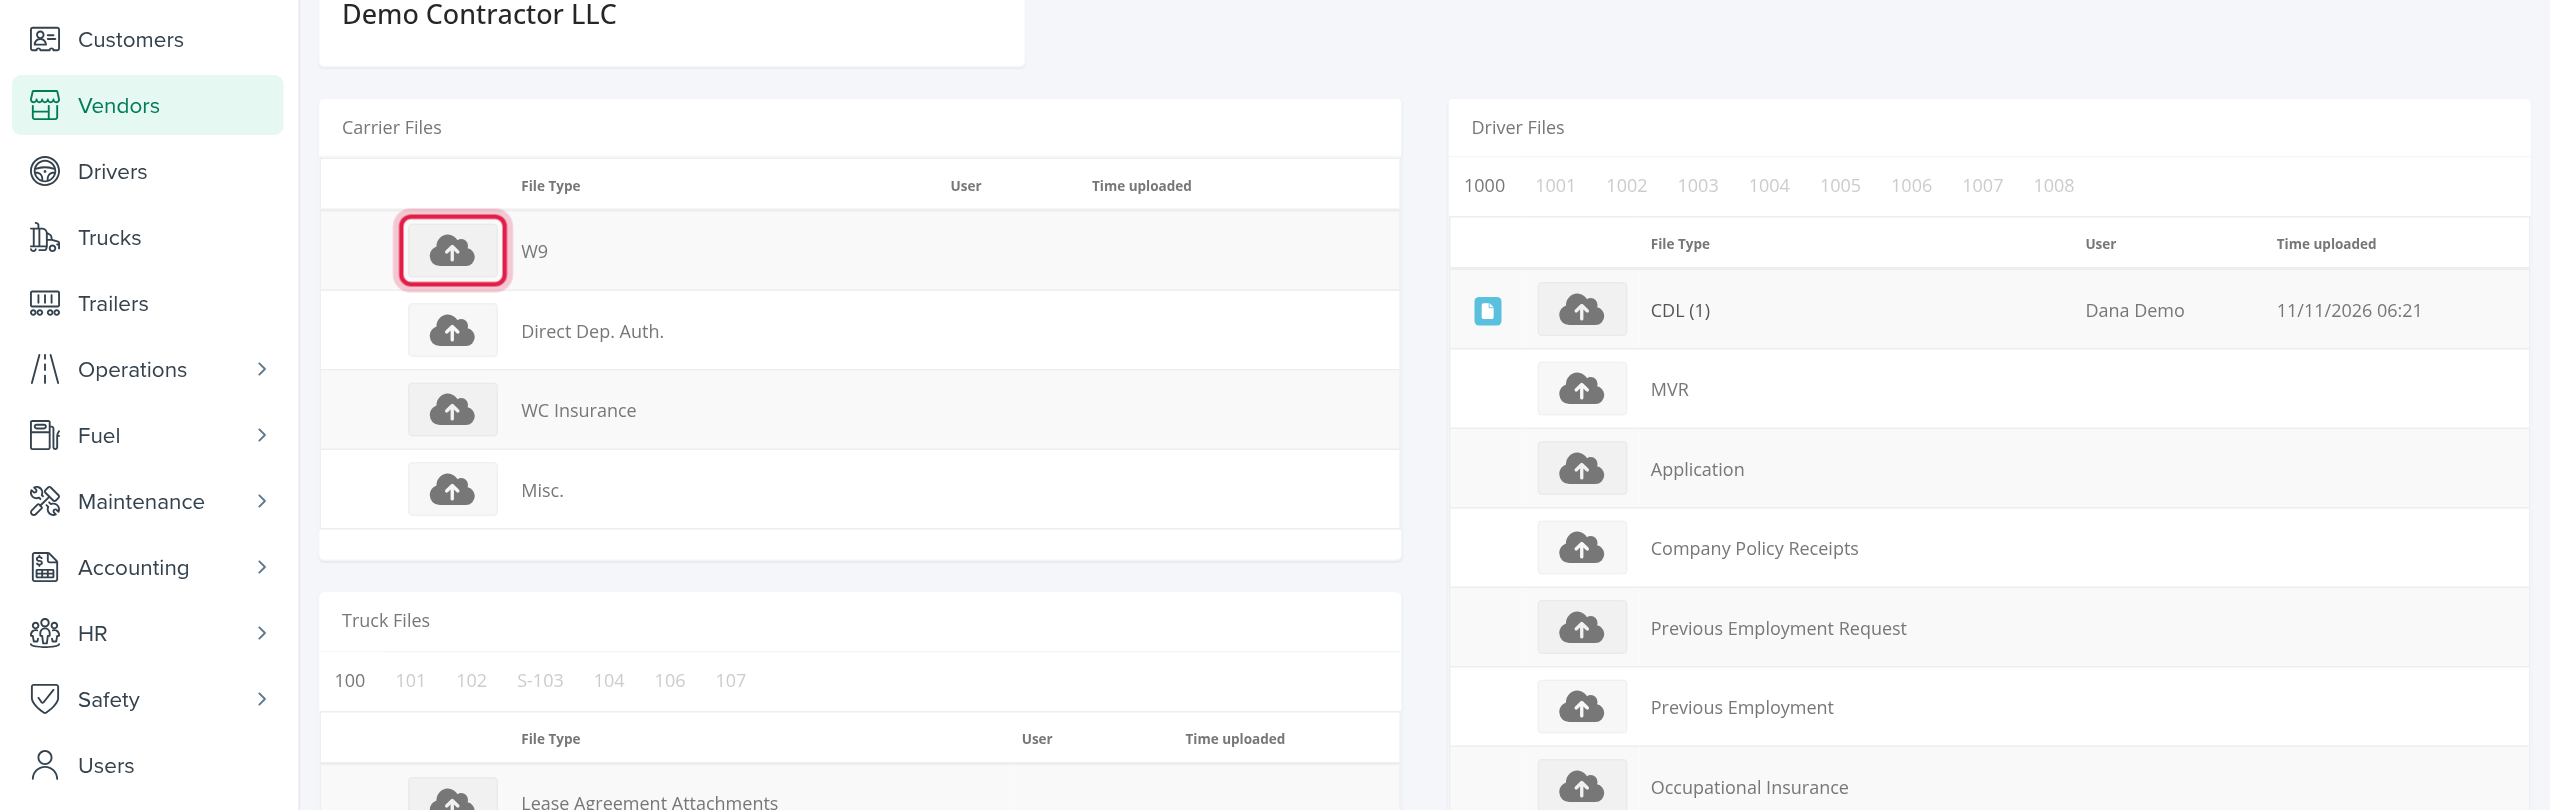
Upload a file
- Open the vendor and select Edit.
- Select the Files tab.
- In the row of the right folder, select the cloud upload icon and choose the file.
The upload icon only shows in edit mode. Without Edit you can open files but not add them.
Driver + Equipment tab
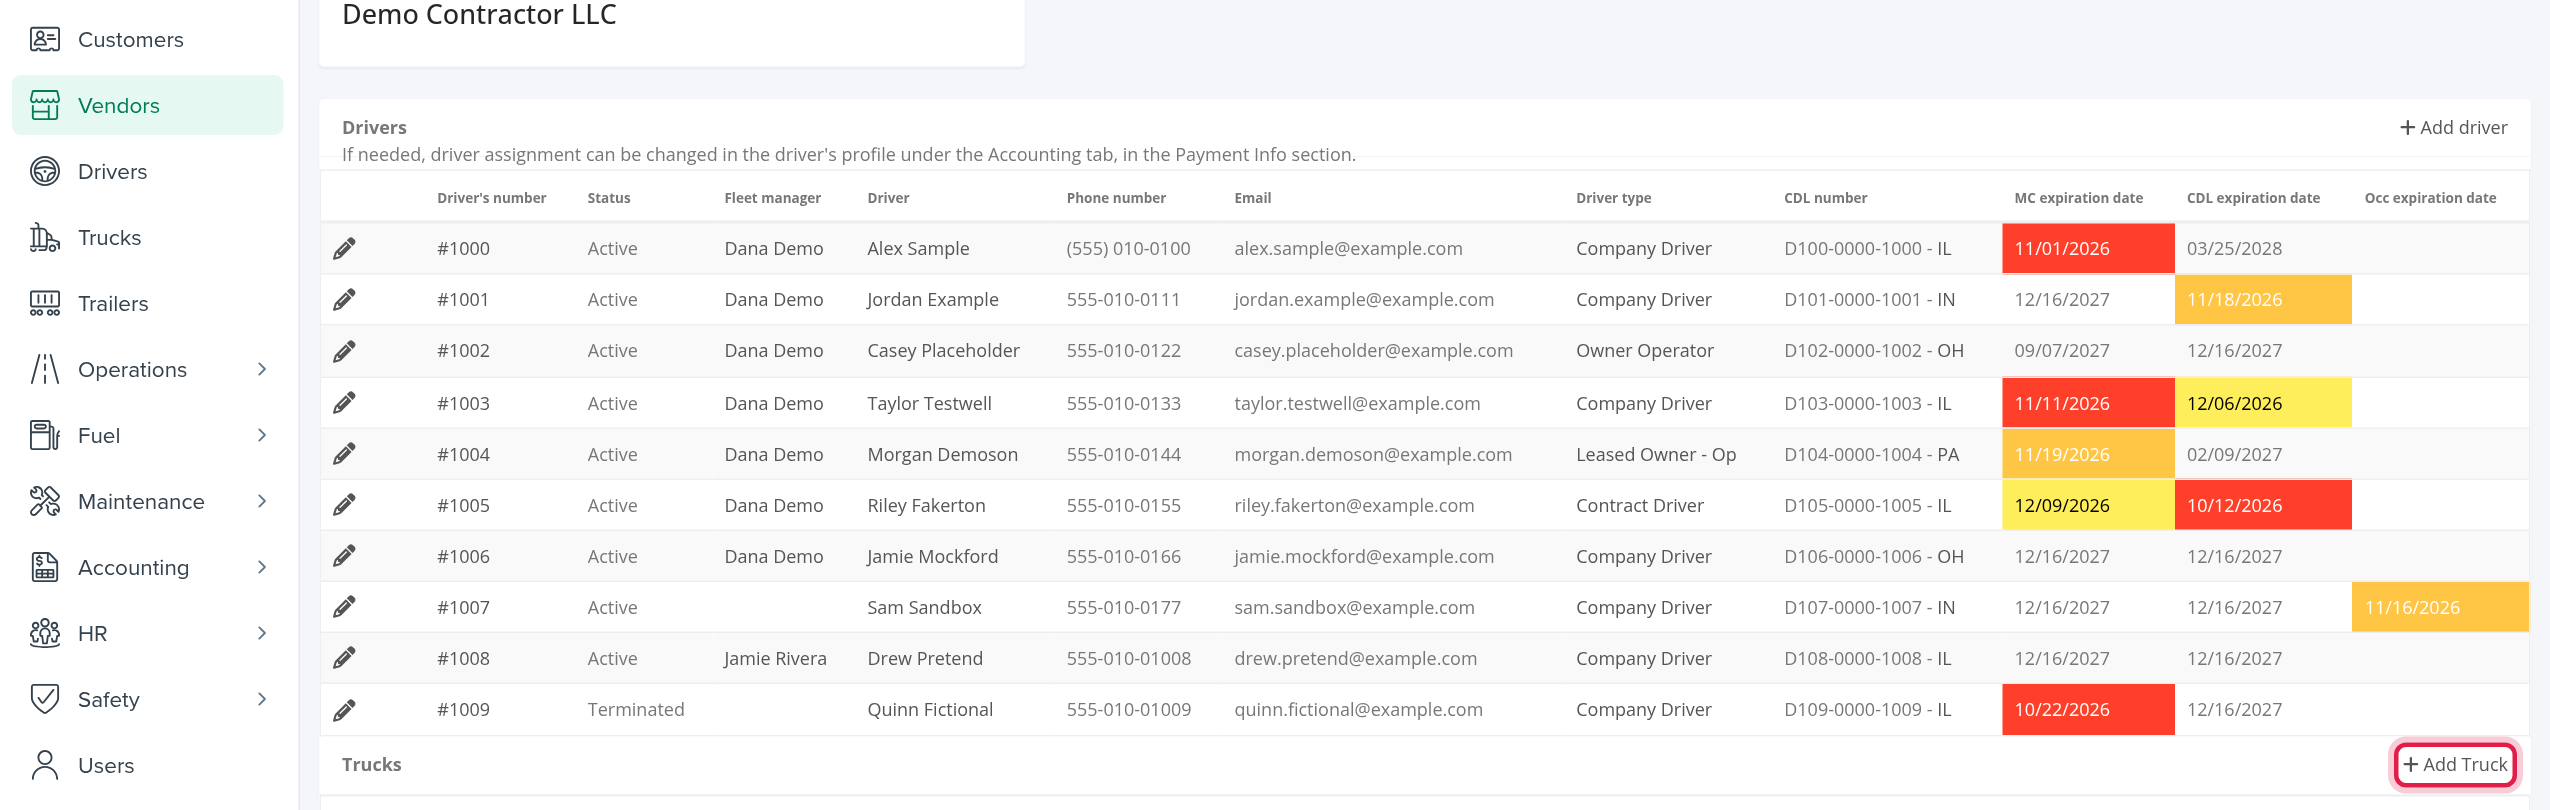
Select Driver + Equipment. It has three tables: Drivers, Trucks and Trailers. They list every driver, truck and trailer linked to the vendor (the list page only shows active ones).
- Drivers: Driver's number, Status, Fleet manager, Driver, Phone number, Email, Driver type, CDL number (with its state) and the MC expiration date, CDL expiration date and Occ expiration date. The driver's number and name open the driver's profile. Expiry dates are coloured when they are close or past.
- Trucks: Unit ID#, Status, Year, Make, Model, Vin, Licence plate (State), Annual Inspection Expiration Date and Insurance Expiration Date. The unit opens the truck.
- Trailers: trailer number, status, year, make, VIN, license plate with state, roof, whether it is vented, skirted or leased, and the annual inspection dates.
The pencil icon at the start of a row opens the driver, truck or trailer to edit, when your role may edit it.
Assign a truck, trailer or driver
- Open the vendor and select Edit, then the Driver + Equipment tab.
- Select Add driver, Add Truck or Add Trailer in the heading of the table.
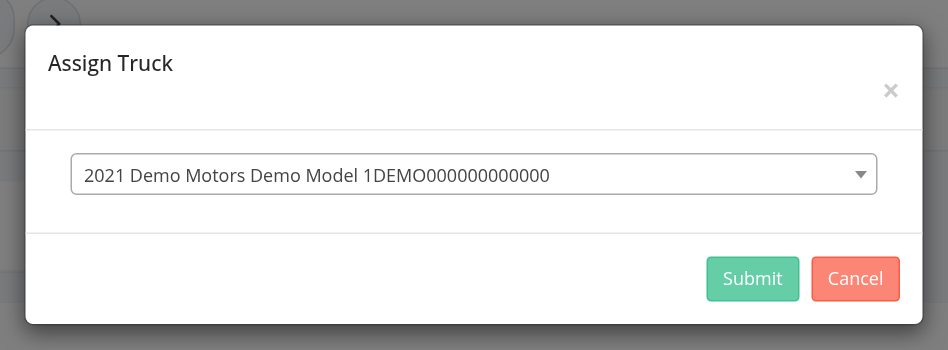
- In the window (Assign Driver, Assign Truck or Assign Trailer), choose the item from the list and submit it.
The list contains all of your account's drivers, trucks or trailers, so check that the one you pick belongs with this vendor. Picking one links it to this vendor.
Remove a truck or trailer from the vendor
Select the trash icon (Remove Assignment) at the start of the truck's or trailer's row and confirm with Are you sure?. The truck or trailer stays in OpenRoad but is no longer linked to this vendor. Drivers have no such icon: change a driver's vendor in the driver's profile, on the Accounting tab, in Payment info (a note on this tab says the same).
Frequently asked questions
Was this article helpful?
That’s Great!
Thank you for your feedback
Sorry! We couldn't be helpful
Thank you for your feedback
Feedback sent
We appreciate your effort and will try to fix the article