The customer profile holds everything OpenRoad knows about one customer: contacts, billing terms and credit status, documents, loads, charge settings and load templates. This article covers every tab, what each card means and what it changes elsewhere. To add a customer, see Adding a customer (Customers → New customer: what is required and what to fill in).
Who can do this: you need permission to view customers (by default Admin, Superadmin, Dispatcher, Capacity and Accounting). Changing a customer needs permission to edit customers (by default Admin, Superadmin and Accounting). Your administrator can hide individual fields, and whole tabs, from some users, so you may see less than this article describes.
Before you begin
- Open a customer from the Customers page by selecting its Name. See Customers page (Customers): list, status filter, column filters, columns and exports.
- Some tabs only show when your account uses the matching feature: Automatic Load Entry, Verification Instructions and Lane Rates. Other tabs need a permission.
- Fields and cards that need a feature, an integration or a setting are marked "when your account uses..." below.
Open a profile
- In the left menu, select Customers, then the customer's Name. The profile opens in view mode: fields are locked.
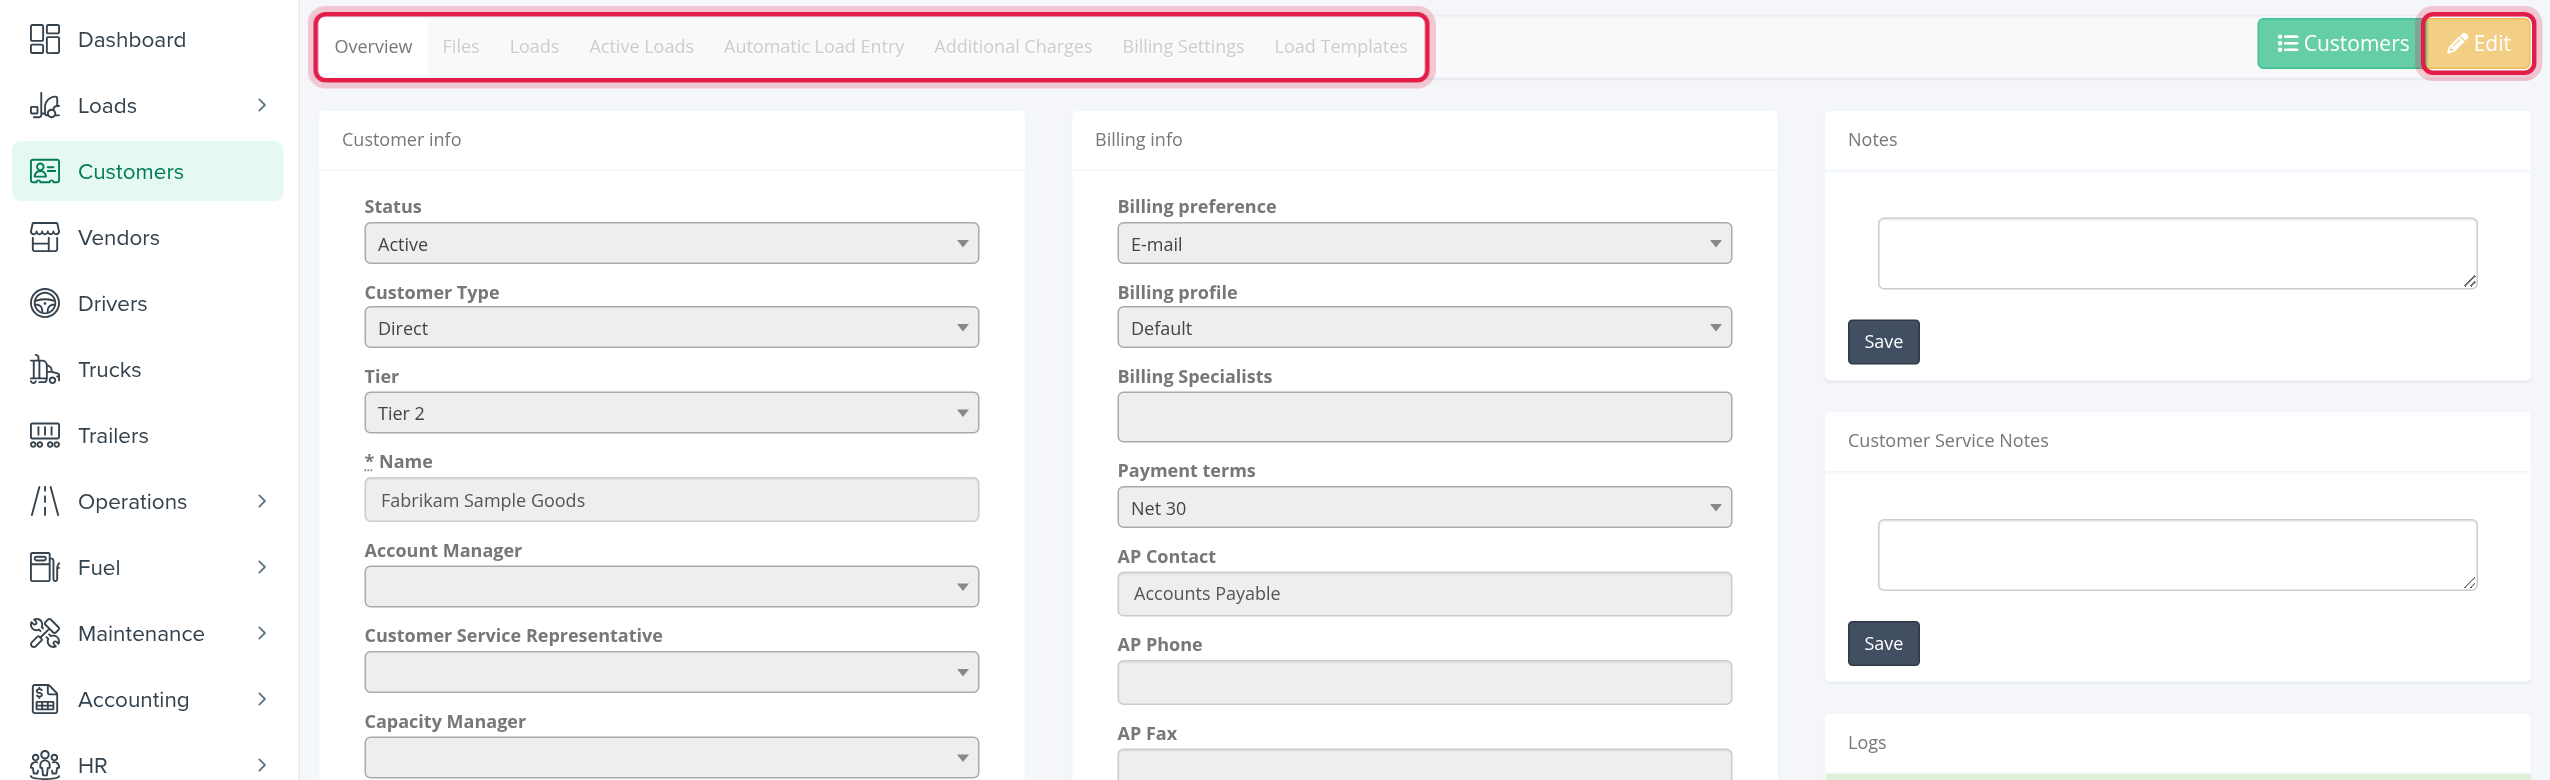
- Select Edit (top right, yellow) to change the Overview and the plain fields on other tabs. Select Customers (top right, green) to go back to the list.
The tabs, in order, are Overview, Files, Loads, Active Loads, Automatic Load Entry, Verification Instructions, Additional Charges, Billing Settings, Lane Rates and Load Templates.
Warnings can appear above the tabs:
- A red DO NOT USE box when the status is Do Not Use.
- A yellow box when the customer reached its balance alert limit, when its contract expires within one month, or when its contract has expired.
Edit a customer
Select Edit, change the fields, then select Save (bottom of the page). Some cards save themselves with their own buttons and do not need Edit: Billing Documents Settings, Automatic Billing, Automatic Export, the fuel surcharge cards, Lane Rates and Load Templates. They are marked below.
| Tab | Shows when |
|---|---|
| Overview | you may view the overview |
| Files, Loads, Active Loads, Load Templates | you have the matching permission |
| Automatic Load Entry | your account uses Automatic Load Entry |
| Verification Instructions | your account uses document verification |
| Additional Charges | you have the additional-charges permission |
| Billing Settings | always |
| Lane Rates | your account uses lane rate settings |
Overview tab
The Overview has three columns of cards.
Customer info
- Status: Active, Inactive, Do Not Use or Potential. What each status does is explained under "Status, credit hold and billing hold" below.
- Customer Type (3PL, Broker, Direct), Tier (Tier 1 to Tier 3).
- Name (up to 60 characters, unique in your account).
- Account Manager (an active user; in view mode it links to that user), Customer Service Representative (when your account uses it) and Capacity Manager.
- Contract Start Date and Contract End Date.
- Tick boxes: Credit Hold, Billing Hold, User Portal, Load status notification email, PFF, Alcohol Shipment, Default Load Type, FSC Applies and, when your account uses the integration, FourKites Integration and Macropoint Integration. Default Load Type shows a drop-down (Contract or Spot) that is required once the box is ticked.
- Send Contracted loads information to: an e-mail address that receives "Load # Info" when a contract load is created for this customer.
- BOL Requirement: Disabled, 24h, 48h or 72h.
- MC, Address, Street #1, Street #2, State, City, Zip Code and Setup date.
Contact info
Contact, Additional Contact, Phone, Additional Phone, E-mail, Account Group Email and Fax, then two lists of e-mail addresses, each with a + button to add a row:
- Load Status Notification E-mails: shown once Load status notification email is ticked. When you choose this customer on a load, these addresses are added to the load's status notifications.
- P.O.D. Notification E-mails: added to the load's proof-of-delivery notifications in the same way.
The same address cannot be entered twice in a list ("Duplicates not allowed in email list!").
Associated users
The customer's own portal users, each linked to its user page.
Customer Portal
Tick Quick Link to generate a link for this customer, then select Copy to copy it. The link is used in load status e-mails ("Track other shipments"). Unticking it deletes the link.
Billing info
- Billing preference: Original, Fax, E-mail, Epay, Website, Manual, EDI, Transflo, RyderShare, CASS, New Profile, Syncada or Transplace.
- Billing profile: one of your account's billing profiles.
- Billing Specialists: active users who receive detention and billing notifications for this customer.
- Payment terms: Due on receipt, Net 2, 7, 10, 15, 30, 45, 50, 52, 60, 90, 120 or BONM 60.
- AP Contact, AP Phone, AP Fax.
- AP E-mail: where invoices are sent. Use a valid customer address, not your own company address. Add more with +.
- Detention Request Email, Accessorial Request Email: addresses used when detention and accessorial requests (TONU, lumper, detention, driver assist) are e-mailed for this customer's loads.
- Trailer Dwell Grace Period (days) and Trailer Dwell Rate per Day: how many days a trailer may stay in this customer's yard free of charge, and the daily rate after that.
- Payment Status Request Email and Payment Status Request Response Email: used by the scheduled payment-status reminders. The first e-mail goes out after the load's due date (from its payment terms) and follow-ups go every Monday, up to 3 in total, while the load is still Billed. Replies go to the response address.
- Custom Billing and Custom Subject: replace the subject of the invoice e-mail. [Customer Load#] and [Load#] are replaced by the load numbers.
- Open Balance, and, when your account tracks credit limits and the customer has a balance record, Available Balance (credit limit minus open balance, read-only), Credit Limit and Hard Block of Credit Limit (read-only).
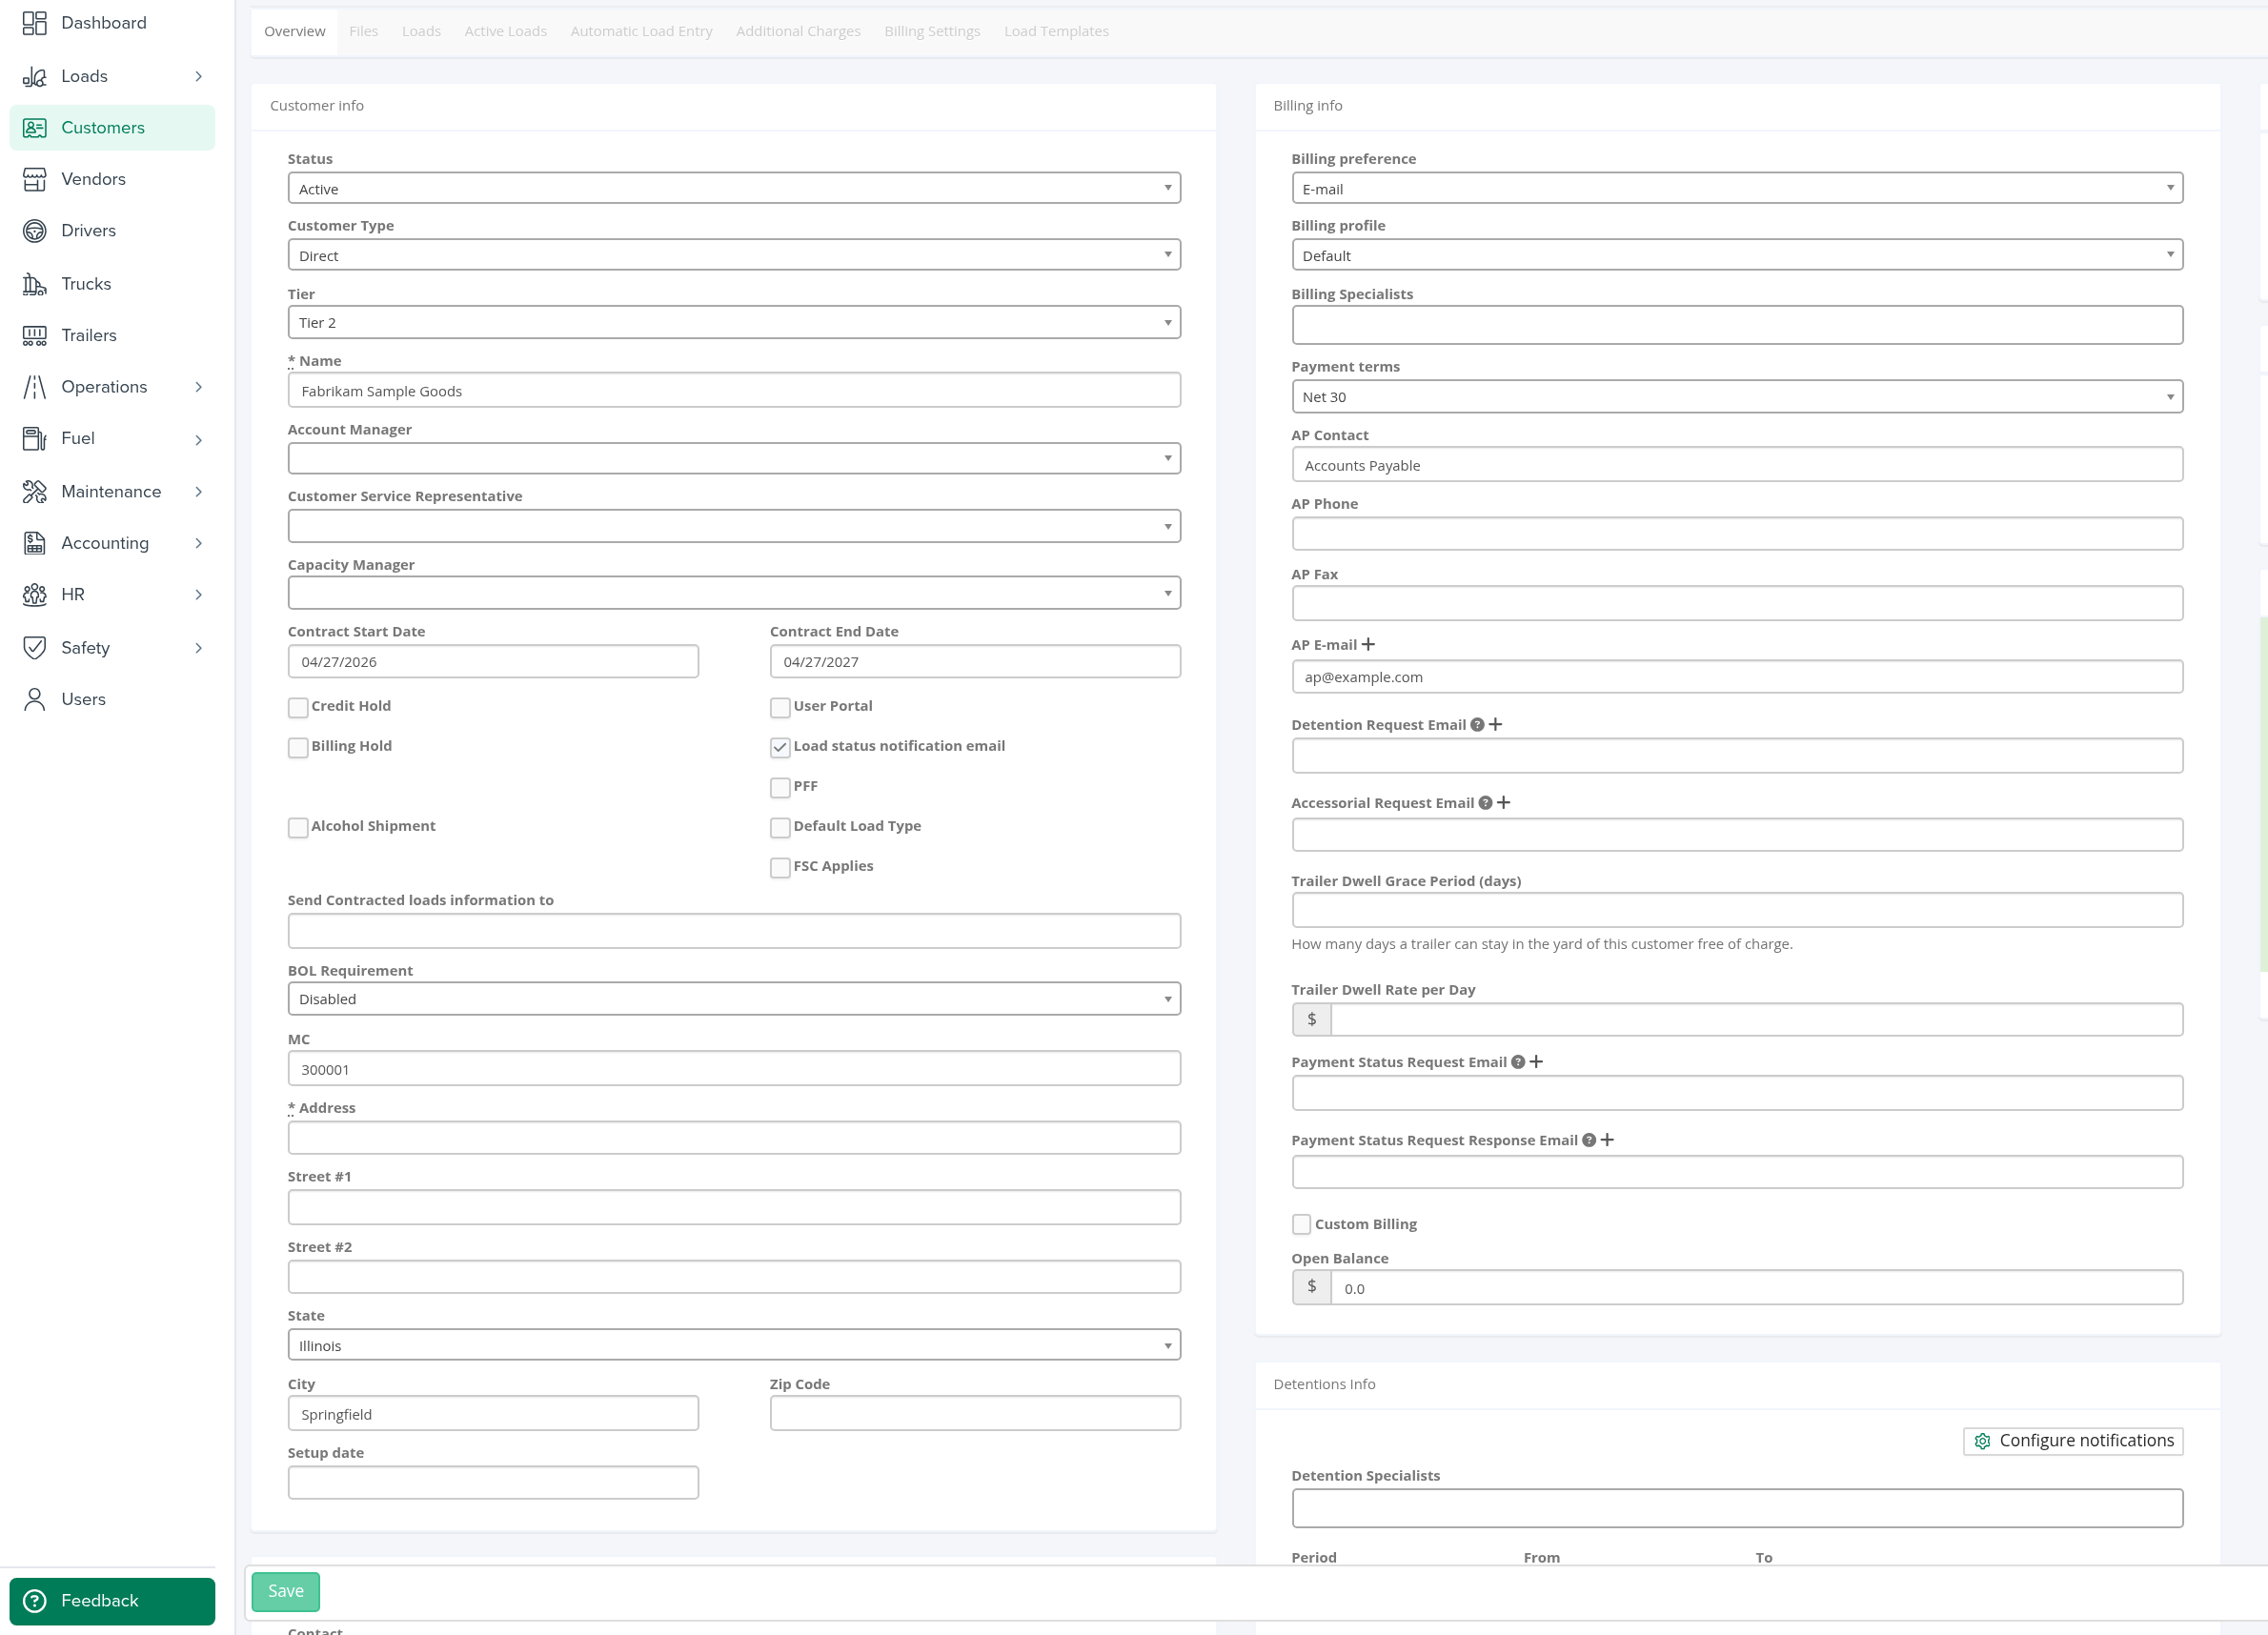
Detentions Info
Shown when your account uses automatic detentions.
- Configure notifications (customer already saved): opens Detention Notifications. For each type, Upcoming, Started, Courtesy and Summary, switch it on or off and choose who receives it from the groups Driver Manager, Sales Rep, Account Manager, Customer Service Rep and Detention Specialists, plus extra e-mail addresses. Changes save automatically. Without permission, or outside edit mode, the window is view-only.
- Detention Specialists: users that form the group of the same name.
- Period, From, To and Search fill in Est. Total Detentions Amount, Paid Detentions Amount, Total Number of Detentions, Total Detentions Duration and Detentions vs Destinations. The boxes stay empty until you select Search. An empty range means all time. The range is applied to the creation date of the load (amounts) and of the stop (counts), not to the delivery date.
When a detention e-mail is sent, the customer's Detention Request Email addresses are used if your account's settings use request e-mails for that type; otherwise the recipients chosen in Detention Notifications are used.
Procedures
A free text area for the customer's own procedures.
Notes
Two cards, Notes and Customer Service Notes, with a text box and Save. They show when your role may add notes.
Logs
For a saved customer, a Logs card lists who changed what and when, 10 entries per page.
Carrier Service Level
When your account uses on-time pickup and delivery tracking, a card at the top shows On-Time Pickup and On-Time Delivery as rings for YTD, Month and Week (green from 95%, amber from 85%, red below), a 12-week trend and the top carrier-late reasons.
Status, credit hold and billing hold
- Do Not Use and Inactive: choosing such a customer on a load shows "This customer is in Do Not Use status and cannot be assigned to the load..." (or the Inactive version) and the choice is reverted. Active-customer pickers across the app list only Active customers.
- Potential: shown in the list with a grey row. No other effect was found.
- Credit Hold: when your account is set so that credit hold blocks new loads, entering a load for this customer fails with "Selected Customer has Credit Hold enabled. New loads will not be entered." (loads created by EDI are not blocked).
- Billing Hold: when you tick it, all of the customer's loads that are not yet exported are put on billing hold; when you untick it they are released.
- Active again: when a customer's status changes to Active and your account has customer reactivation notices on, an e-mail "status changed from ... to Active" is queued.
- Contract dates: the Account Manager receives e-mails about a contract that is about to expire and one that has expired.
Files tab
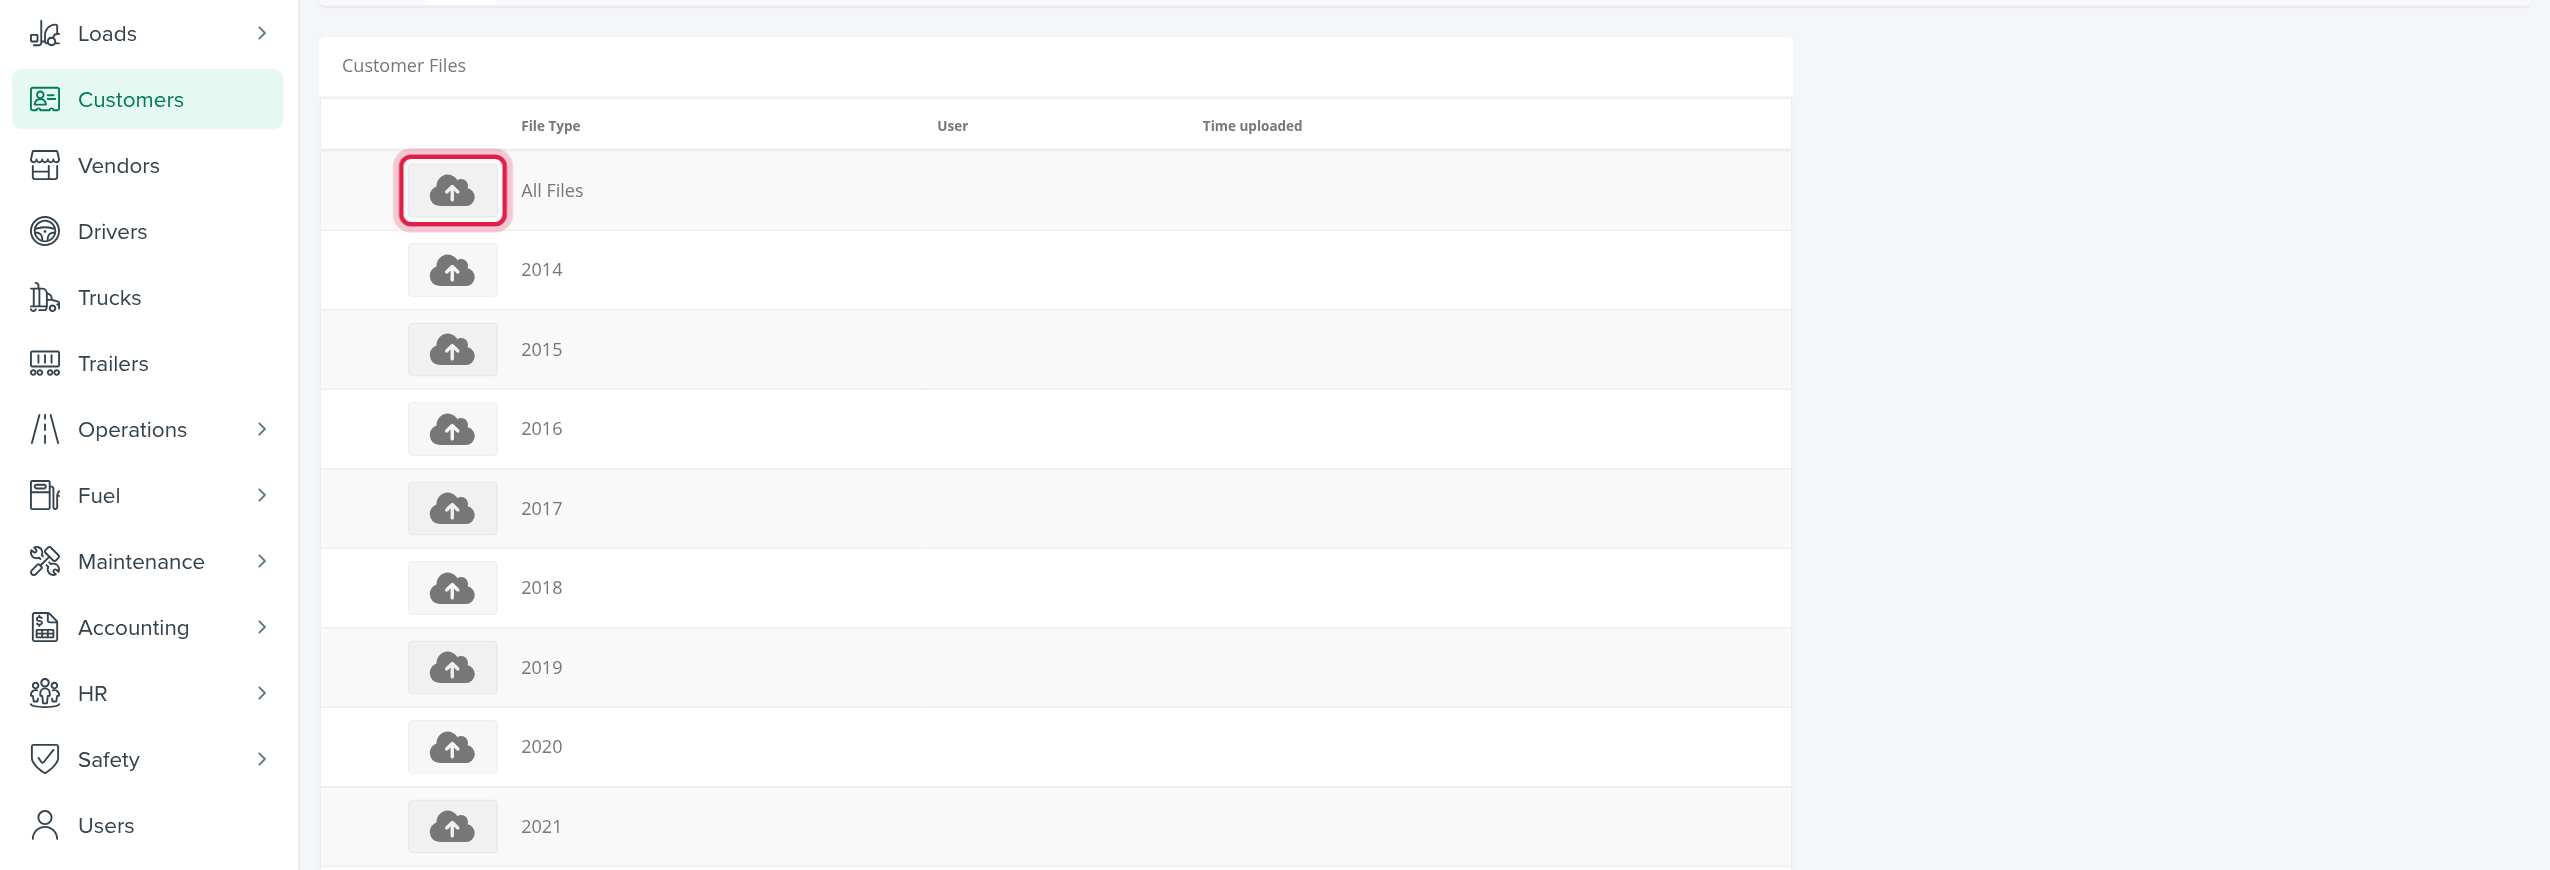
Customer Files lists folders: All Files (every file of the customer), the custom folders your superadmin set up in Settings, and one folder per year from 2014 to the current year. Each row shows the File Type, the User and Time uploaded of the newest file, and the number of files in brackets. Select a row to see its files, download them or delete them (you are asked to confirm).
To upload, open the customer with Edit, select the cloud icon in the row of the right folder and choose files. Allowed types: PDF, JPG, JPEG, PNG, DOC, DOCX, XLS, XLSX, CSV, TXT, JPE, JFIF, HEIC, TIF, TIFF, MP4 and MOV. The maximum is 120 MB per file (the upload box mentions 32 MB).
Loads tab
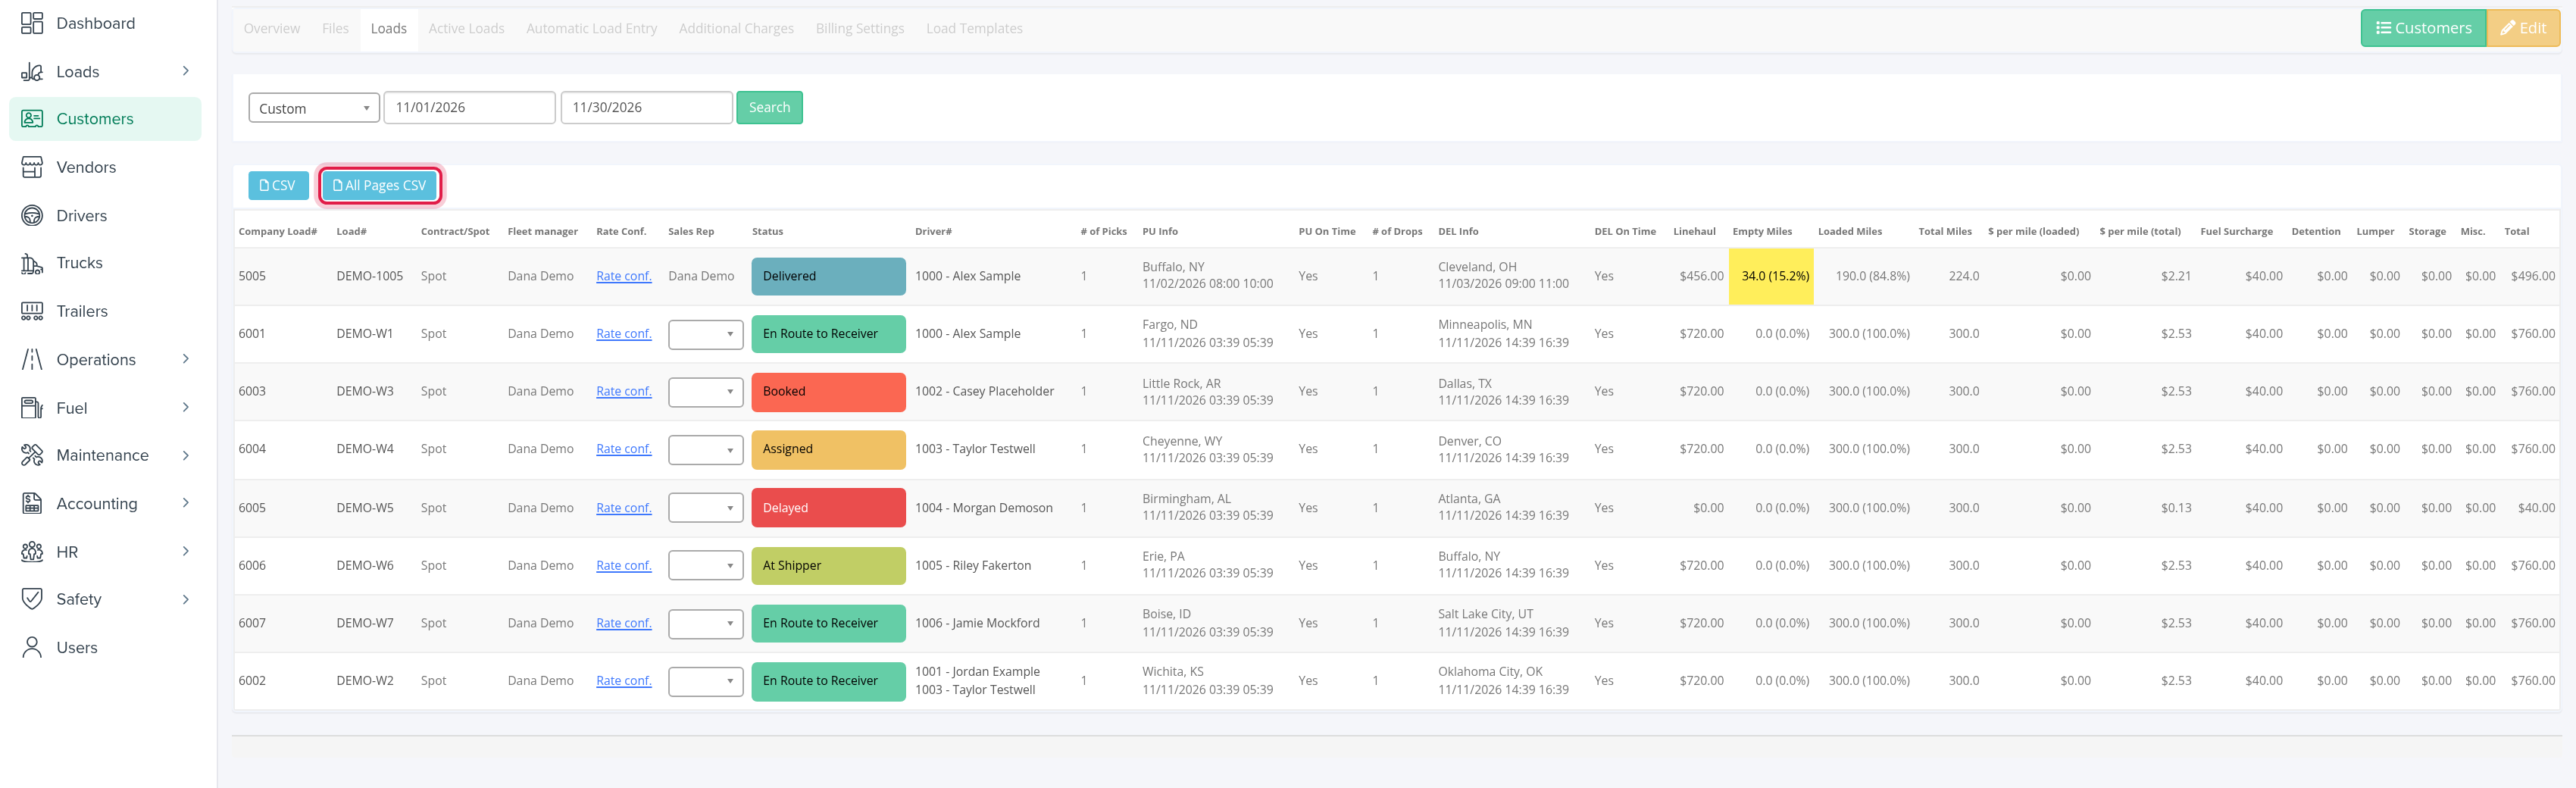
All loads of this customer, except cancelled ones. At the top: Period, Start Date, End Date and Search. The default range is the current month; All removes the date filter. A load is included when any of its stops has an appointment date in the range. Only loads with a driver on a stop (or child loads) appear in the main table.
- The table has 20 loads per page: Company Load#, Load# (open the load in a new tab), Contract/Spot, Fleet manager, Rate Conf., Sales Rep, Status, Driver#, # of Picks, PU Info, PU On Time, # of Drops, DEL Info, DEL On Time, Linehaul, Empty Miles, Loaded Miles, Total Miles, $ per mile (loaded), $ per mile (total), Fuel Surcharge, Detention, Lumper, Storage, Misc. and Total. When a load has no Sales Rep, a drop-down lets you assign one on the spot.
- CSV downloads the loads on the current page. All Pages CSV queues the export and e-mails you the CSV.
- Above the main table, when the customer has booked or in-progress loads that still have a stop without a driver, a second table lists them regardless of the date range. Its Driver drop-down assigns a driver immediately.
Active Loads tab
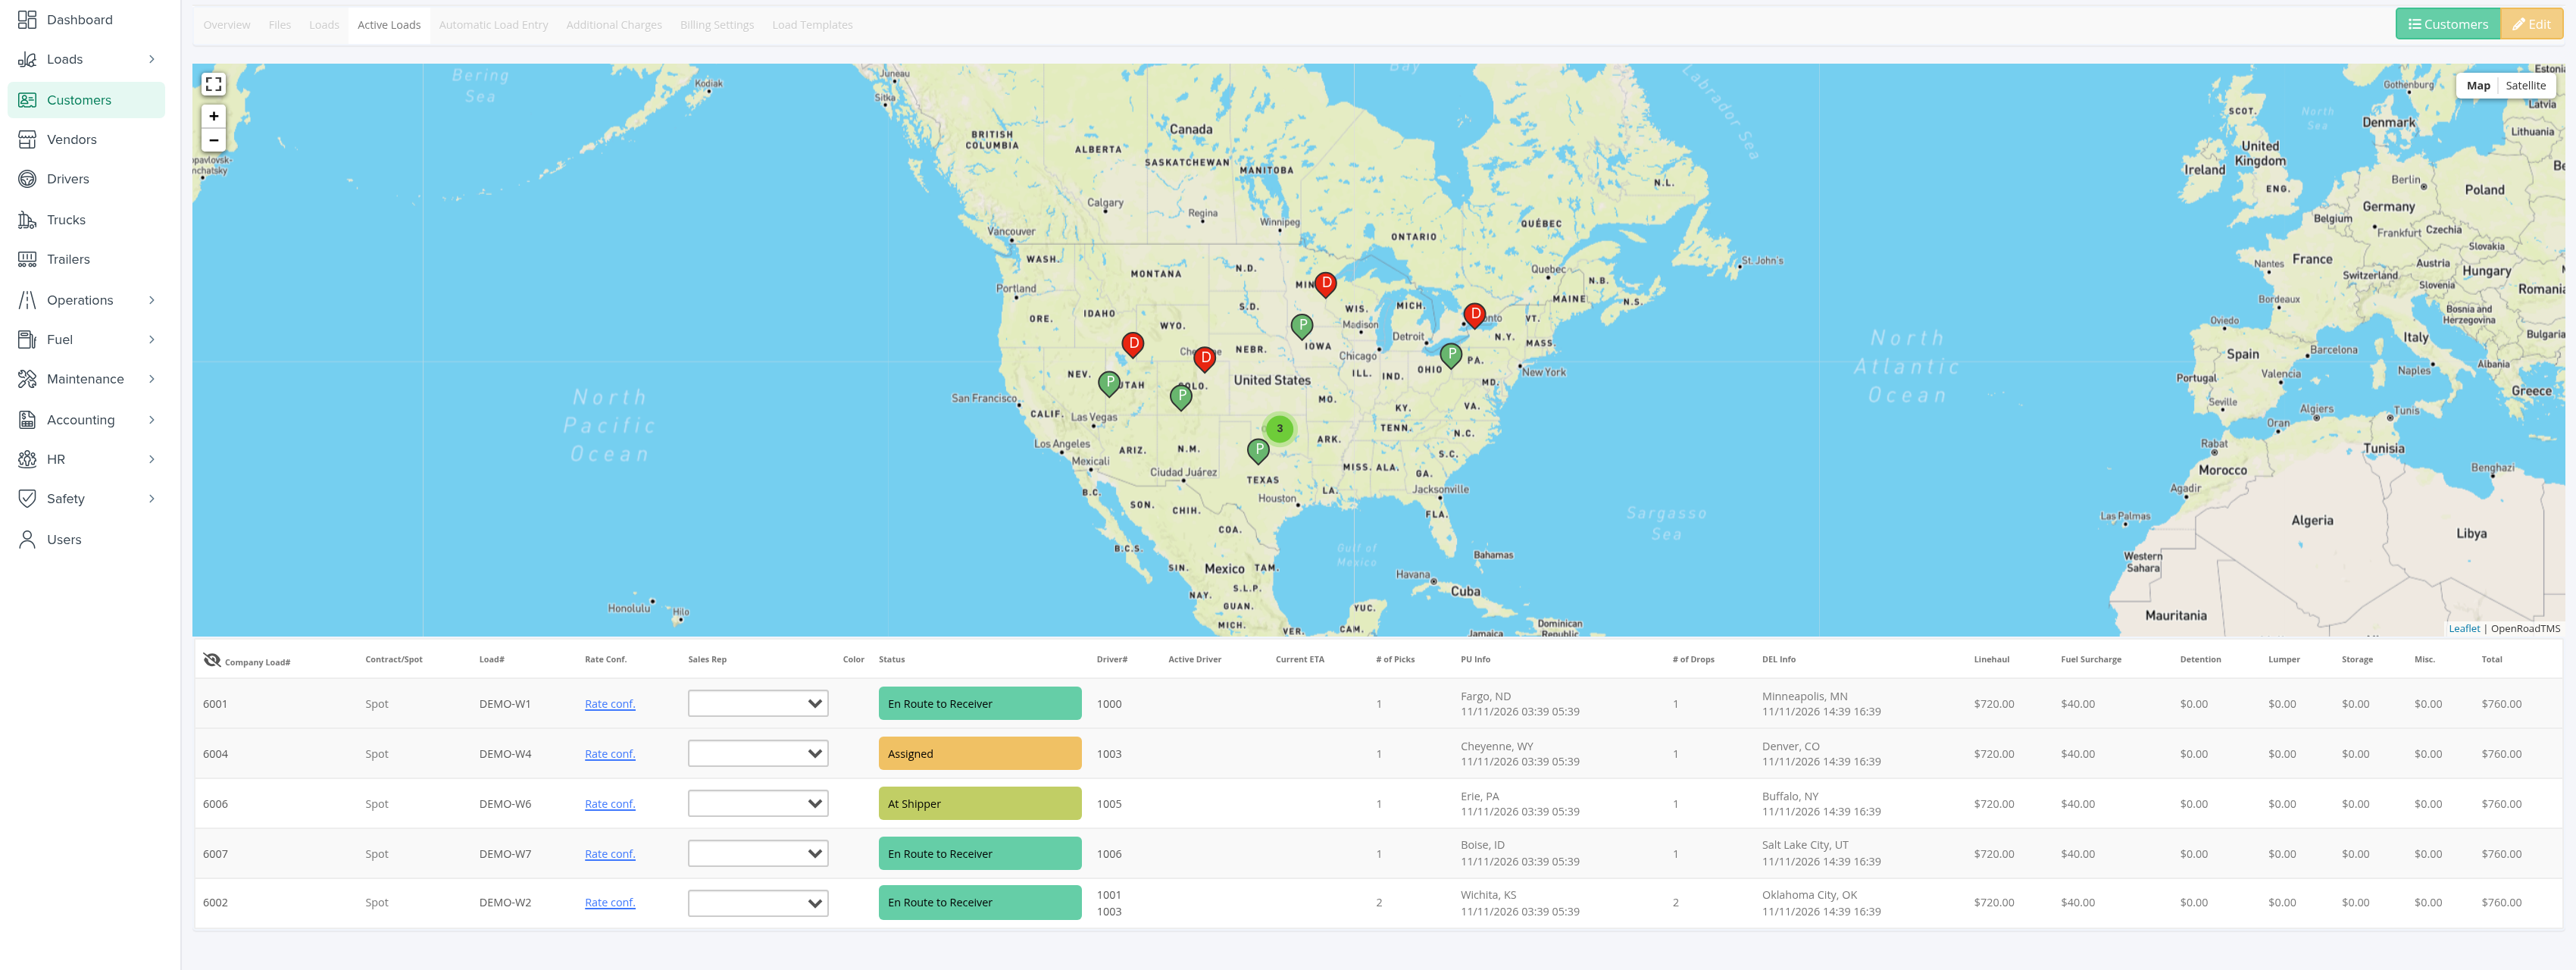
A map and a list of the customer's loads that are Booked, Assigned, En Route to Shipper, At Shipper, Picked Up, En Route to Consignee or At Consignee. Booked rows are hidden at first: the eye icon in the first column header shows them. The list has Company Load#, Contract/Spot, Load#, Rate Conf., Sales Rep, Color (the colour of the load's route on the map), Status, Driver#, Active Driver, Current ETA, # of Picks, PU Info, # of Drops, DEL Info, Linehaul, Fuel Surcharge, Detention, Lumper, Storage, Misc. and Total. The map shows the stops, the trucks and a route line for each load.
Automatic Load Entry tab
Shown when your account uses Automatic Load Entry. Maximum Weight (lbs) replaces the account's load weight limit for every load of this customer (blank uses the account limit); it is saved by Save. Add opens the settings window (needs permission to edit customers): Customer, Automatic Load Entry enabled, Keywords (comma separated; use "A && B" for both), Allowed sender emails, Default values for Automatic Load Entry (pick a load field and its value; the same field twice is not allowed), Additional information for Robot, Success Notifications and Failure Notifications. Each saved setting is shown as a card with edit and delete buttons. When a load tender arrives from an allowed sender, that sender picks the customer, and the default values are added to the tender.
For how Automatic Load Entry works and how to set it up, see Automatic Load Entry (EXTRA FEATURE): create loads from PDF rate confirmations.
Additional Charges tab
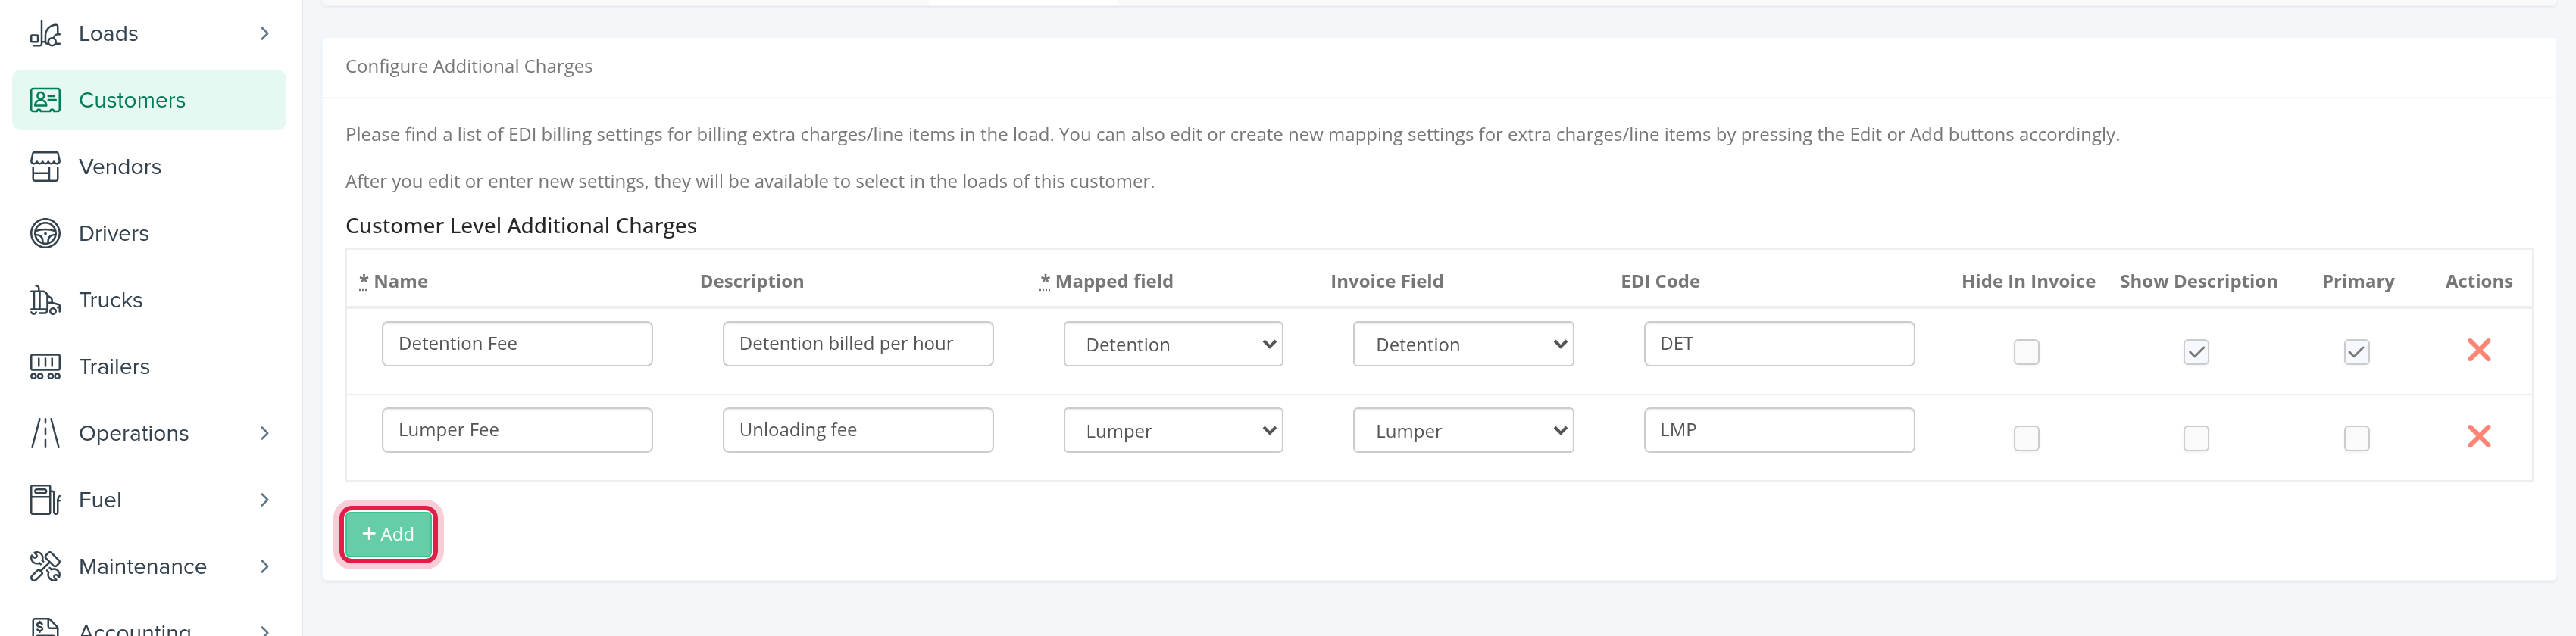
Lists the charge lines that can be added to this customer's loads and how they are billed. The Account Level Additional Charges table (read-only, managed in Settings) applies unless a customer charge has the same name. In Customer Level Additional Charges (edit mode), Add a row with Name (at least 3 characters, no duplicates), Description, Mapped field (Linehaul, Fuel Surcharge, Lumper, Storage, Misc., Detention or Deductions), Invoice Field, EDI Code, Hide In Invoice, Show Description, Primary and, when your account uses the new wages, Counts as Layover (only for Detention). Use the red x to remove a row. Select Save.
After saving, the names are available on this customer's loads. Hide In Invoice rolls the amount into the first visible invoice line, Primary keeps the lines of one mapped field adding up to the load total, and EDI Code matches charges in EDI tenders.
Billing Settings tab
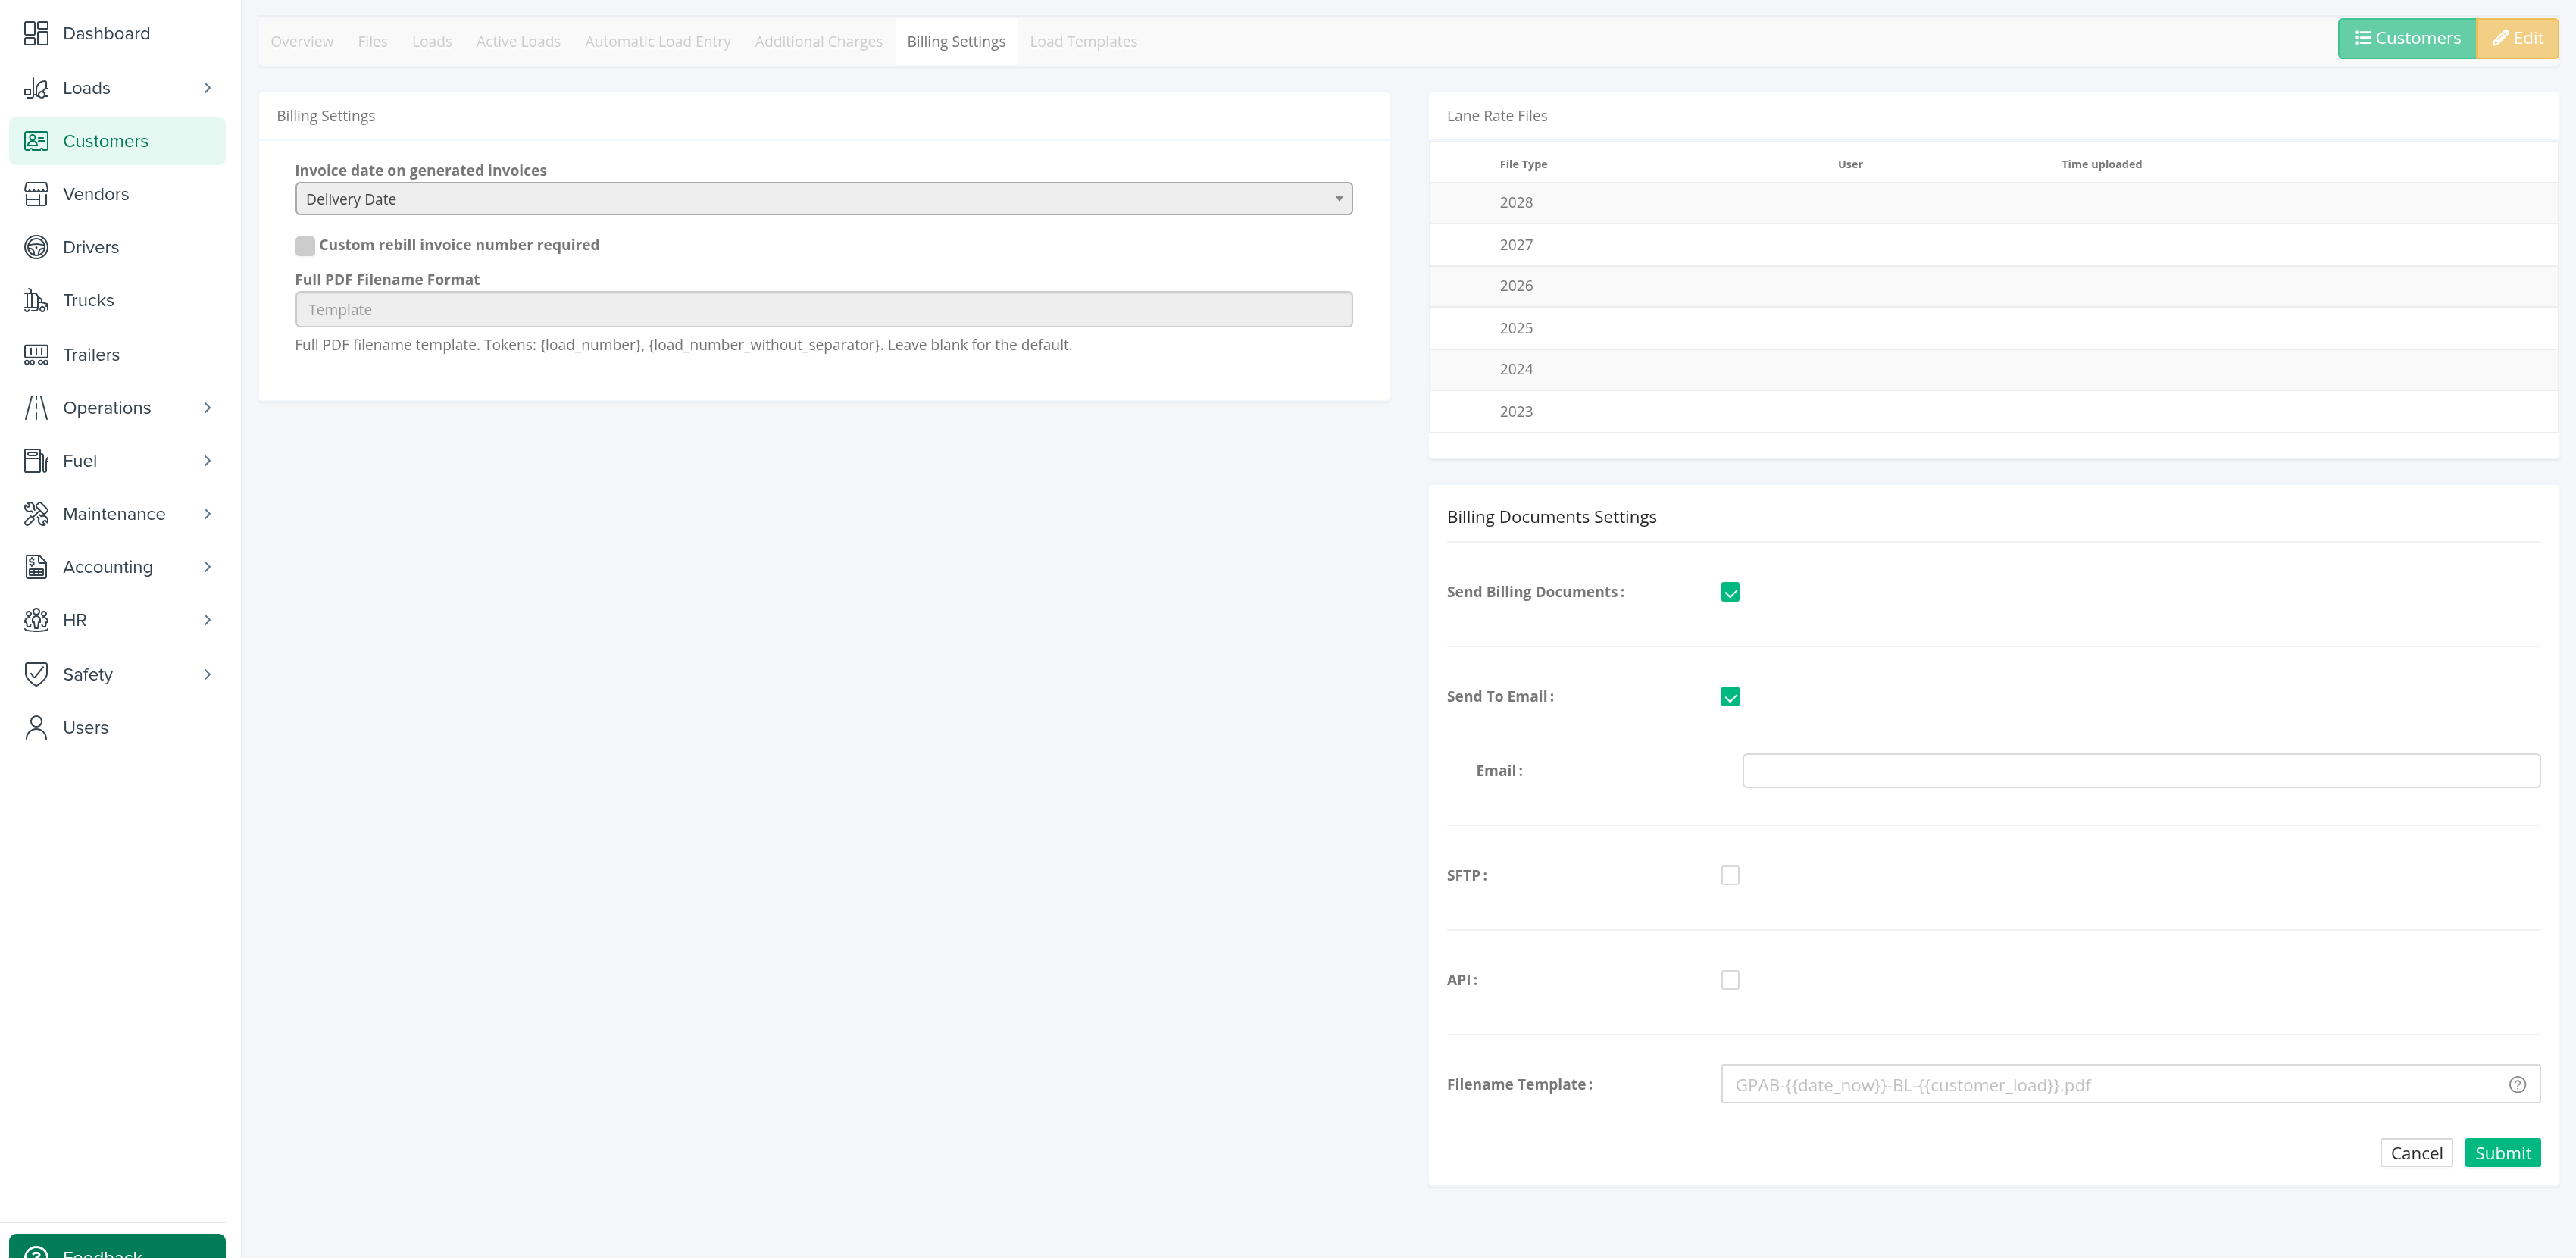
- Billing Settings (saved by Save): Invoice date on generated invoices (Billing date or Delivery date), Custom rebill invoice number required, and Full PDF Filename Format (tokens {load_number} and {load_number_without_separator}; blank uses the default).
- Automatic Billing (when your account uses it, the customer's Billing preference is E-mail and you have permission): select the pencil, then Automatic Billing, the checks (Linehaul Check and Fuel Surcharge Check, with Greater than $0.00 or Awarded Lane Rate), Load Status, Load Range (delivery date), POD Check (approved POD) and Previously Billed Check, then Submit. Twice a day, loads that pass every check are billed and the invoice is e-mailed; the others stay for manual billing.
- Automatic Export (when your account uses it and you have permission): the same pattern with extra checks (Driver Assigned Check, Time Ins/Outs Recorded Check, Detention Check, Lumper Check, Notes Check with Additional keywords). Loads that pass are exported.
- Fuel surcharge customer settings (when your account uses fuel surcharge estimates and you have permission): the Enable switch saves at once. Fuel Surcharge and Linehaul Estimates and updates has three settings, Automatic Fuel Surcharge Update in Load, Automatic Linehaul Update in Load and Automatic Mileage Update in Load. Each is Account setting, On or Off, with Trigger statuses (Delivered, Delivered Pending) and Max allowed difference (%). Fuel Surcharge Matrix holds the fuel price tables (Start Date, a CSV with from, to and rate columns, optional Fuel price offset days). Methods chooses how the surcharge is worked out per load type (All, Spot, Contract). When the Breakthrough integration is on, Breakthrough Integration takes a Shipper Identifier.
- Lane Rate Files: a file grid like Files, with one folder per year, for lane rate documents.
- Billing Documents Settings (when you have permission): tick Send Billing Documents and choose Send To Email, SFTP or API with their fields. The documents (BOLs, lumper receipts, scale tickets) are merged into one PDF and sent only for customers whose Billing preference is EDI, when the load has a BOL.
Lane Rates tab
Shown when your account uses lane rate settings. It lists the customer's contract Bids (Active, Future, Historical), the lane clusters inside a bid and the individual lanes, with search, filters and Export CSV. A bid can be deleted by roles that have permission. The gear button on the Fuel surcharge customer settings card, Lane Rates Validation Notification settings, turns on warnings about linehaul, fuel surcharge and mileage that differ from the lane rate by more than a percentage.
Load Templates tab
Reusable load presets for this customer. New Template (needs permission to edit customers) opens a form: Template Details (Template Name, which must be unique for the customer, LTL / FTL, Equipment, Contract / Spot, Weight, Commodity), Rates, Default Assignments, Flags and the Stops, added with + Pick Up and + Delivery. Select Create. Each template appears as a card with Edit and Delete.
For the full guide to creating, editing and using templates, see Load Templates: create, edit and use templates (Customers > Load Templates).
When you create a load for this customer, a Load Template drop-down appears; choosing a template pre-fills the load and replaces its stops.

Frequently asked questions
Was this article helpful?
That’s Great!
Thank you for your feedback
Sorry! We couldn't be helpful
Thank you for your feedback
Feedback sent
We appreciate your effort and will try to fix the article