How to access the page
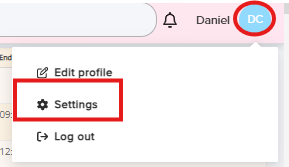
- Click your profile picture in the top right corner of the screen.
- Select Settings from the menu.
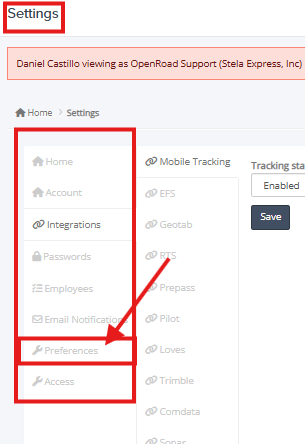
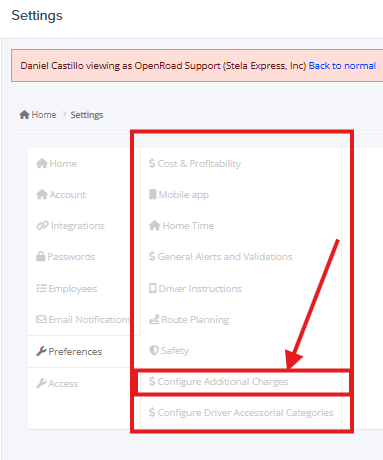
- Click Preferences, then Additional Charges, which is located in the Load section.
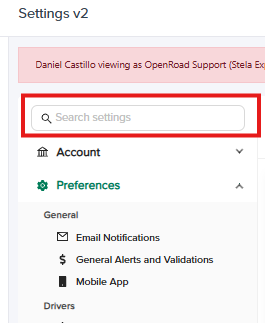
You can also type Additional Charges in the Settings search bar to go directly to the page.
How to create a charge
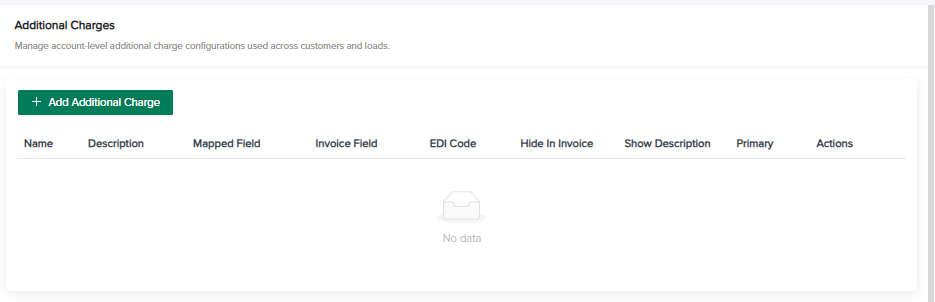
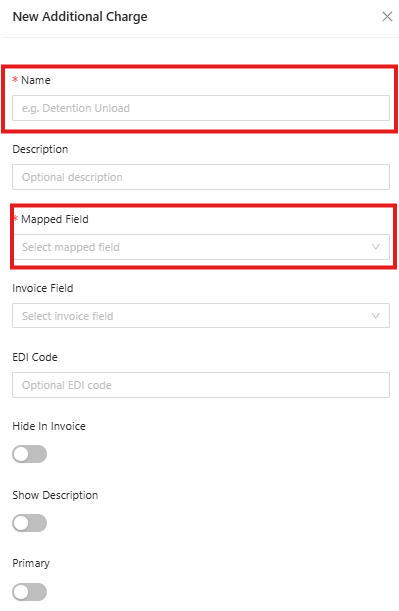
The page shows a table of your existing charges and a green Add Additional Charges button. Clicking the button opens the New Additional Charge window. Name and Mapped Field are required. Once both are filled in, click Create to save the charge, or Cancel to close the window without saving. Charges can be edited at any time after they are created.
Once created, the charge becomes available to select in the Additional Charges section of your loads, where you enter the amount for that load.
Field by field
Name (required)
This is the label of the charge, for example Layover, Lumper, or Brokerage Fee. It is the name you select when adding the charge to a load, and it is the name printed on the customer invoice.
Description (optional)
A short explanation of the charge. By default it is stored with the charge for your reference only. It is shown on the load and on the invoice only when the Show Description toggle is on.
Mapped Field (required)
This tells the system which load billing field the charge belongs to. The available fields are Linehaul, Fuel Surcharge, Detention, Storage, Lumper, Misc, and Deductions. When you add the charge to a load, its amount is added to the total of the mapped field. For example, a Layover charge mapped to Detention increases the Detention total on that load. On the customer invoice, the charge appears as a line under its mapped category.
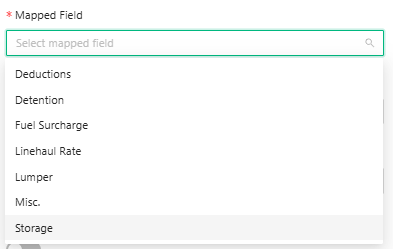
Please note that for Detention, the Detention total on the load must equal the sum of all charges mapped to Detention. If the amounts do not match, the system blocks the save and shows a message asking you to update the Detention field under the stop.
EDI Code (optional)
For customers who are not on EDI, this field can be left empty.
For customers who are not on EDI, this field can be left empty.
The code your customer or their EDI provider uses for this charge. It is only needed for customers you exchange EDI documents with. It allows the system to recognize the charge when it arrives on an EDI load tender (204) and to send it with the correct code on the EDI invoice (210). The code must match exactly what your trading partner expects, so we recommend confirming it with them before going live.
Hide in Invoice (toggle, off by default)
When this toggle is on, the charge line is not shown on the customer invoice. The charge itself remains on the load. This is useful for charges you need to track on the load but do not want listed on the invoice. When it is off, the charge line is shown on the invoice as normal.
Show Description (toggle, off by default)
When this toggle is on, a Description field appears for this charge on the load, prefilled with the description from the settings. You can edit it for each load if needed. The description is also printed on the customer invoice on a new line under the charge name. When it is off, only the charge name and amount are shown.
Primary (toggle, off by default)
This toggle only applies to charges mapped to Fuel Surcharge or Linehaul, and only matters if you use the automatic Fuel Surcharge and Linehaul updates. It marks the charge as the main charge for that field, so the system knows which additional charge can be updated together with the Fuel Surcharge or Linehaul field on the load.
For charges mapped to any other field, this toggle can be left off.
How to check a charge is working
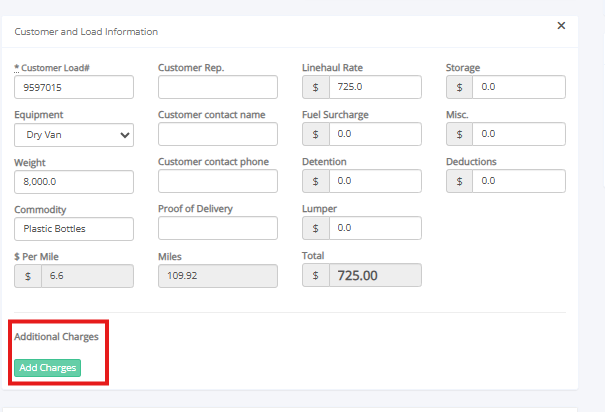
We recommend a quick test on one load:
- Create the charge in the Additional Charges settings.
- Open a load, add the charge in the Additional Charges section, and enter an amount.
- Confirm the total of the mapped field on the load increased by that amount.
- Open the invoice preview and confirm the charge line appears, or does not appear, according to the Hide in Invoice and Show Description toggles.
Was this article helpful?
That’s Great!
Thank you for your feedback
Sorry! We couldn't be helpful
Thank you for your feedback
Feedback sent
We appreciate your effort and will try to fix the article