OpenRoad TMS — Getting Started Series
This article explains how to view your customer list and create a new customer record in OpenRoad TMS, including how Customer Type is used to classify each account.
Before You Begin
- Go to Customers from the main dashboard menu.
- Creating or editing customers typically requires an Admin, Accounting, or Fleet Manager role — check with your Superadmin if you don't see the option.
Step 1: View Your Customers List
1. Go to Customers from the main dashboard menu.
2. Here you'll see each customer's name, city/state, sales this year, loads this year, last active load, MC number, contact, and phone.
3. Use the status filter to view Active, Inactive, Do Not Use, or Potential customers.

Figure 1 — Customers list. Company names, sales figures, MC numbers, and phone numbers shown are examples.
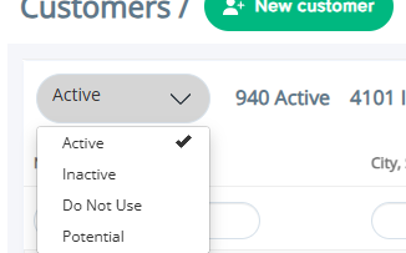
Figure 2 — Customer status filter.
You can also use Edit columns to customize which fields are shown, and Export All to Email to download the full list.
Step 2: Add a New Customer — Basic Information
1. Click + New Customer at the top right of the Customers page.
2. Set the Status (Active by default) and choose a Customer Type.
3. Enter the customer's Name, and optionally assign an Account Manager, Customer Service Representative, and Capacity Manager.
4. Set Contract Start Date / End Date if applicable.
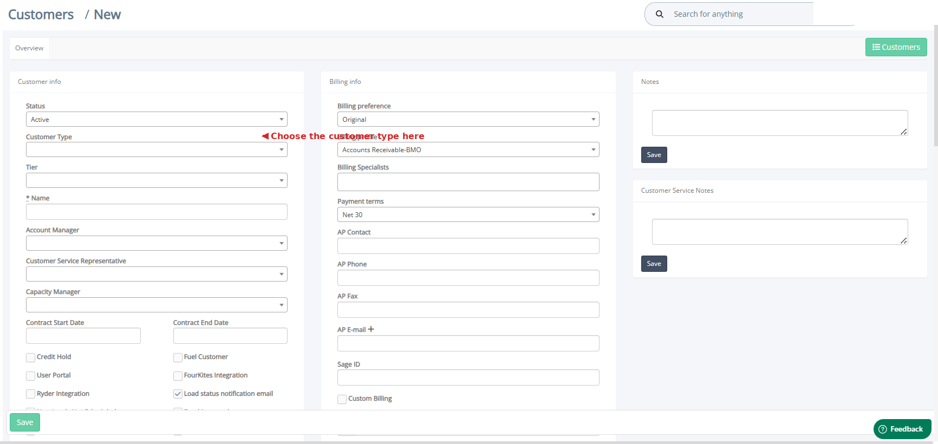
Figure 3 — New Customer form: Customer Info, Billing Info, and Notes.
Understanding Customer Type
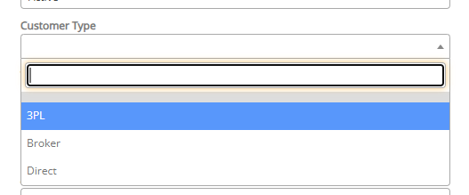
Figure 4 — Customer Type options.
Customer Type | What it means |
3PL | A third-party logistics company that manages transportation on behalf of another business, rather than shipping its own freight. |
Broker | A company that arranges freight transportation between shippers and carriers, without owning the freight itself. |
Direct | The company that directly owns the freight being shipped (sometimes called the "shipper"). Dealing with this account directly, rather than through a broker or 3PL. |
Note: Only one Customer Type can be selected per customer, and it's left blank by default. Setting this correctly helps your team plan and prioritize work with each account.
Step 3: Billing Information
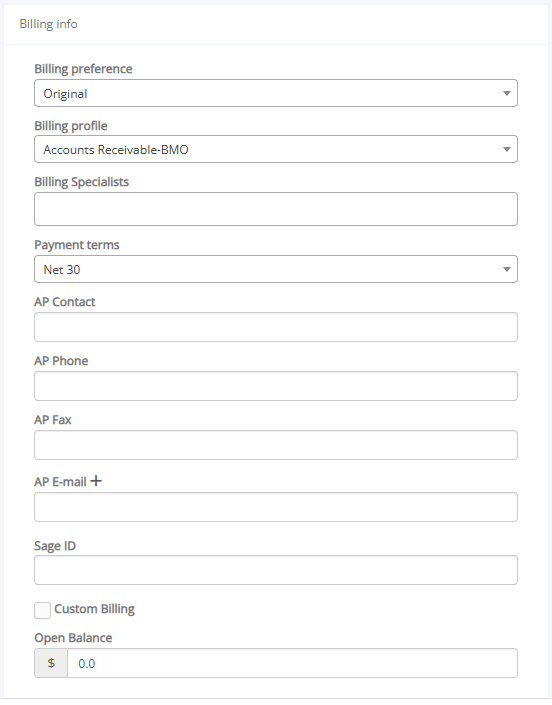
1. Under Billing Info, set the Billing Preference and Billing Profile.
2. Add Billing Specialists and Payment Terms (e.g., Net 30).
3. Fill in AP Contact, AP Phone, AP Fax, and AP E-mail for accounts payable communication.
4. Add a Sage ID if this customer is tracked in your accounting system.
Step 4: Address and Contact Information
1. Scroll down to enter the customer's Address, Street, City, State, and Zip Code.
2. Add a Setup Date if relevant.
3. Under Contact Info, add the main Contact and Additional Contact, along with Phone, E-mail, and Fax.
4. Add any Load Status Notification E-mails or P.O.D. Notification E-mails this customer wants to receive.
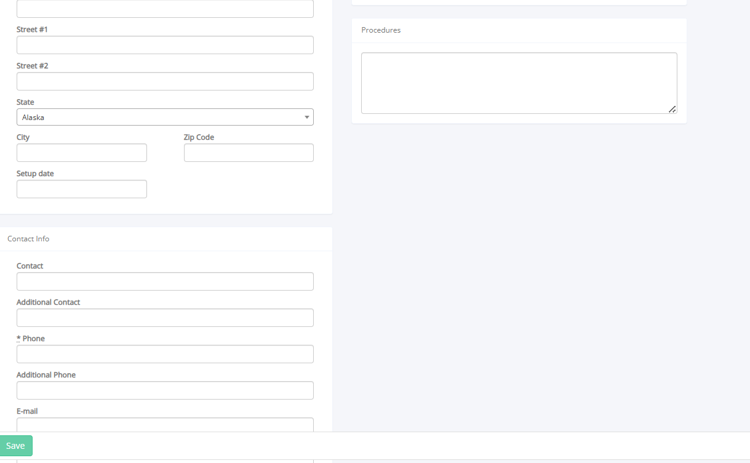
Figure 5 — Address and Procedures section.
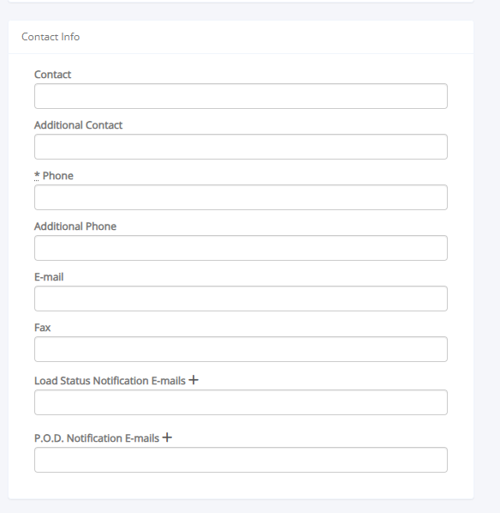
Figure 6 — Contact Info section.
Step 5: Additional Settings
Further down the form, you'll find optional settings for more advanced needs:
- Credit Hold / Fuel Customer — flags for accounting.
- User Portal, FourKites Integration, Ryder Integration, and other integration checkboxes — turn on only if this customer uses that specific integration.
- BOL Requirement — how long a Bill of Lading is required (Disabled, 24h, 48h, or 72h).
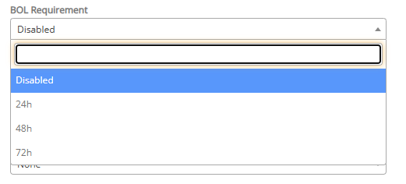
Figure 7 — BOL Requirement options.
- Detentions Info — track detention amounts and specialists for this customer.
Tip: If you're not sure whether a specific integration or advanced setting applies to a customer, reach out to support before enabling it — some of these affect billing or automated emails.
Frequently Asked Questions
Q: What's the difference between 3PL, Broker, and Direct?
A: 3PL and Broker both arrange transportation on behalf of others; Direct means the company owns the freight itself. See the Customer Type table above for details.
Q: Can a customer have more than one Customer Type?
A: No, only one Customer Type can be selected per customer.
Q: How do I mark a customer as inactive?
A: Open the customer and change their Status from Active to Inactive, Do Not Use, or Potential, depending on the situation.
Q: Where do I set up billing details for a customer?
A: Under the Billing Info section when creating or editing the customer — this includes billing preference, profile, payment terms, and AP contact details.
Still need help? Contact our support team at help@openroadtms.com
Was this article helpful?
That’s Great!
Thank you for your feedback
Sorry! We couldn't be helpful
Thank you for your feedback
Feedback sent
We appreciate your effort and will try to fix the article