OpenRoad TMS — Getting Started Series
This article walks you through the basic setup of your company's account in OpenRoad TMS: your company information, account passwords, email notifications, and general preferences. Completing this setup ensures your account information is accurate and that your team receives the right alerts.
Before You Begin
- You must be logged in with an Admin account. Some of these settings are restricted to Admin users only.
- From the main menu, look for the gear/Settings icon, or go directly to Settings from your account menu.
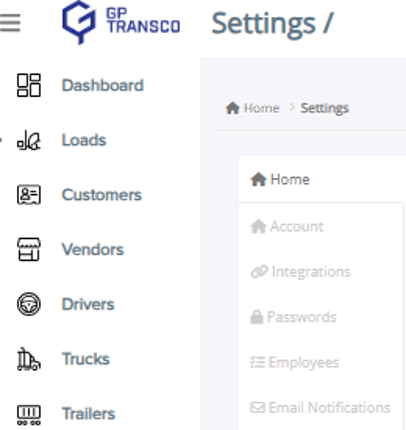
Figure 1 — The Settings menu and its sections: Account, Integrations, Passwords, Employees, Email Notifications, Preferences, and Access.
Step 1: Update Your Company Information
1. Go to Settings → Account → Main Info.
2. Review or update your company's legal name area (DBA), logo, address, and contact details (phone, fax, email).
3. Click Save to apply your changes.
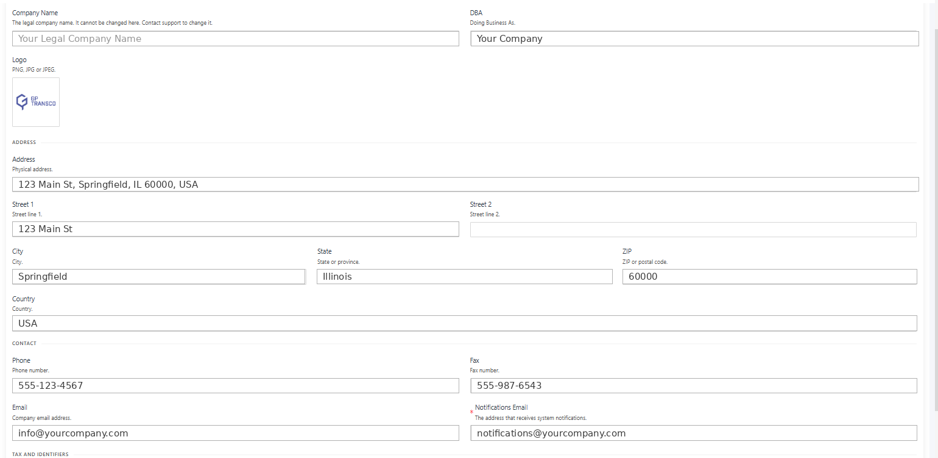
Figure 2 — Company Information page. Values shown are examples.
4. Scroll down to Tax and Identifiers to review your Tax ID, MC number, DOT number, and SCAC code.
Figure 3 — Tax and Identifiers section. Values shown are examples.
Tip: Your legal company name cannot be edited from this page. If it needs to change, contact OpenRoad TMS Support.
Step 2: Set Up Your Module Passwords
1. Go to Settings → Account → Passwords.
2. Set an access password for each protected module: Load Password, Payroll Password, Adjustments Password, and Fuel Card Transaction Password, as well as your Tracking PIN.
3. Optionally, set your Team $ Per Mile Goal, used for performance tracking.
4. Click Save Settings when you're done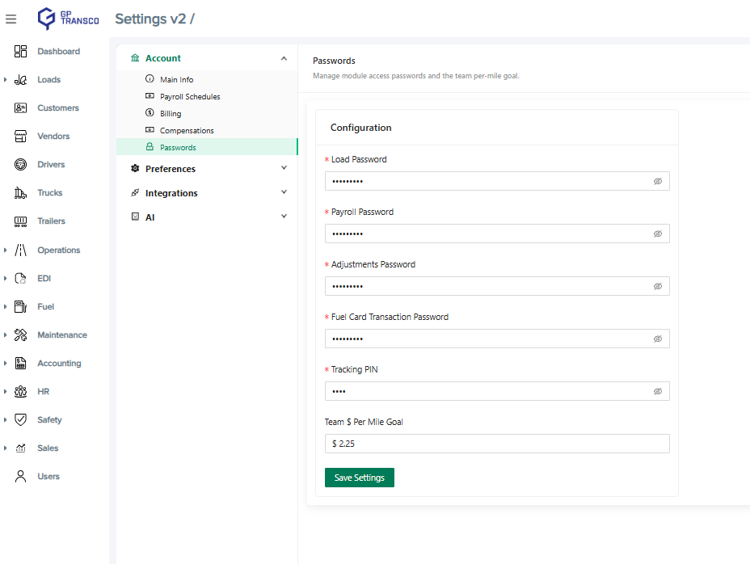
Figure 4 — Passwords configuration page.
Step 3: Configure Email Notifications
1. Go to Settings → Account → Email Notifications.
2. Browse notifications by area (Loads & Dispatch, Customers & Billing, Drivers, Safety & Compliance, Equipment & Maintenance, Payroll & Accounting, or Integrations & System).
3. Turn each notification On or Off, and set which email address(es) should receive it.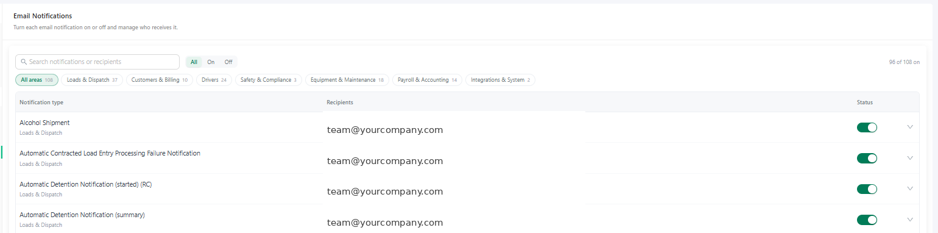
Figure 5 — Email Notifications page. Recipient addresses shown are examples.
Tip: You can search for a specific notification by name, or filter by area, using the search bar at the top of this page.
Step 4: Review General Preferences
1. Go to Settings → Preferences → General.
2. Here you'll find: General Alerts and Validations, Mobile App settings, and Email Notifications (also available from Step 3).
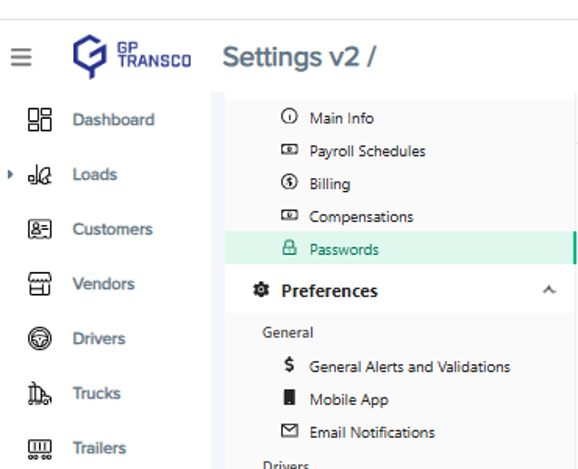
Figure 6 — Preferences menu, General section.
Frequently Asked Questions
Q: Who can change company settings?
A: Only users with Admin access can view and edit these settings.
Q: Will changing my company information affect existing invoices or documents?
A: No. Updates only apply to new documents generated after the change.
Q: I forgot one of my module passwords. What should I do?
A: Any Admin user can view or reset it directly from the Passwords page.
Q: Can I choose who receives a specific email notification?
A: Yes. Each notification type can be assigned to one or more recipients from the Email Notifications page.
Still need help? Contact our support team at help@openroadtms.com
Was this article helpful?
That’s Great!
Thank you for your feedback
Sorry! We couldn't be helpful
Thank you for your feedback
Feedback sent
We appreciate your effort and will try to fix the article