The Email Notifications page lists every email OpenRoad TMS can send on its own, such as a new customer, a driver status change or a load rejection. For each one you can turn it on or off and decide who receives it. This article explains how to find a notification, switch it, add or remove recipients and groups, what To, CC, BCC, Reply-to and Excluded mean, and what happens when a notification is off or has nobody to send to.
Before you begin
- Only a Superadmin can open Settings. If you cannot see Settings, ask a Superadmin in your company.
- New accounts start with your company's Notifications Email. Most notifications are created with the Notifications Email from Main Info as their recipient. See Settings → Account → Main Info: your company profile, logo, contact details and tax identifiers.
- Changing the Notifications Email later does not change the notifications you already have. Each notification keeps the address it was given, so edit the notifications you want to move.
- Which notifications you see depends on your account. Some exist only while a feature is switched on for your account, for example Automatic Load Entry, Relay Lumper or Unconfirmed Uploads Verification.
Part 1: Open the page
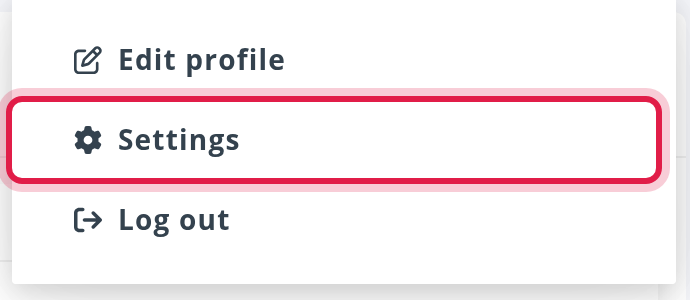
- Select your avatar in the top right corner and choose Settings.
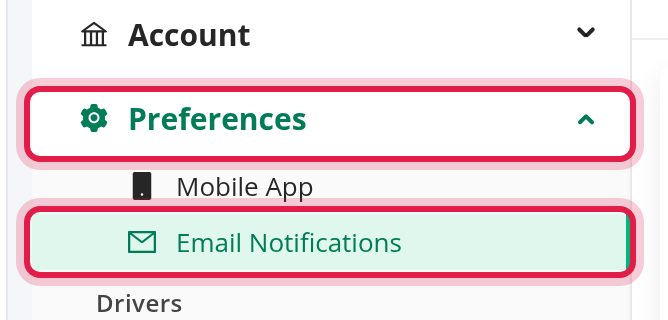
- In the Settings menu on the left, open Preferences and select Email Notifications.
Part 2: Find a notification
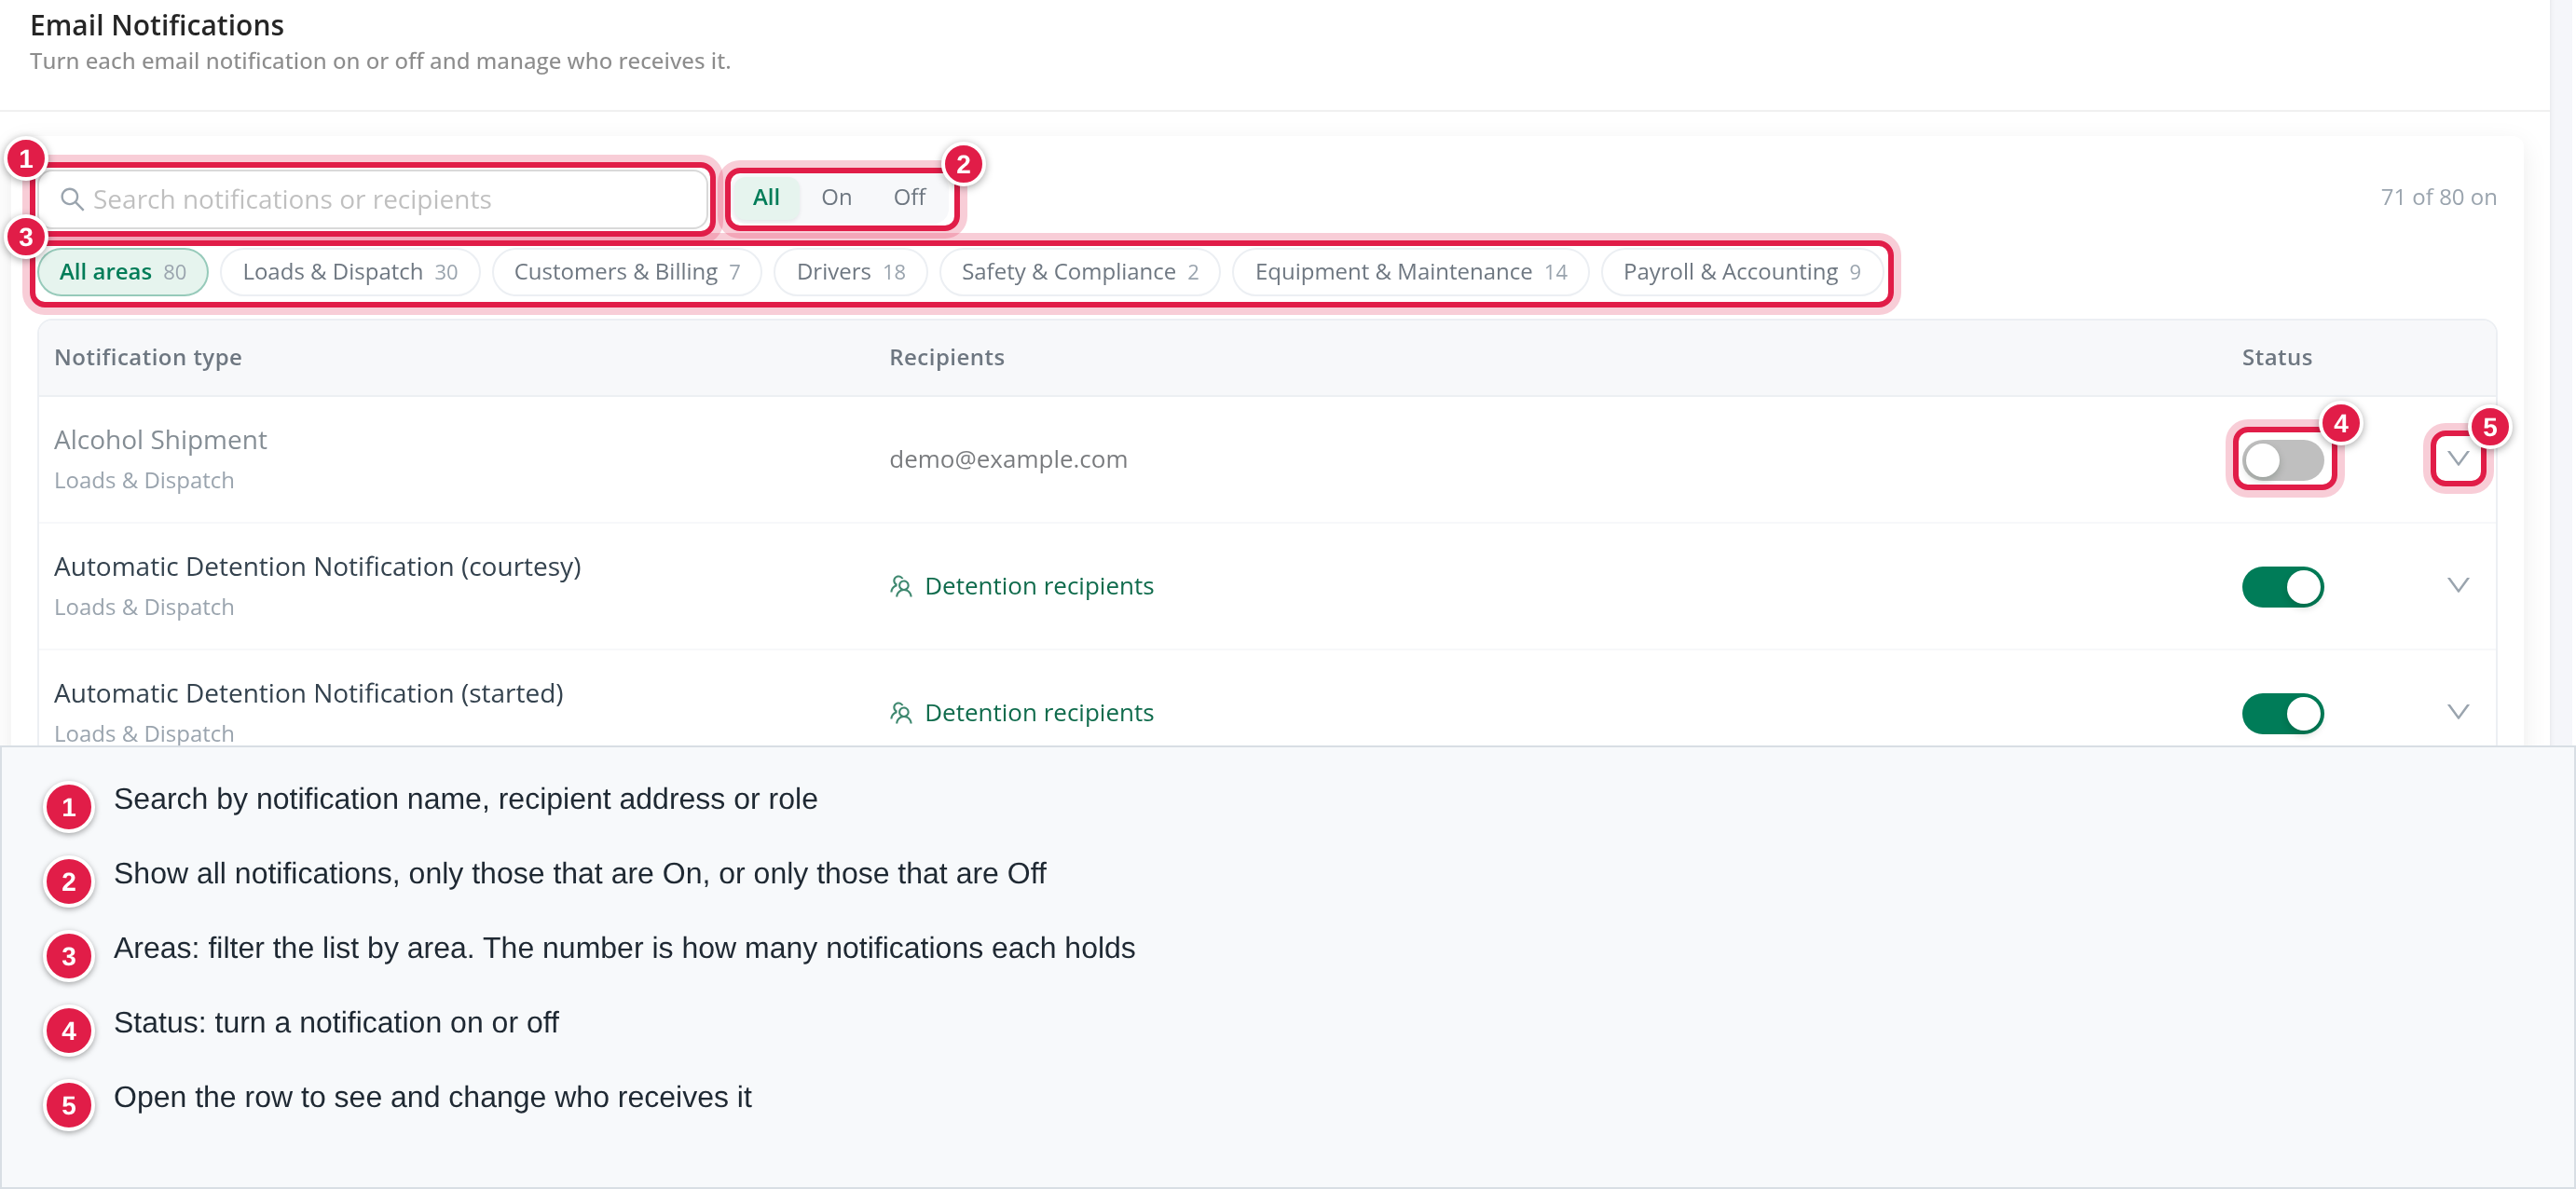
The table has three columns: Notification type, Recipients and Status.
- Search looks at the notification name, the recipient addresses and the role names such as "Driver email".
- All, On and Off show every notification, only the ones that are on, or only the ones that are off. The counter at the right ("71 of 80 on", for example) tells you how many are on.
- The area buttons filter the list. They are All areas plus the areas your account has: Loads & Dispatch, Customers & Billing, Drivers, Safety & Compliance, Equipment & Maintenance, Payroll & Accounting, and, when your account has any, Integrations & System and Other. The number on each button is how many notifications the area holds. It does not change when you search.
- With All areas selected, the area of each notification is written under its name.
Part 3: Turn a notification on or off
Use the switch in the Status column. There is no Save button: the change is saved the moment you click, and you see "Notification settings updated". An Off row is shown dimmed.
When a notification is Off, nothing is sent for it, not even to its CC and BCC recipients.
Some notifications start Off when the account is created. Check the ones you need, for example with the Off button.
Part 4: See and change who receives it
Select a row (or the arrow at its right) to open it. Under Recipients you see everybody it goes to, each with a delivery setting.
There are two kinds of recipients:
- People or addresses you manage. An email address or a group, with a delivery setting you can change and a bin icon to remove it.
- Roles built into the notification, such as Driver email or Fleet manager. They are shown in capitals, cannot be changed or removed, and have their delivery setting locked.

A role built into a notification is not replaced by what you add. Addresses you set to CC or BCC are always added to the notification. An address you set to To is used only when the notification has no To recipient of its own.
Add a recipient
- Open the notification and select Add recipient.
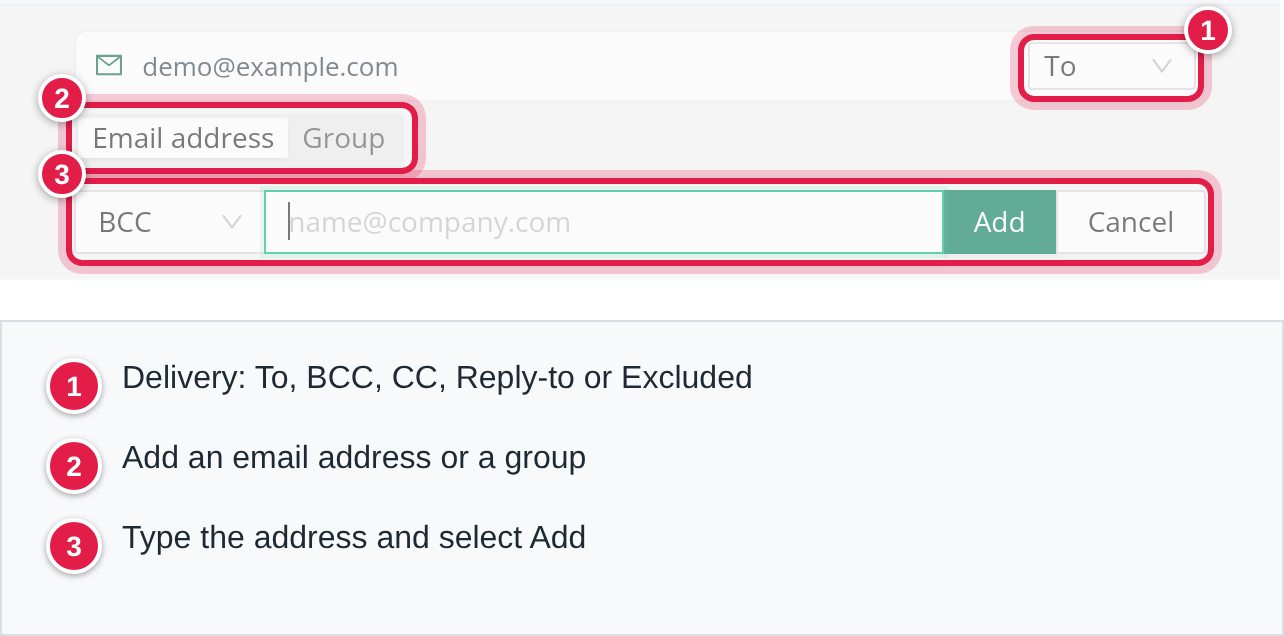
- Choose how it is delivered (see the next list). New recipients start as BCC, or To when the notification has no To recipient yet.
- Choose Email address and type the address, or choose Group and pick a group.
- Select Add (or press Enter). Select Cancel (or press Escape) to close the form without adding.
- One address per time. Type an address and select Add, then repeat for the next one. An address that is not valid is refused ("Enter a valid email address."), and an address or group that is already on the notification is refused too.
- Groups. The Group choice appears only on notifications that allow it. The groups are All Dispatchers, All Safety, All Accounting, All Maintenance, All Capacity and All HR, each with the number of active users in it. When the email is sent, a group becomes the email addresses of its active users. If a group has no active user, the editor warns you that nobody receives it from that group.
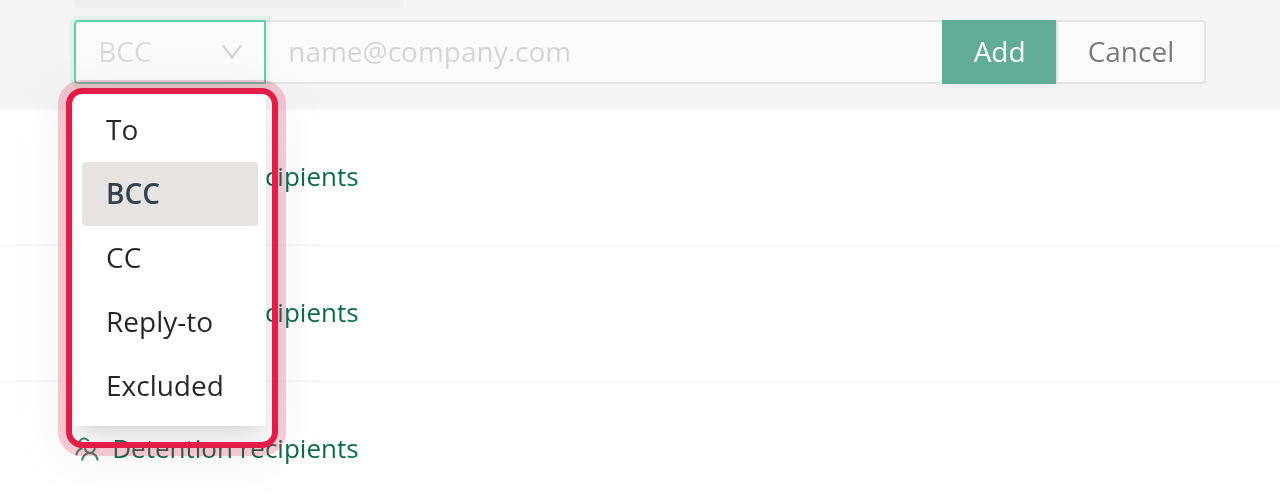
What the delivery options mean
- To: the main recipient.
- CC and BCC: copies. BCC copies are hidden from the other recipients.
- Reply-to: the address that gets the reply when somebody answers the email.
- Excluded: removes that address from the To, CC and BCC lists, so it is not sent even if it appears there. Groups cannot be excluded.
Change or remove a recipient
- To change how an address is delivered, use the delivery setting next to it. It saves at once.
- To remove one, select the bin icon and confirm Delete in the Delete setting? window ("This action cannot be undone."). You cannot remove the last recipient of a notification, so add the new address first and then remove the old one.
When nothing is sent
- The notification is Off.
- The notification has no To recipient and none of its own. For notifications that allow groups, the open row warns: "No TO recipient. This notification is not sent until one is added." and the closed row shows "No TO recipient, not sent".
See who changed what
Every change on this page (switching a notification, adding, changing or removing a recipient) is recorded in Settings → Audit Logs.
Frequently asked questions
Was this article helpful?
That’s Great!
Thank you for your feedback
Sorry! We couldn't be helpful
Thank you for your feedback
Feedback sent
We appreciate your effort and will try to fix the article