Every invoice OpenRoad sends to your customers is built from a billing profile. The profile holds your company name and address, your logo, the contact details printed on the invoice, the factoring company (if you use one) and two pieces of text that you write yourself. This article explains each field of the page, shows where it appears on the invoice, and explains how to keep more than one profile.
the Billing settings page is for Superadmin users. Other users cannot open it.
Before you begin
- Have your logo ready as a PNG, JPG or JPEG file of at most 5 MB.
- Have your company name, address, phone number and e-mail address for invoices.
- If a factoring company collects your invoices, know which one it is (RTS or APEX).
Part 1: Open the billing profiles
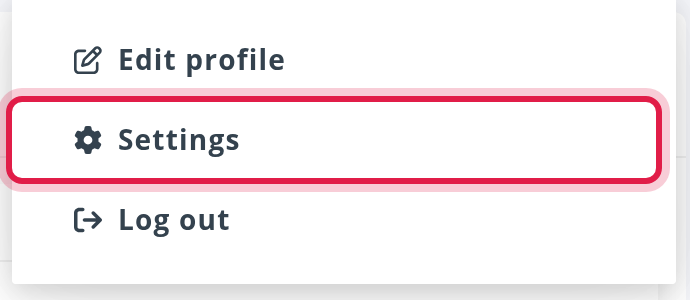
- Select your avatar in the top right corner and choose Settings.
- In the Settings menu on the left, open Account and select Billing.
The page shows one billing profile at a time. Choose the profile from the list at the top left. New accounts start with one profile named Default.
Change the fields you need and click Save at the bottom of the page. Only the profile you are looking at is saved.
Nothing you change on this page takes effect until you click Save. This applies to every field, switch and the logo: the invoices your customers receive, and the Preview invoice, show only what has been saved.
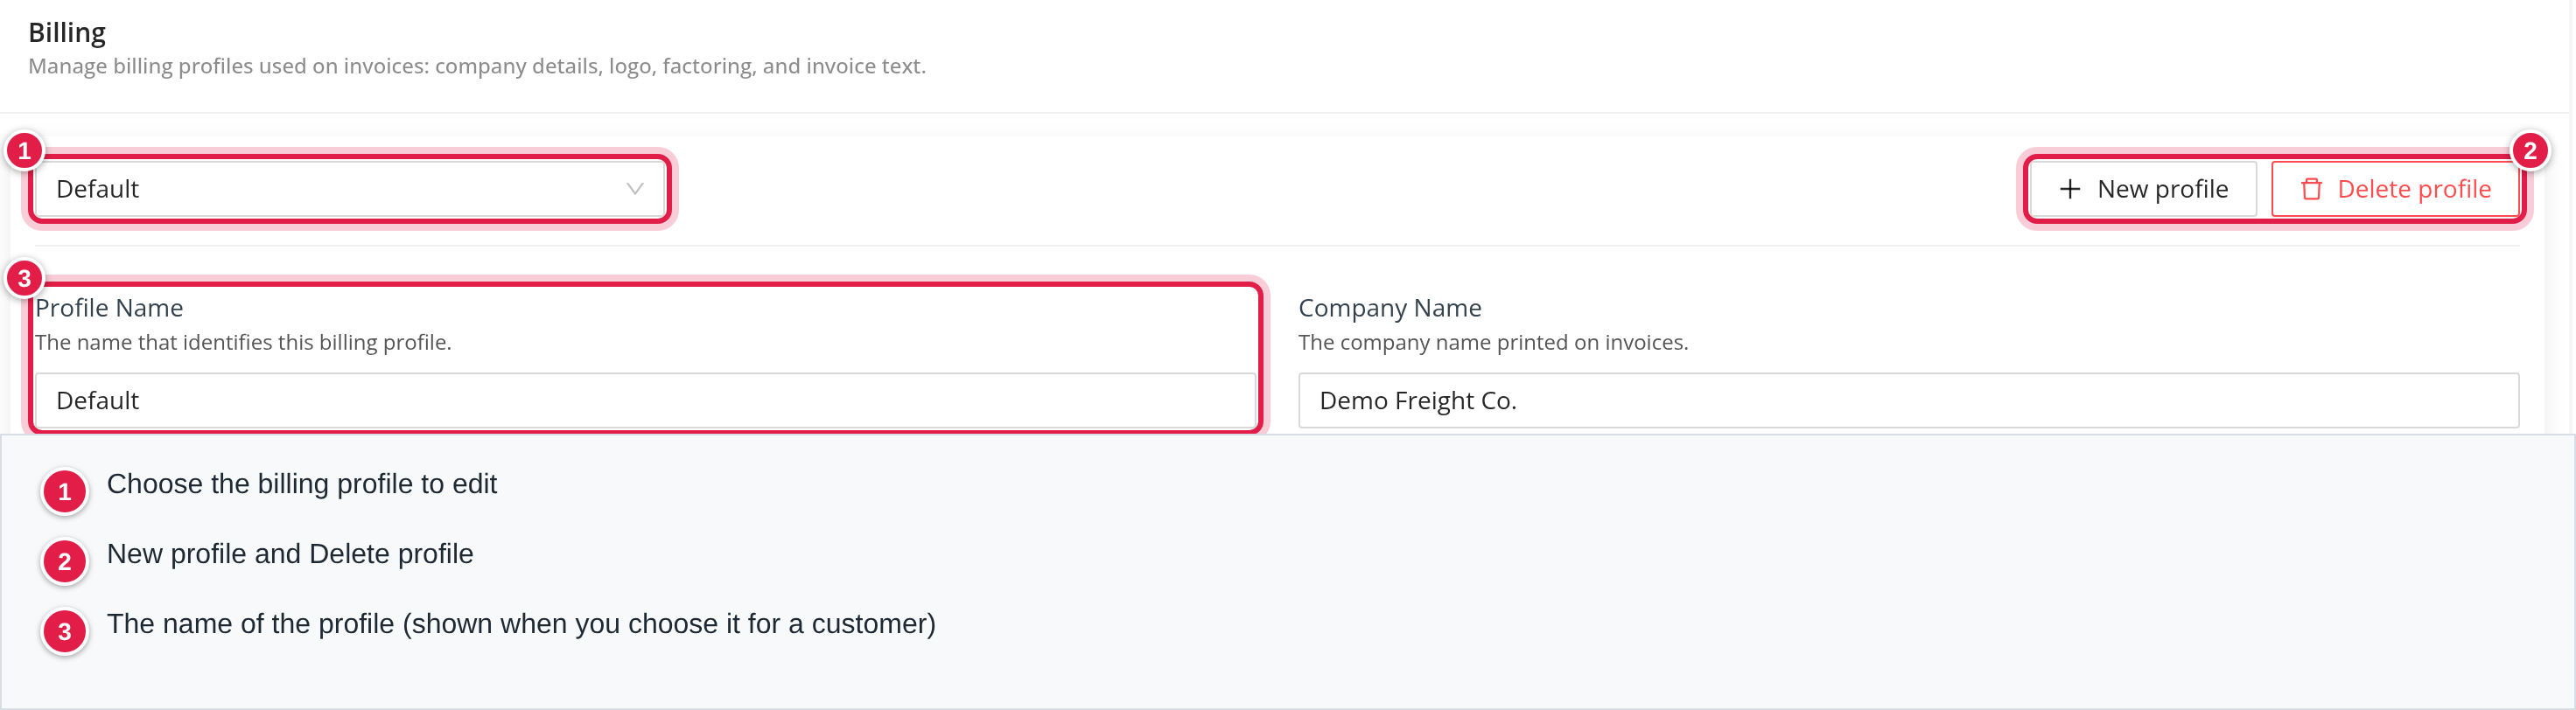
The page has these parts, from top to bottom: the profile settings (name, factoring, switches, logo), the company address, Contact and Identifiers, and Invoice Text.
Part 2: Profile settings
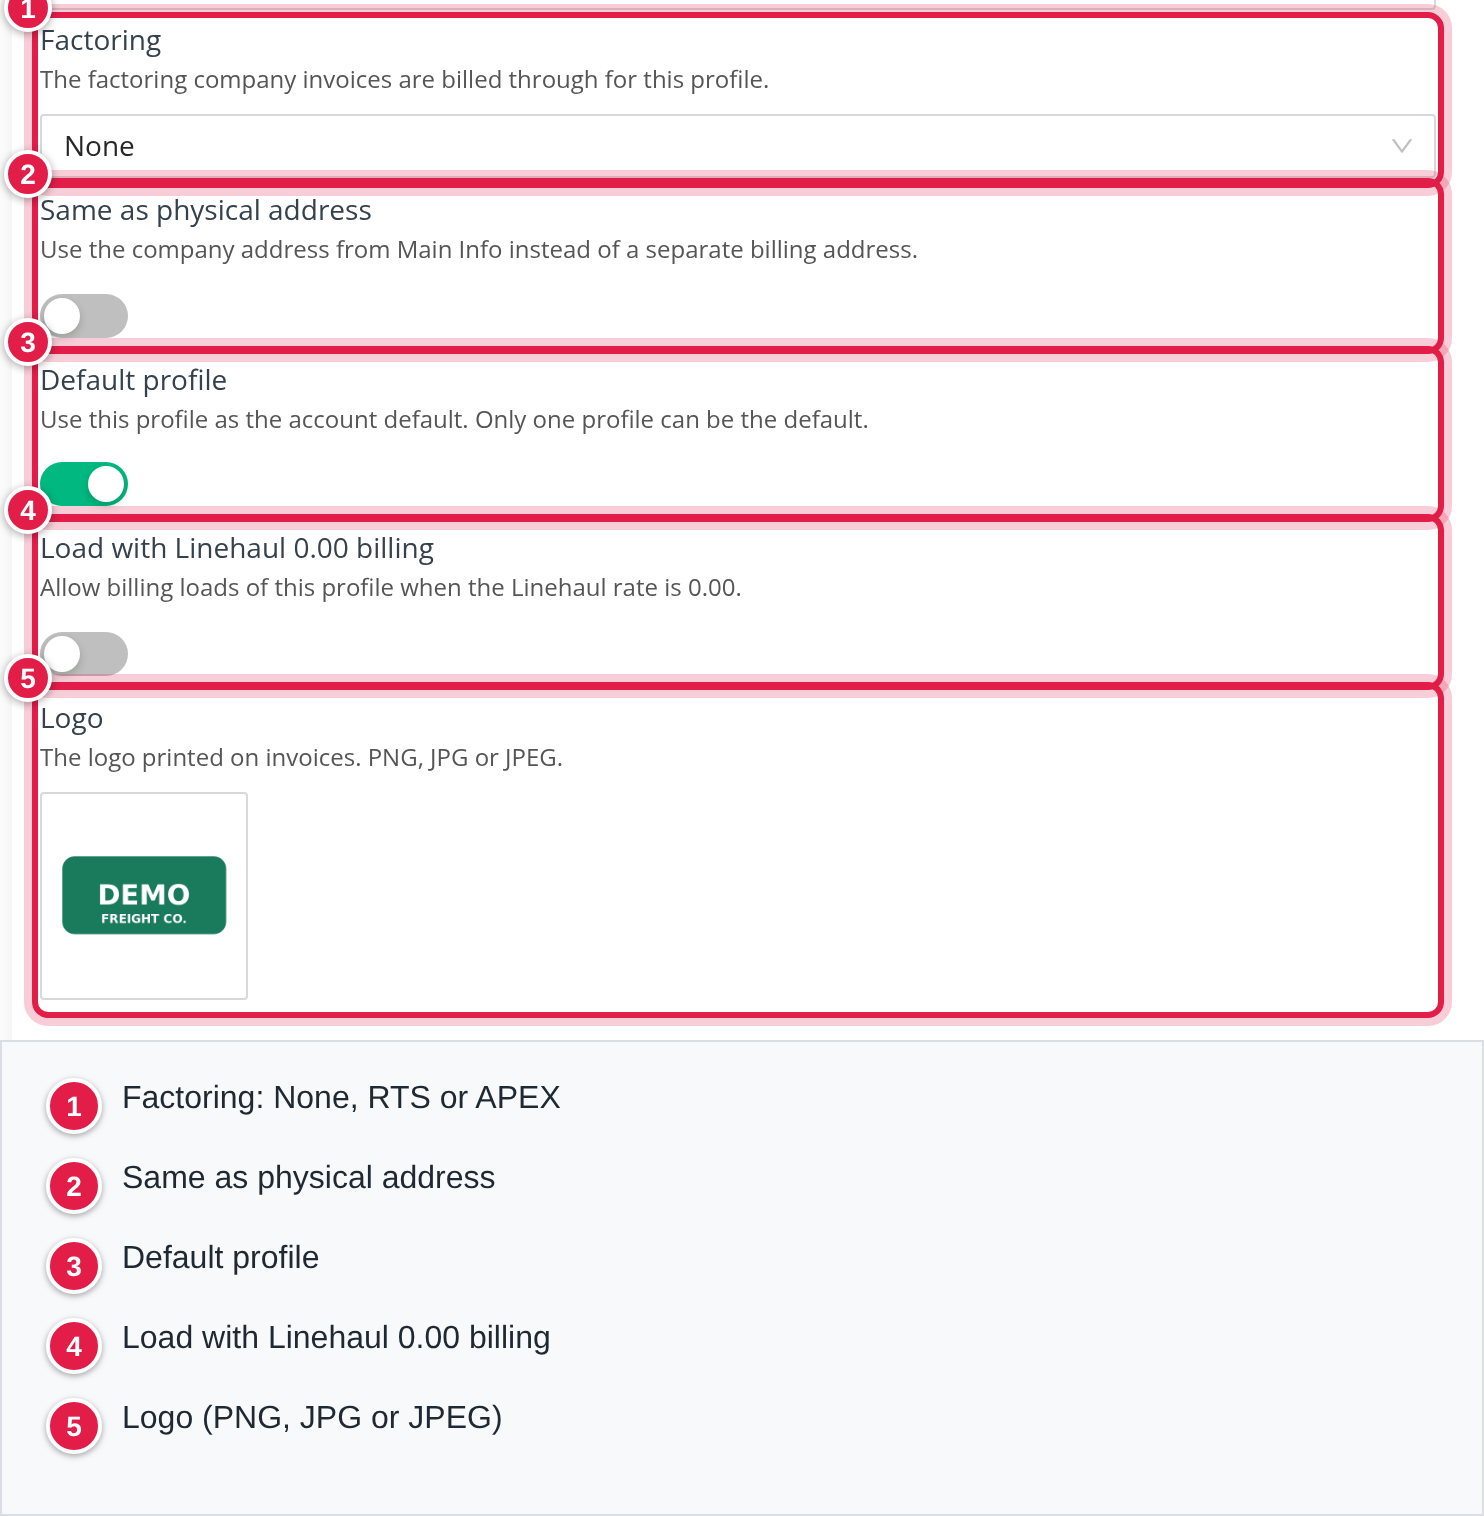
| Field | What it does |
|---|---|
| Profile Name | The name that identifies the profile. It is the name you see when you choose a billing profile for a customer. It is not printed on the invoice. |
| Factoring | The factoring company your invoices are billed through: None, RTS or APEX. See "Factoring" below. |
| Same as physical address | "Use the company address from Main Info instead of a separate billing address." While it is on, the fields of the profile cannot be edited. |
| Default profile | Makes this the profile of your account. Only one profile can be the default: switching it on for one profile switches it off for the others. |
| Load with Linehaul 0.00 billing | "Allow billing loads of this profile when the Linehaul rate is 0.00." Without it, a load with a linehaul rate of 0.00 cannot be billed. |
| Logo | The logo printed on invoices. Click Upload, choose a PNG, JPG or JPEG file and click Save. The logo shows on your invoices once it is saved. |
Logo rules. The file must be a PNG, JPG or JPEG of at most 5 MB. Otherwise you see "Only PNG, JPG and JPEG files are allowed." or "The logo must be 5 MB or smaller.". To remove the logo, remove the file and click Save. On the invoice the logo is fitted into a box of 100 by 100 points at the top left. If the profile has no logo, the invoice uses the logo of your account.
Part 3: Company details
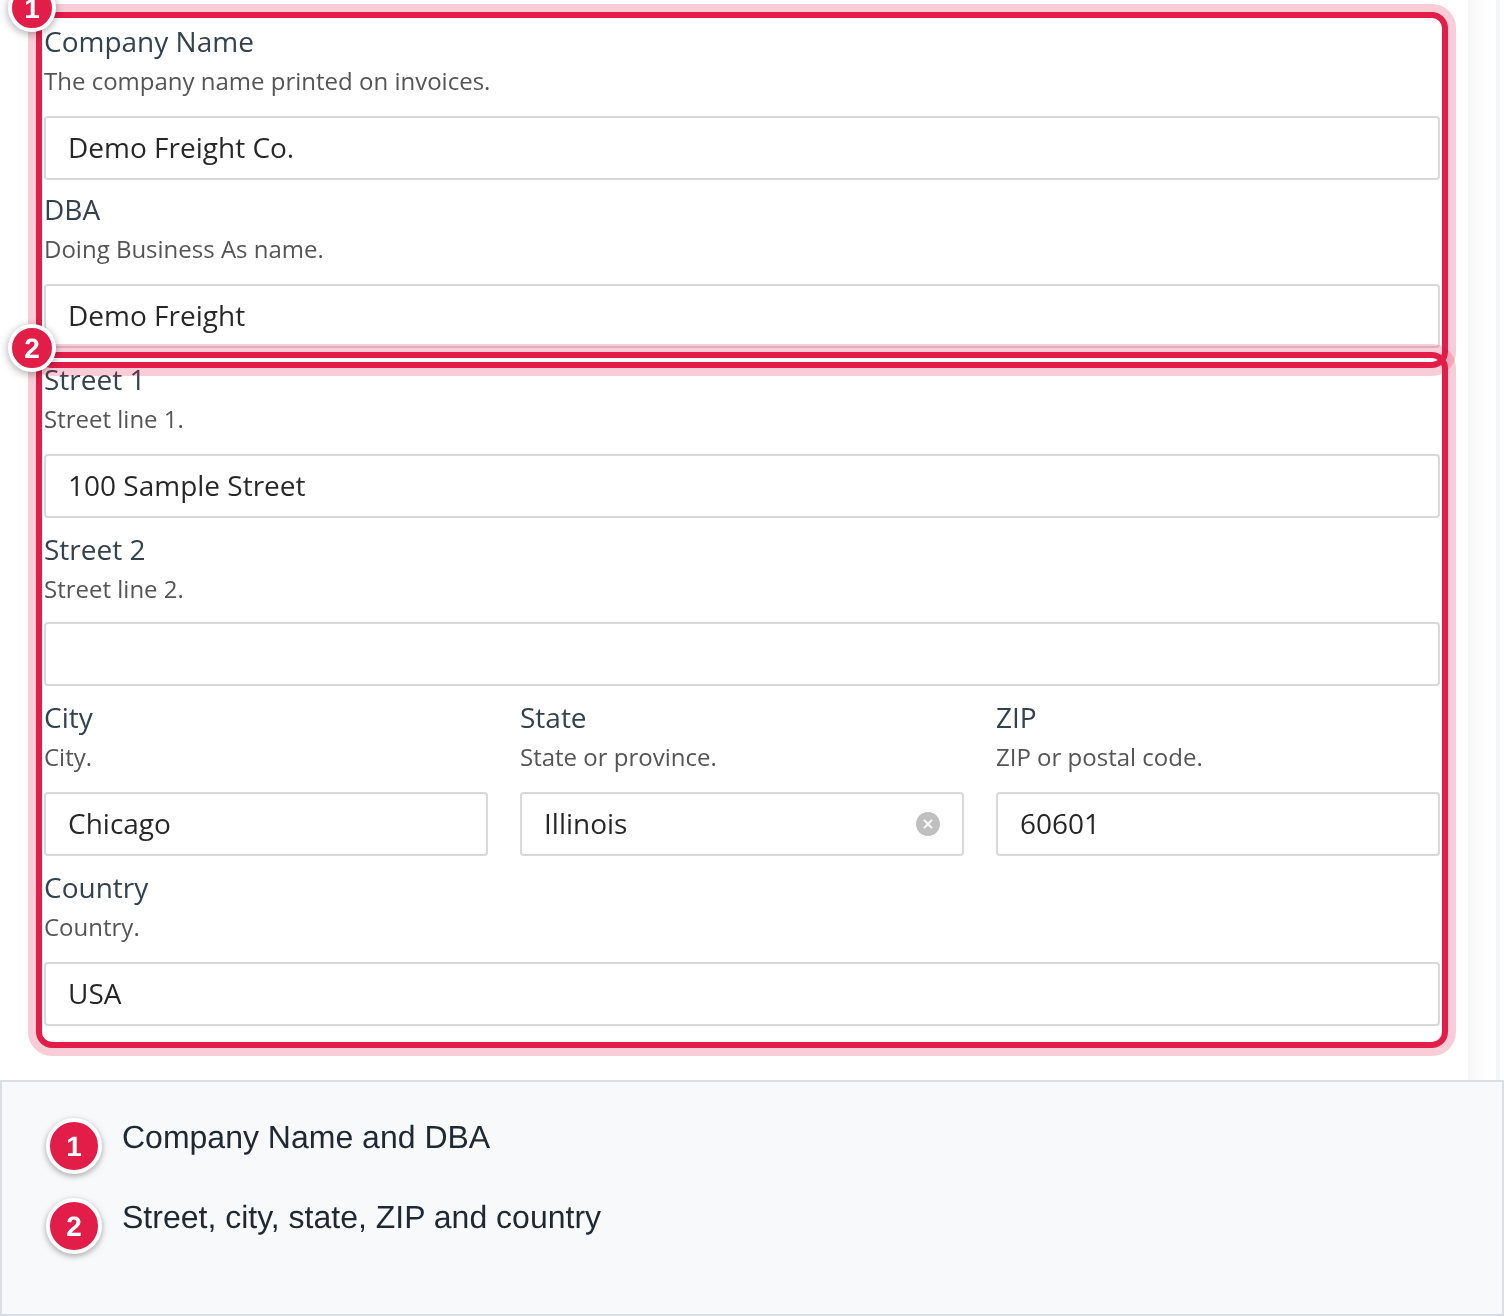
Company Name and DBA (doing business as), then Street 1, Street 2, City, State (choose from the list), ZIP and Country.
Part 4: Contact and identifiers
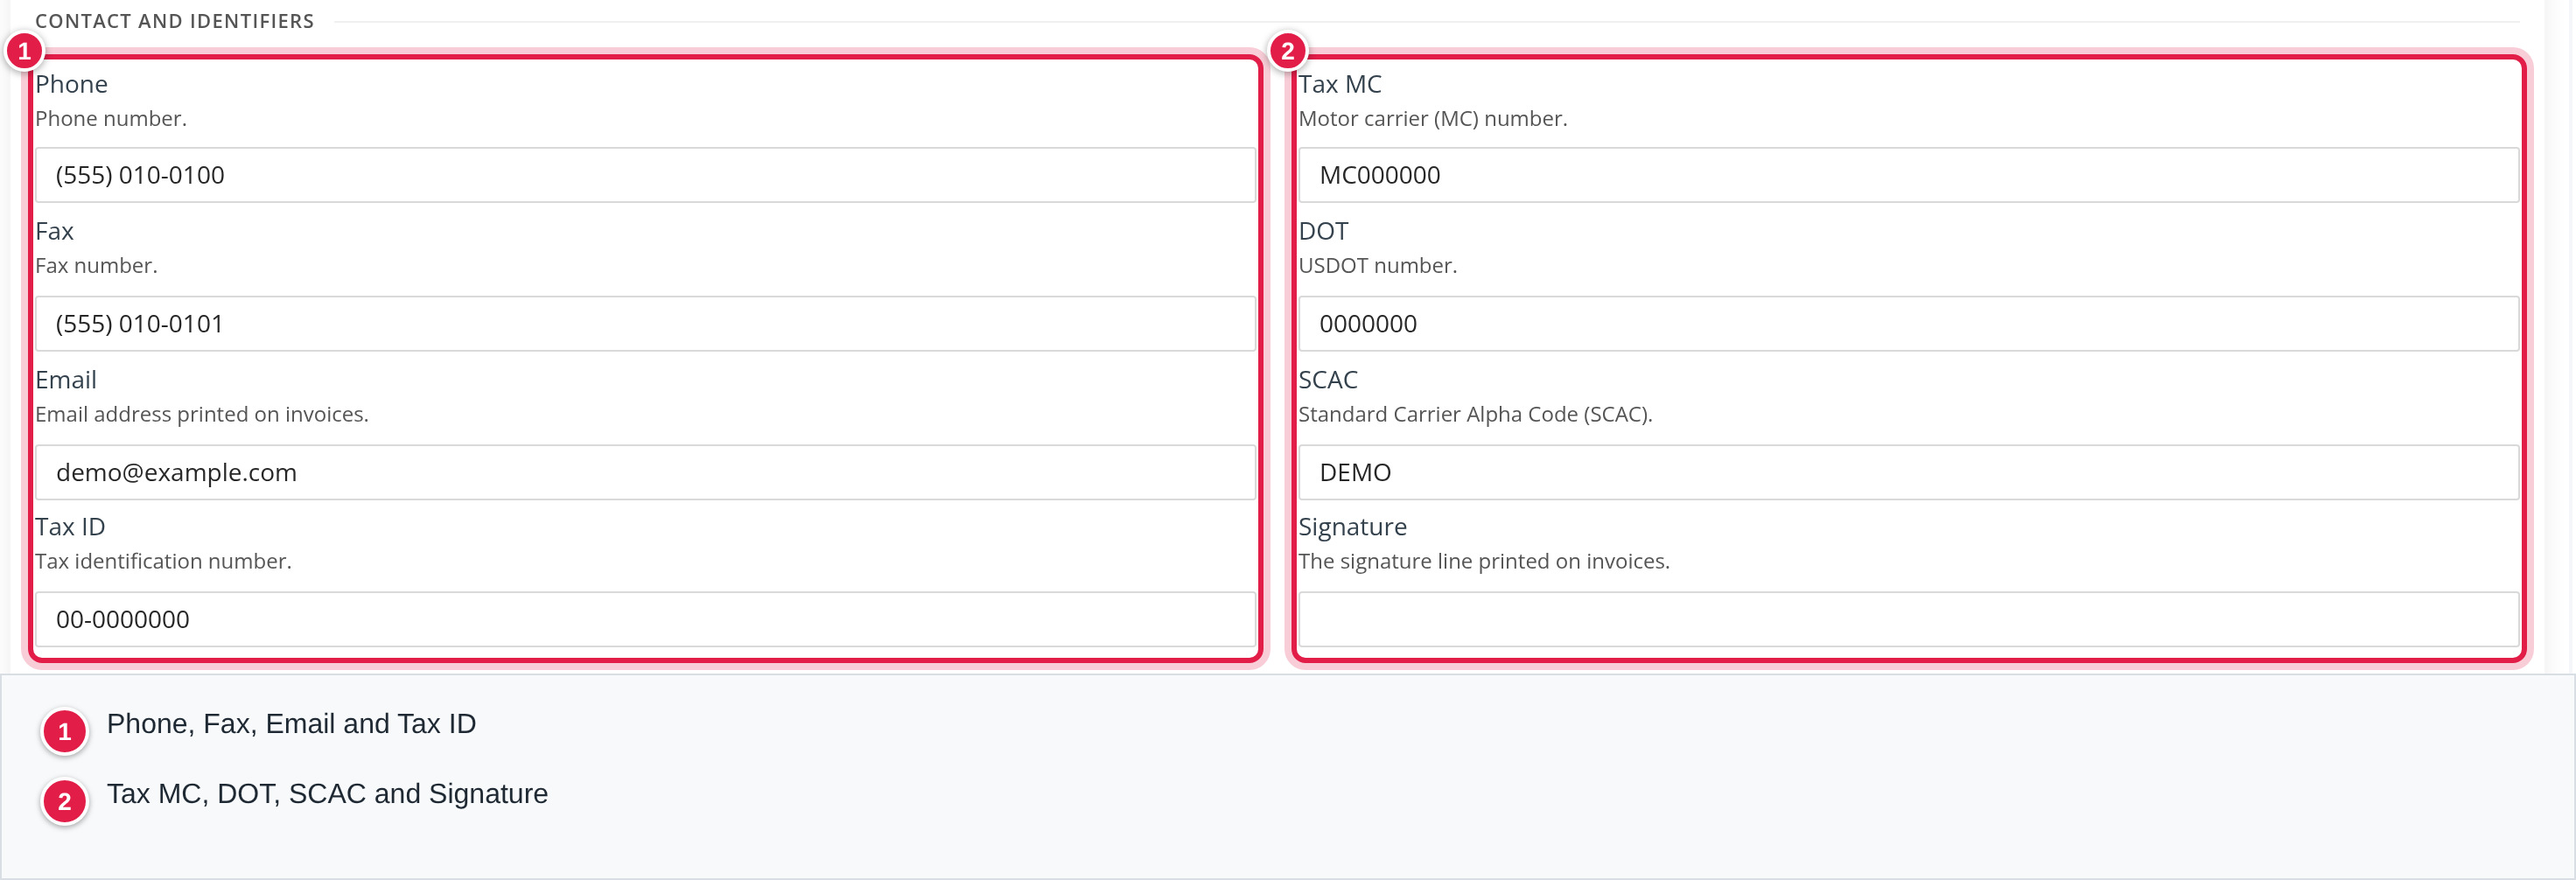
Phone, Fax, Email, Tax ID, Tax MC (motor carrier number), DOT (USDOT number), SCAC (Standard Carrier Alpha Code) and Signature. Email must be a valid e-mail address.
Part 5: Invoice text
Two free-text boxes let you add your own wording to the invoice.
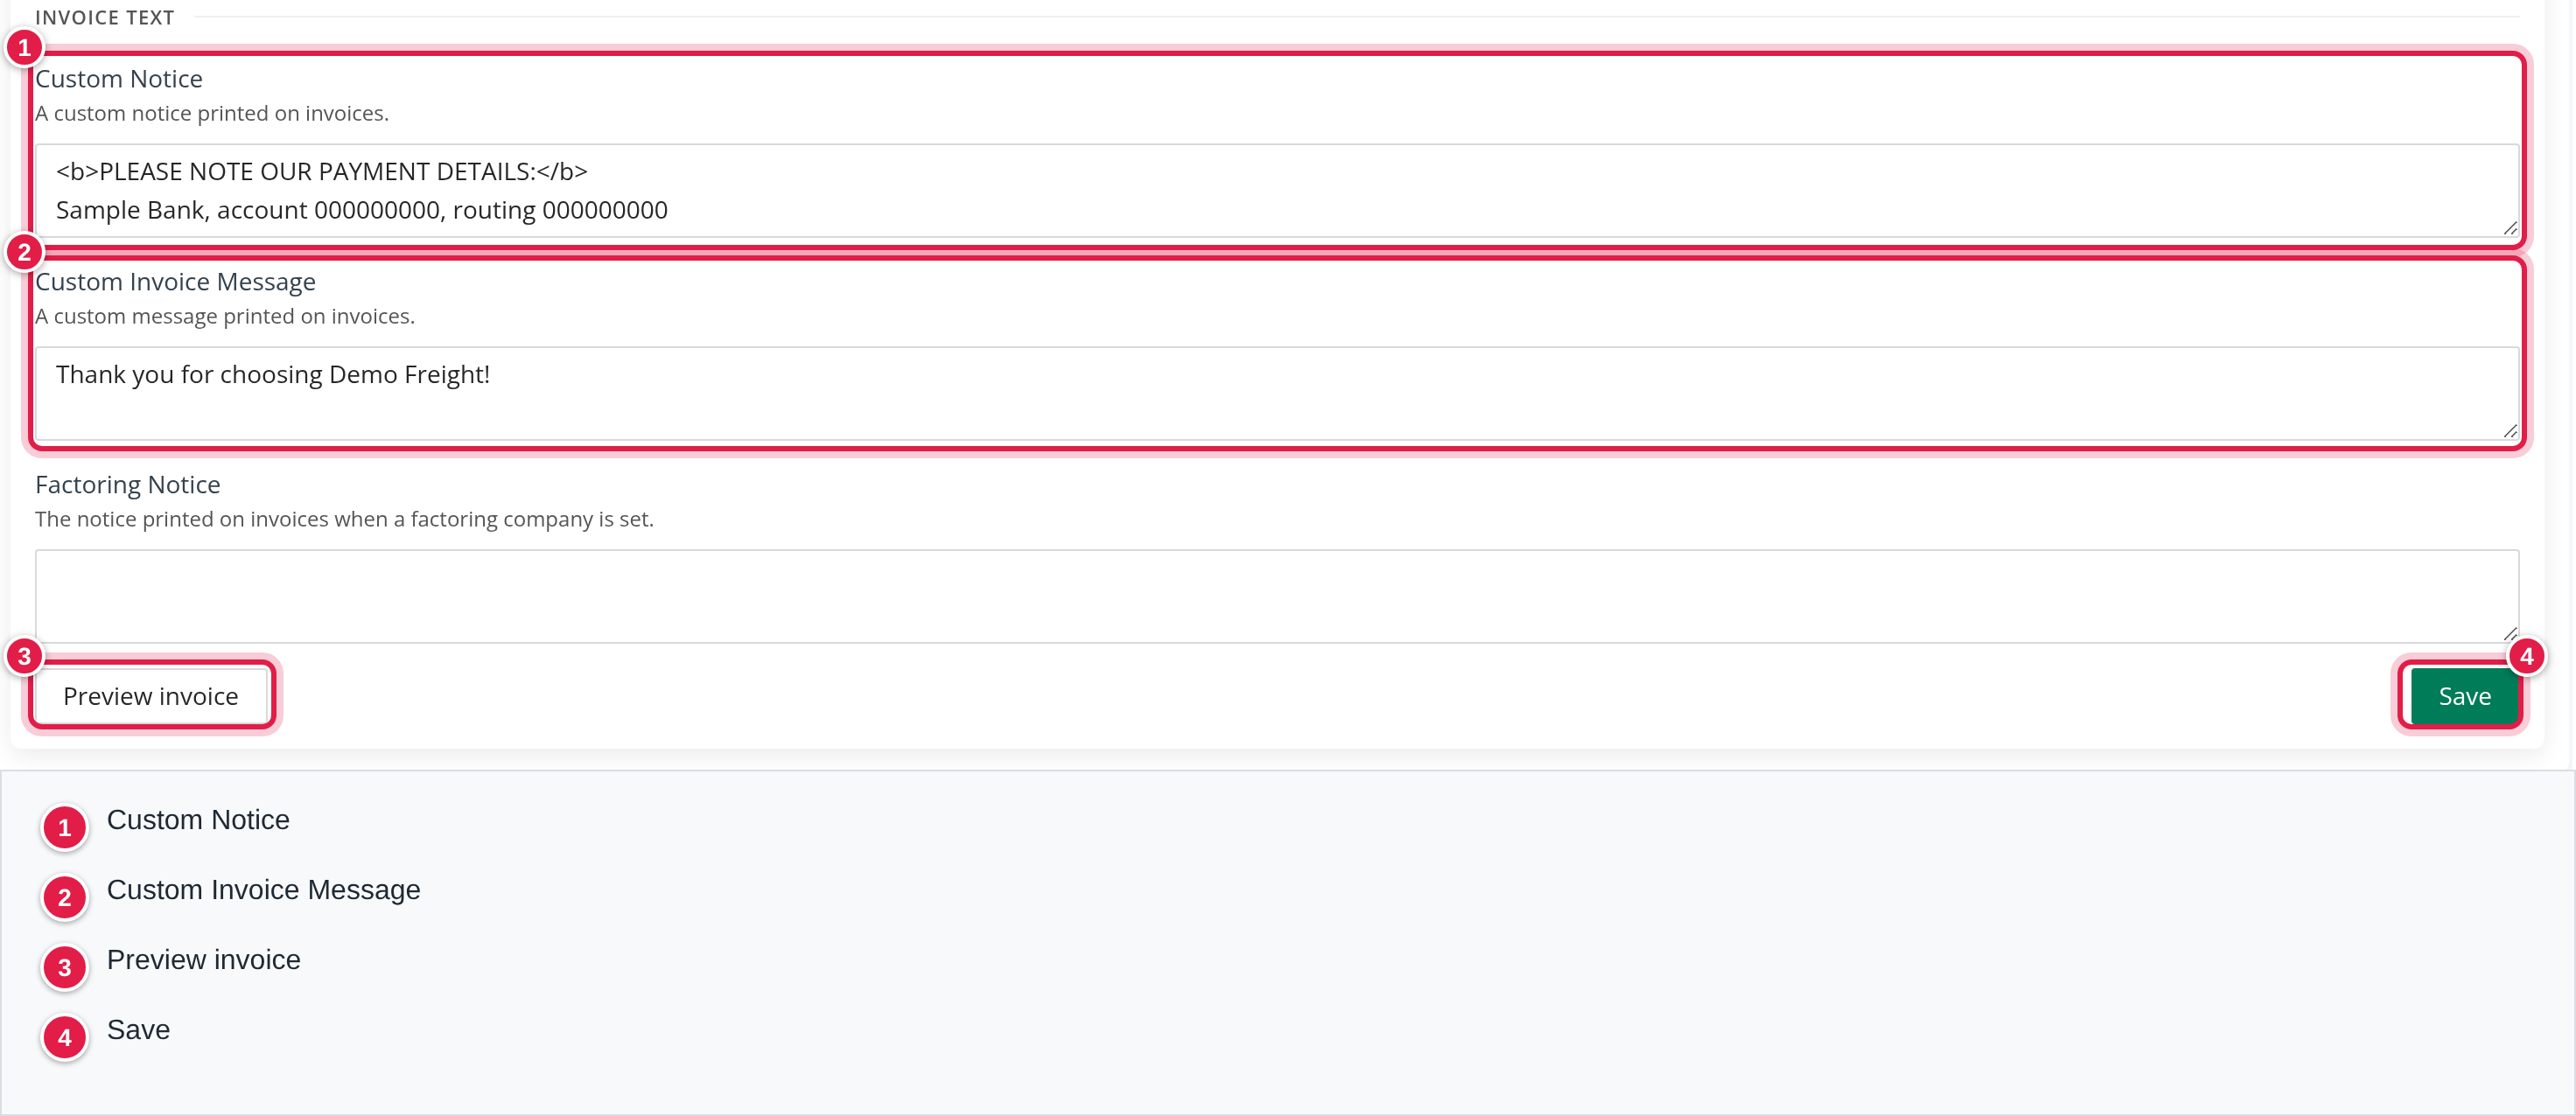
- Custom Notice is printed in the middle of the invoice, in the space above the footer, centered. Simple formatting tags work in it: put
<b>and</b>around text to make it bold,<i>and</i>for italic and<u>and</u>for underlined. Use it for anything your customers must know, for example new payment details. - Custom Invoice Message is printed in green bold at the very bottom, under the line "If you have any questions regarding this invoice, please call (your phone) or email (your e-mail)". Tags are not interpreted here. If you leave it empty, the invoice says "Thank you for your business!".
Example. Typing this in Custom Notice:
<b>PLEASE NOTE OUR PAYMENT DETAILS:</b> Your bank details on the next line
prints the first line in bold and the second line normally.
Part 6: See what the invoice looks like
Click Save, then Preview invoice. A sample invoice opens in a new tab. The preview uses what is saved, so save your changes first.
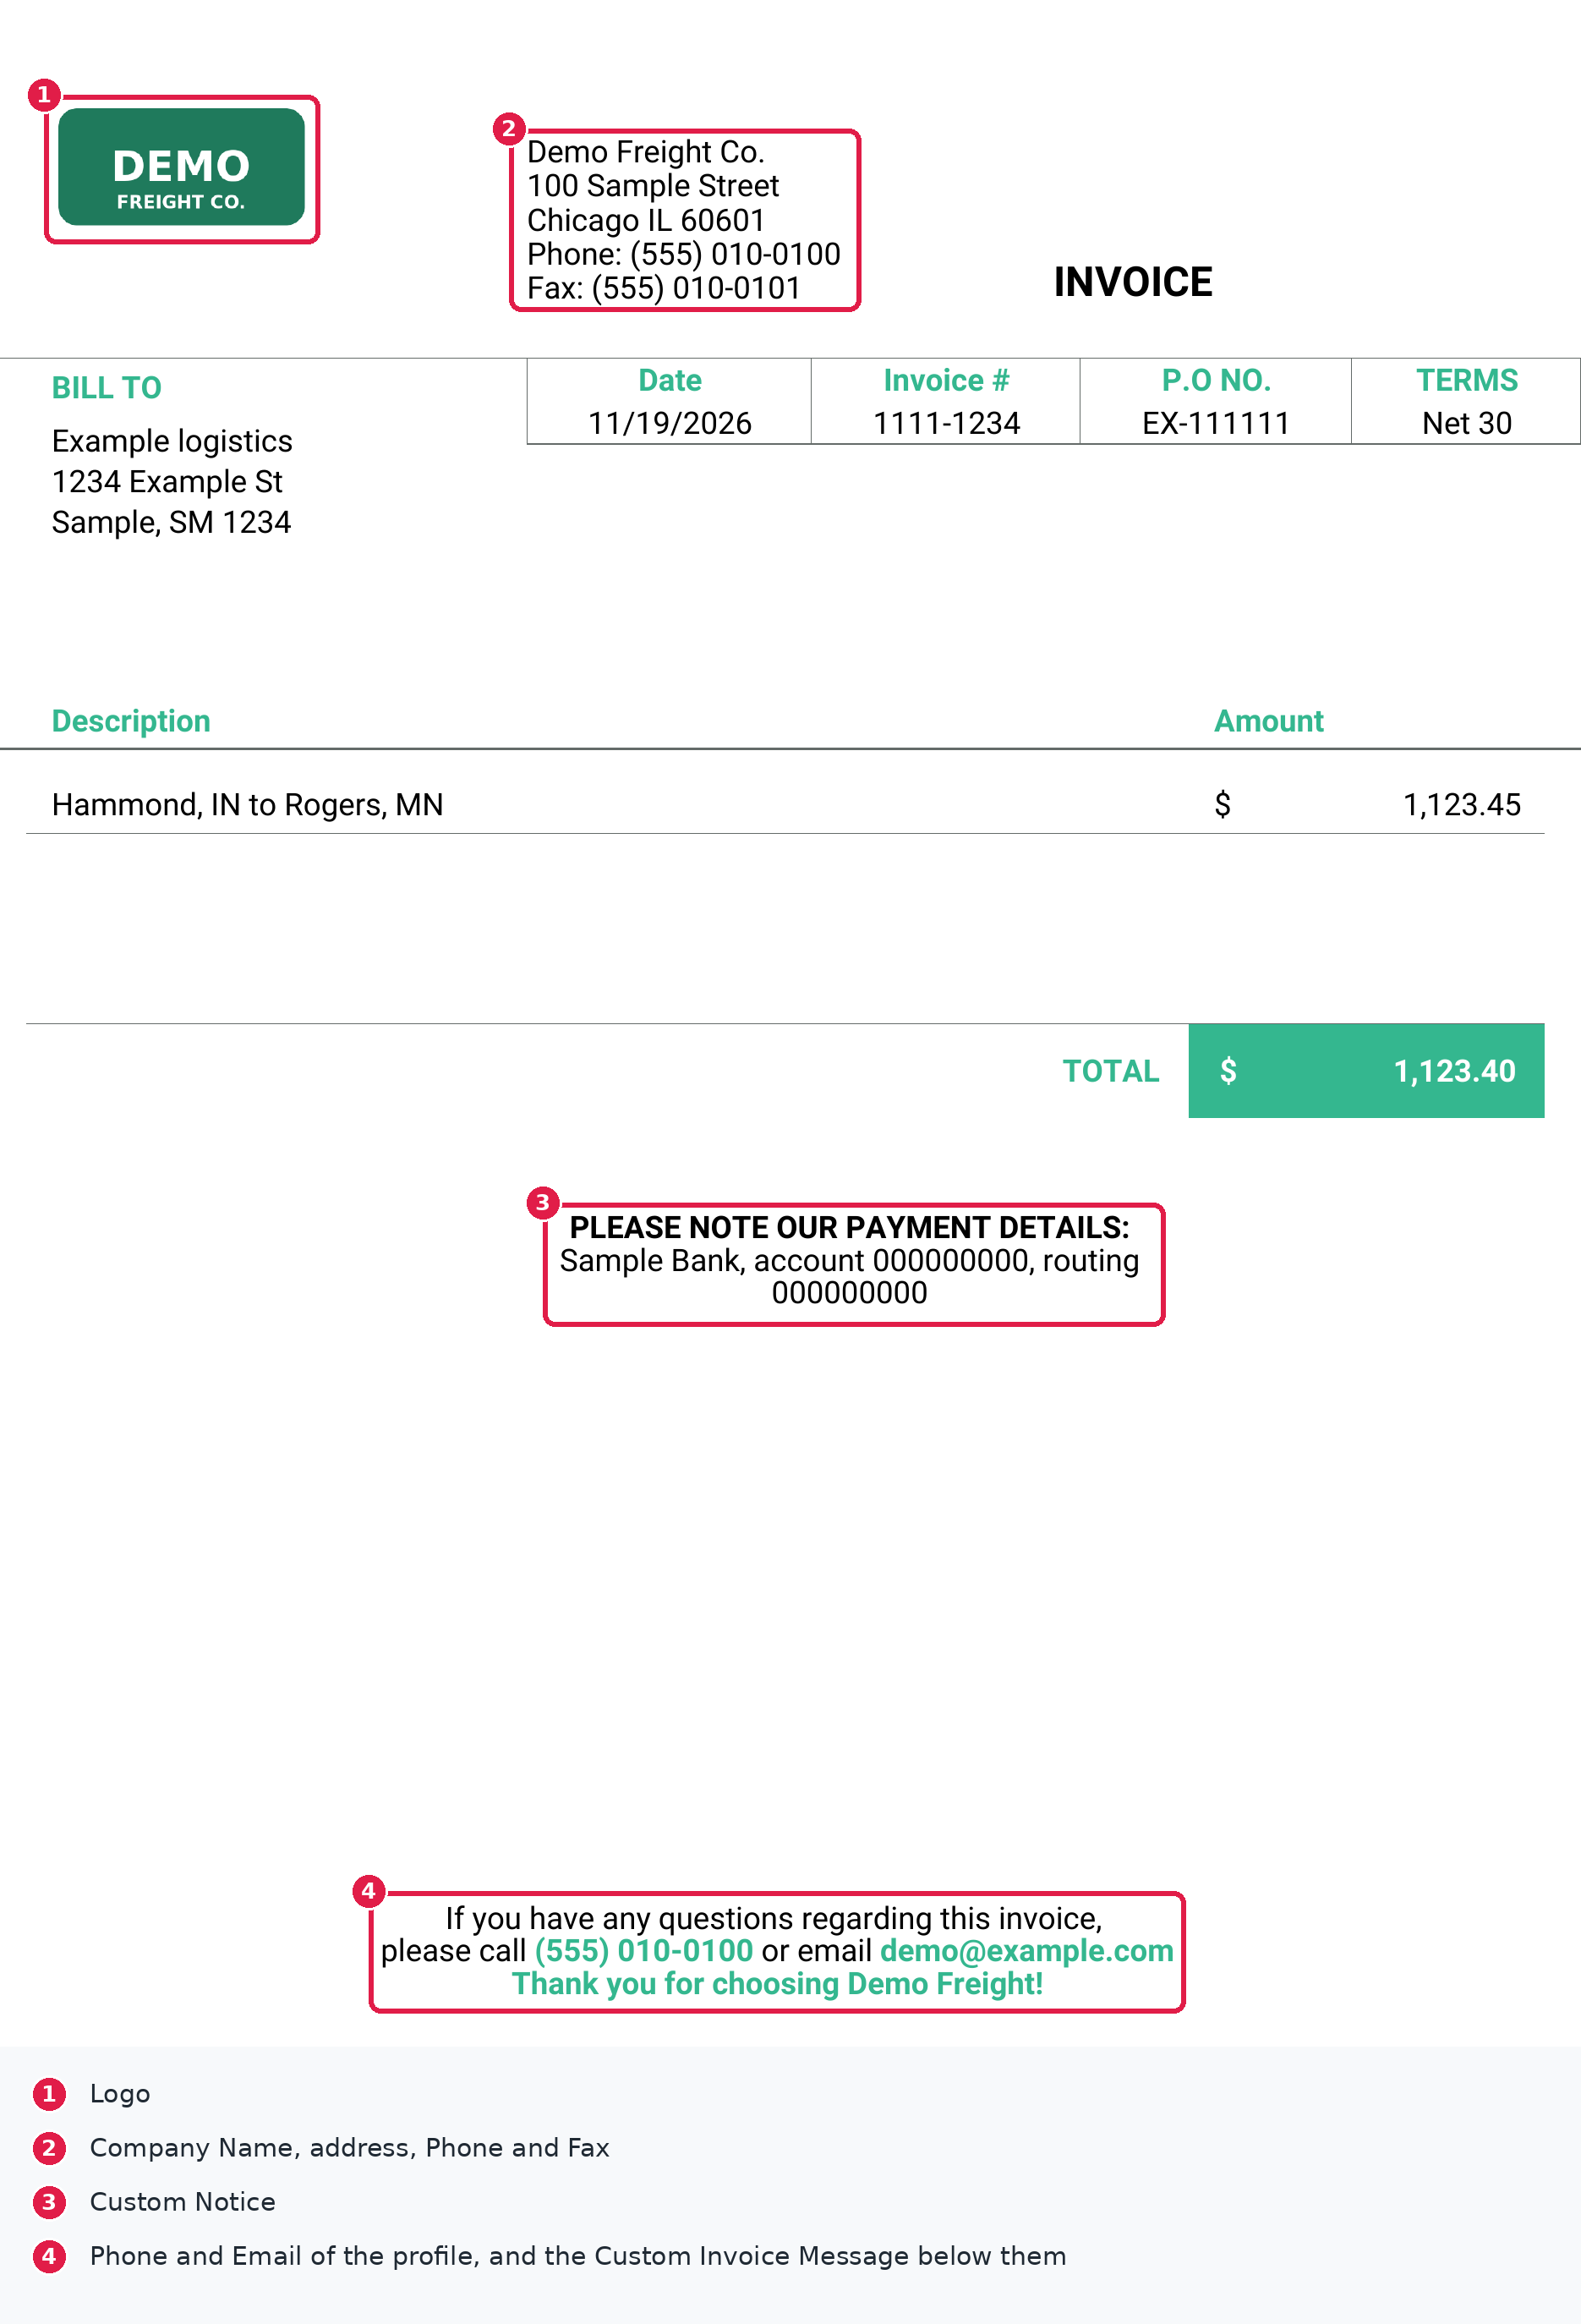
Where each field appears:
- Logo: top left.
- Company Name, Street 1, Street 2, city, state and ZIP, Phone and Fax: in the block at the top, next to the logo.
- Custom Notice: above the footer.
- Phone and Email: in the footer sentence.
- Custom Invoice Message: the last line.
The profile also stores DBA, Country, Tax ID, Tax MC, DOT, SCAC and Signature, but the invoice PDF does not print them.
The rest of the invoice comes from the load and the customer, not from the profile: BILL TO (the customer), the Date, Invoice #, Customer Load # and TERMS (the customer's payment terms), the lines of the invoice and the TOTAL. The first line is the linehaul with the route; fuel surcharge, detention, storage, lumper, misc. and deductions follow when the load has them. Additional charges appear as indented lines under their billing field; see Additional Charges: set up charge types, add them to loads and see them on the invoice. Invoice Notes of the load are added at the end.
The sample invoice always shows the same example customer and amounts.
Factoring
If a factoring company collects your invoices, choose it in Factoring.
- RTS: when you choose it, OpenRoad tests the connection to RTS. If the test fails, Factoring goes back to None.
- APEX: no test is made.
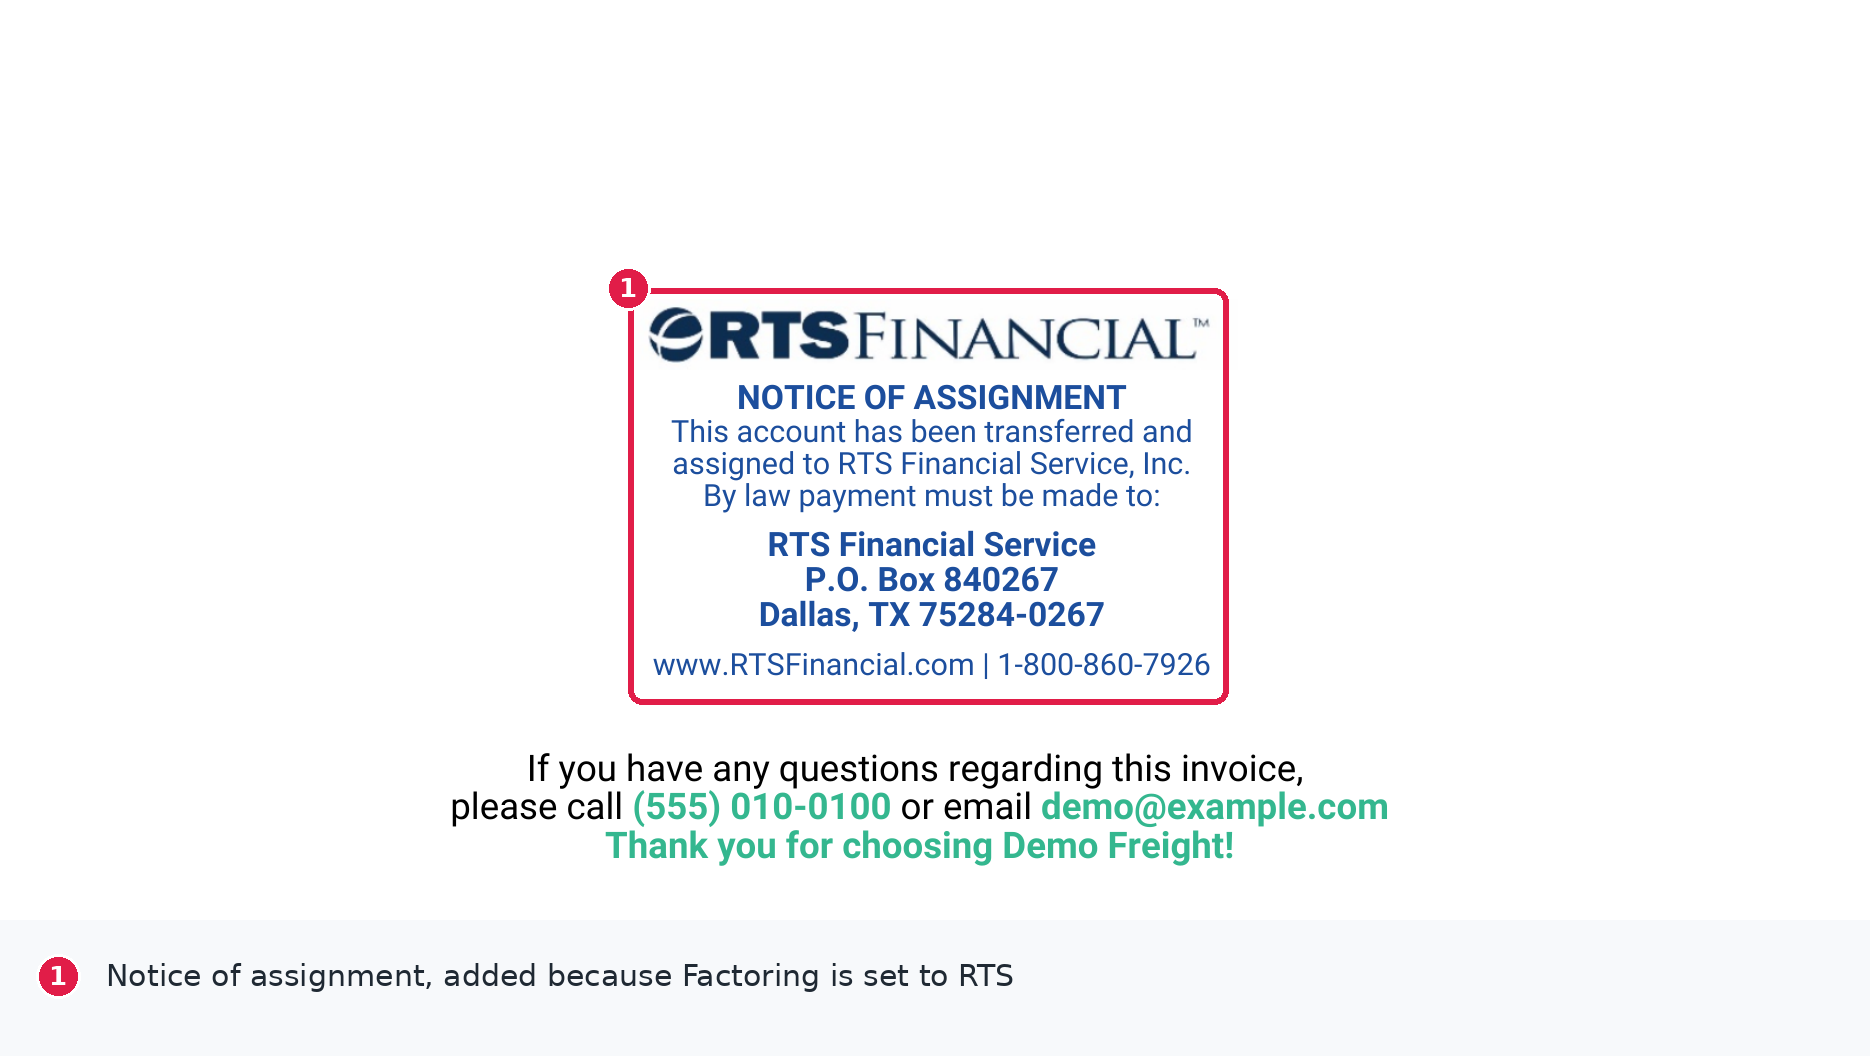
- Invoices of customers that use this profile then carry the factoring company's notice of assignment with its payment address, and OpenRoad sends the invoice to the factoring company. See Billing: review delivered loads, fix what blocks an invoice, bill your customers and export to accounting.
Work with more than one profile
Use several profiles when different customers must receive invoices with different logos, company details or factoring companies.

- New profile creates an empty profile named New profile and opens it. It is not the default. Fill it in and click Save.
- To use it for a customer, choose it in the Billing profile field of the customer.
- A customer saved without a billing profile gets your default profile.
- Delete profile appears when you have more than one profile and asks you to confirm. A profile that still has customers cannot be deleted. Choose another Billing profile for those customers first. Customers are not moved to another profile automatically.
Frequently asked questions
Was this article helpful?
That’s Great!
Thank you for your feedback
Sorry! We couldn't be helpful
Thank you for your feedback
Feedback sent
We appreciate your effort and will try to fix the article